How to Wire a Raspberry Pi Relay Module for OpenClaw Home Automation
52% of people who install smart home devices themselves report difficulty during setup, and relay modules sit right at the hardest boundary: where low-voltage GPIO meets mains-powered appliances. This guide covers safe wiring of an optocoupler-isolated relay board to a Raspberry Pi, Python control code using RPi.GPIO, and connecting the relay to an OpenClaw agent so you can toggle lights, fans, and pumps from a chat message or scheduled automation.


Why Relay Modules Are the Missing Piece in Pi Home Automation
A Parks Associates survey found that 52% of smart home device owners who installed devices themselves reported difficulty during setup or configuration. Relay modules sit at the exact point where that difficulty spikes: the junction between a Raspberry Pi's 3.3V GPIO pins and the 120V or 240V circuits that power real appliances.
A relay is an electrically operated switch. A small current flowing through an electromagnetic coil opens or closes a separate, higher-voltage circuit. The two sides are galvanically isolated, meaning the Pi never touches mains voltage directly. When you set a GPIO pin HIGH, current flows through the coil, the contacts close, and your lamp turns on. Set it LOW, the coil releases, and the lamp turns off.
Standard relay modules come in 1, 2, 4, and 8 channel configurations. Each channel controls one independent circuit. A 4-channel board can switch four appliances from four different GPIO pins. Most boards you will find online use the SRD-05VDC-SL-C relay or similar, rated for 10A at 250VAC, which covers lights, fans, small pumps, and most household appliances below 2,500W.
Each relay has three output terminals:
- COM (Common): The shared terminal where your load wire connects
- NO (Normally Open): Disconnected when the relay is off, connected when energized. Use this for devices you want OFF by default
- NC (Normally Closed): Connected when the relay is off, disconnected when energized. Use this for devices you want ON by default
Most home automation setups use the NO terminal. If power is lost or the Pi crashes, the appliance stays off rather than running unattended.
The input side of the relay module has three pins: VCC (power), GND (ground), and IN (signal). Some multi-channel boards label the signal pins IN1, IN2, IN3, and so on. The signal pin is what your GPIO controls.
Related guides
- How to Choose Between Devin AI and Claude for Code AutomationDevin AI and Claude represent two distinct methodologies for automated coding, separating remote cloud-hosted...
- Manus AI Script Execution: Automation Setup GuideManus AI script execution and automation allows the agent to run Python, Node.js, and shell scripts in isolated cloud...
- How to Automate Workflows with OpenClaw Webhooks on Raspberry PiA Raspberry Pi running OpenClaw as a systemd service becomes an always-on AI agent that responds to webhook triggers...
- Raspberry Pi Soil Moisture Sensor Setup for Automated Garden Monitoring with OpenClawResistive soil moisture probes corrode within weeks of continuous use, sending most Raspberry Pi garden projects to an...
- How to Automate Your Chicken Coop Door with OpenClaw on Raspberry PiBackyard chicken keepers have relied on timers and light sensors to open and close coop doors for years. This guide...
- How to Automate Your Garage Door with OpenClaw on Raspberry PiGuide to openclaw raspberry garage door physical access automation agent: Most Raspberry Pi garage door projects stop...
More on this subject: OpenClaw on Raspberry Pi (192 guides)
What to Check Before Switching Mains Voltage
This is the section most Raspberry Pi relay tutorials skip or reduce to a single warning sentence. Mains voltage can kill you. A shock from 120V (North America) or 240V (Europe, Asia, Australia) can cause cardiac arrest, severe burns, or fire. Every decision in this section prioritizes safety over convenience.
Never switch the earth wire. The relay should interrupt the live (hot) wire only. The neutral and earth wires pass through unbroken. Switching earth removes the safety ground from your appliance, which means a fault could energize the metal case without tripping a breaker.
Use a proper enclosure. Exposed mains connections on a breadboard or open relay board are a fire and shock hazard. Mount the relay module and all mains wiring inside a rated electrical enclosure (IP-rated junction box or DIN rail housing). Keep low-voltage Pi wiring physically separated from mains wiring inside the enclosure.
Derate your relay. A relay rated for 10A at 250VAC should not run at 10A continuously. Load no more than 50% of the rated current as a safety margin. For a 10A relay, that means 5A continuous, or about 1,200W at 240V. Inductive loads like motors and compressors draw startup current several times higher than their running current, so size your relay for the surge, not just the steady-state draw.
Code must fail safe. If your Python script crashes, the Pi reboots, or the SD card corrupts, what happens to the relay? If you wired through the NO terminal, the appliance turns off. That is the correct default. NC wiring means a crash leaves the appliance running. Use NO unless you have a specific reason not to.
Cheap blue relay boards are not mains-rated. The small PCB relay modules common on Amazon and AliExpress often have insufficient trace clearance between mains and logic sides. If the relay fails, mains voltage could reach the GPIO header. Boards with optocoupler isolation (the ones with a separate "JD-VCC" jumper for relay coil power) provide a real galvanic barrier. If your board does not have optocouplers, do not connect mains voltage to it.
When in doubt, hire an electrician. Wiring a relay to blink an LED from a battery is a beginner project. Wiring a relay to switch a mains-powered water heater is electrical work. If you are not comfortable identifying live, neutral, and earth conductors, or you do not own a multimeter, get professional help for the mains side. You can still build and test the entire Pi-to-relay circuit at low voltage before an electrician connects the load side.

How to Wire a Relay Module to Raspberry Pi GPIO
This walkthrough uses a 2-channel optocoupler-isolated relay module wired to a Raspberry Pi 5 (or Pi 4). The same steps apply to 1-channel and 4-channel boards with minor pin adjustments.
Parts list:
- Raspberry Pi 4 or 5 with Raspberry Pi OS installed
- 2-channel 5V relay module with optocoupler isolation
- Jumper wires (female-to-female for Pi GPIO header to relay board)
- USB-C power supply for the Pi (official 27W supply for Pi 5)
- Separate 5V power supply for the relay board (optional but recommended for isolated boards)
Step 1: Identify your relay board's input pins.
Most boards have VCC, GND, IN1, and IN2. If the board has a JD-VCC jumper, it supports isolated operation: remove the jumper and power JD-VCC from a separate 5V source so the relay coils draw current from that supply instead of the Pi's 5V rail. This keeps electrical noise from the coils off the Pi's power bus.
Step 2: Connect the logic side.
- Relay board GND to Pi GND (Pin 6, 9, 14, 20, 25, 30, 34, or 39 on the 40-pin header)
- Relay board VCC to Pi 3.3V (Pin 1 or 17) for the optocoupler logic side
- Relay board IN1 to Pi GPIO 17 (Pin 11)
- Relay board IN2 to Pi GPIO 27 (Pin 13)
Step 3: Address the 3.3V vs 5V trigger issue.
Raspberry Pi GPIO outputs 3.3V. Many relay modules expect a 5V trigger signal. Optocoupler-isolated boards often work fine at 3.3V because the optocoupler LED forward voltage is typically 1.2V to 1.5V, well within the Pi's output range. Test this before connecting any load: run the Python code below and listen for the relay click. If the relay does not click, you need a level shifter or a simple NPN transistor (like a 2N2222) between the GPIO pin and the relay input. The transistor base connects to GPIO through a 1K resistor, the collector connects to the relay IN pin (pulled up to 5V), and the emitter connects to ground.
Step 4: Connect the load side (low voltage testing first).
Before wiring mains voltage, test with a low-voltage load. Connect a 5V LED and resistor between the relay's COM and NO terminals, powered by a separate battery or USB source. Run the control code. If the LED toggles, your wiring is correct.
Only after confirming the logic works should you wire a mains load inside a proper enclosure, following the safety rules in the previous section.


Persist Your Relay Configs and Automation Logs Off the Pi
A workspace for your OpenClaw agent. Store relay skill definitions, schedules, and event logs in a searchable cloud workspace. Monthly plans start with a trial of up to 14 days (credit card required).
Python Code for Relay Control
The RPi.GPIO library is the standard choice for relay control. It is preinstalled on Raspberry Pi OS.
Basic on/off toggle:
import RPi.GPIO as GPIO
import time

RELAY_1 = 17
RELAY_2 = 27

GPIO.setmode(GPIO.BCM)
GPIO.setwarnings(False)
GPIO.setup(RELAY_1, GPIO.OUT, initial=GPIO.LOW)
GPIO.setup(RELAY_2, GPIO.OUT, initial=GPIO.LOW)

try:
    GPIO.output(RELAY_1, GPIO.HIGH)
    print("Relay 1 ON")
    time.sleep(3)
    GPIO.output(RELAY_1, GPIO.LOW)
    print("Relay 1 OFF")
finally:
    GPIO.cleanup()
The initial=GPIO.LOW parameter is important. It sets the pin LOW at startup, keeping the relay off until you explicitly turn it on. The try/finally block ensures GPIO.cleanup() runs even if the script crashes, releasing the pins cleanly.
Scheduled relay with time-based control:
import RPi.GPIO as GPIO
import time
from datetime import datetime

RELAY_PIN = 17
ON_HOUR = 18
OFF_HOUR = 23

GPIO.setmode(GPIO.BCM)
GPIO.setup(RELAY_PIN, GPIO.OUT, initial=GPIO.LOW)

try:
    while True:
        hour = datetime.now().hour
        if ON_HOUR <= hour < OFF_HOUR:
            GPIO.output(RELAY_PIN, GPIO.HIGH)
        else:
            GPIO.output(RELAY_PIN, GPIO.LOW)
        time.sleep(60)
except KeyboardInterrupt:
    pass
finally:
    GPIO.cleanup()
This turns a relay on at 6 PM and off at 11 PM, checking once per minute. It works, but it is fragile. If the script stops, the relay state freezes. That is where an OpenClaw agent adds resilience: the agent can monitor the script, restart it, and respond to ad-hoc commands on top of the schedule.
Alternative: gpiozero for simpler syntax.
The gpiozero library wraps RPi.GPIO with a higher-level API:
from gpiozero import OutputDevice
from time import sleep

relay = OutputDevice(17, active_high=True, initial_value=False)
relay.on()
sleep(3)
relay.off()
Both libraries work. RPi.GPIO gives you more control over pin modes and edge detection. gpiozero is cleaner for simple on/off switching. Pick whichever fits your project.
Connecting Relay Control to an OpenClaw Agent
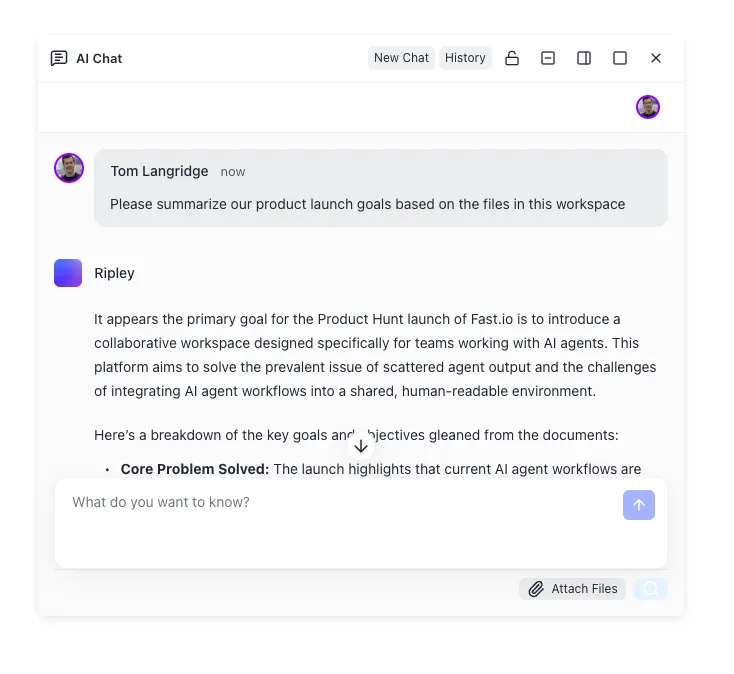
A Python script running in a terminal can toggle a relay. An OpenClaw agent can toggle that relay from a Telegram message, a WhatsApp voice note, a scheduled cron job, or a chain of sensor readings from other devices on your network.
OpenClaw is a self-hosted AI agent runtime that connects language models to real-world actions through messaging apps. It runs on the same Raspberry Pi that controls your relays, and the total hardware cost for the full stack (Pi 5, relay board, power supply, case) stays under $100.
The integration path is straightforward. OpenClaw supports custom skills, which are Python scripts the agent can invoke when it recognizes a relevant command. You wrap your relay control code in a skill, register it with the gateway, and the agent calls it when you say "turn on the porch light" in your preferred chat app.
How the skill pattern works:
Your relay control script becomes a callable function. The OpenClaw gateway receives a natural language message ("turn off the garage fan"), the LLM interprets the intent and maps it to the registered skill, and the skill executes the GPIO command on the Pi. The round-trip latency from message to relay click is typically 2 to 5 seconds, most of which is the LLM inference call.
Scheduling and automation:
Beyond chat-driven commands, OpenClaw supports scheduled tasks. You can configure the agent to run relay commands on a cron-like schedule: lights on at sunset, irrigation pump on for 30 minutes every morning, exhaust fan on when a temperature sensor reads above a threshold. The agent handles the scheduling, and if something fails, it can notify you through the same messaging channel.
Multi-device coordination:
A 4-channel or 8-channel relay board gives you control over multiple appliances from a single Pi. The OpenClaw agent can coordinate across channels: "turn off everything in the workshop" maps to setting GPIO 17, 27, 22, and 23 LOW in a single skill call. Combine this with sensor data from a temperature probe or motion detector (via additional GPIO inputs or I2C sensors), and you have a genuinely reactive home automation system controlled through natural language.
The advantage over commercial smart home hubs is flexibility. You are not locked into one vendor's ecosystem or protocol. The Pi handles the hardware, the relay handles the switching, the LLM handles the language, and OpenClaw ties them together.
How to Store Configs and Logs in a Fast.io Workspace
A Raspberry Pi running a relay-based home automation system generates configuration files, automation schedules, sensor logs, and skill definitions. Keeping all of that on the Pi's SD card is risky. Cards corrupt, especially on devices that run 24/7 without clean shutdowns. You need a backup strategy that does not depend on remembering to run rsync manually.
Fast.io workspaces give the OpenClaw agent a persistent cloud layer for storing and sharing these files. The agent can upload relay configurations, skill definitions, and event logs to a workspace through the Fast.io MCP server, keeping a version-controlled copy off the Pi. If the SD card dies, you reflash the OS, reinstall OpenClaw, and pull the latest configs from the workspace. Downtime drops from hours of reconfiguration to minutes of restoration.
What to store in a workspace:
- Relay skill definitions (the Python scripts that map GPIO pins to appliance names)
- Scheduling configs (which relays fire at what times)
- Event logs (timestamps of every relay state change, useful for debugging and energy tracking)
- Sensor data archives (temperature, humidity, motion logs from connected sensors)
Monthly plans start with a trial of up to 14 days (credit card required). The Starter plan is $9.99/mo and Business is $49.99/mo, with storage, monthly credits, and workspaces scaled to each tier. That is enough for a multi-room home automation setup with years of log history.
Intelligence Mode for searching logs:
Enable Intelligence Mode on the workspace and the logs become searchable by meaning, not just filename. Ask the workspace "when did the irrigation pump last run for more than 30 minutes?" and get a cited answer pulled from your event logs. This turns raw log files into a queryable operational history.
Sharing configs across multiple Pis:
If you run relay boards on more than one Pi (one per floor, one in the garage, one in the greenhouse), a shared workspace becomes the single source of truth for automation configs. Update a schedule in the workspace, and each Pi's agent pulls the latest version. The ownership transfer feature lets you build the entire automation system as an agent, then hand the workspace off to the homeowner's account while keeping admin access for maintenance.
Sources
References used to verify factual claims in this guide.
-
52% of smart home device owners who set up devices themselves reported difficulty during installation or configuration
-
Standard relay modules use SRD-05VDC-SL-C rated for 10A at 250VAC
-
OpenClaw round-trip device latency of 2 to 5 seconds; total hardware cost under $100
-
Waveshare relay HAT provides three relays rated at 10A at 230V each
Frequently Asked Questions
How do I connect a relay module to a Raspberry Pi?
Connect the relay board's GND to a Pi ground pin, VCC to the Pi's 3.3V pin (for the optocoupler logic side), and the IN pin to any available GPIO pin (such as GPIO 17 on pin 11). If the relay board has a JD-VCC jumper for coil power, remove it and power JD-VCC from a separate 5V supply for proper isolation. Test with a low-voltage LED before connecting any mains load.
Can a Raspberry Pi control 220V or 240V appliances?
Yes, but not directly. The Pi's GPIO outputs 3.3V, which cannot switch mains voltage. A relay module acts as the intermediary: the Pi controls the relay's coil through GPIO, and the relay's contacts switch the mains circuit. Always use an optocoupler-isolated relay board, wire inside a rated enclosure, switch only the live wire (never earth), and derate the relay to 50% of its rated current. If you are not experienced with mains wiring, hire an electrician for the high-voltage side.
What relay module works best with Raspberry Pi?
Look for a 5V relay module with optocoupler isolation (boards with a JD-VCC jumper). The SRD-05VDC-SL-C is a common relay found on these boards, rated for 10A at 250VAC. For multiple appliances, 4-channel boards are a good balance of capacity and GPIO usage. Avoid the cheapest unbranded boards that lack optocouplers, as they provide no galvanic isolation between mains and logic circuits.
Is it safe to use a Raspberry Pi with relay modules?
The Pi-to-relay connection itself is safe because the relay provides galvanic isolation between the low-voltage control side and the high-voltage load side. The risk comes from the mains wiring on the load side. Use an optocoupler-isolated board, mount everything in a proper enclosure, wire through the NO (Normally Open) terminal so the default state is off, and never switch the earth conductor. Test your entire circuit at low voltage before connecting mains power.
Do I need a level shifter for a 3.3V Raspberry Pi with a 5V relay?
It depends on the relay board. Optocoupler-isolated boards often trigger reliably at 3.3V because the optocoupler LED requires only 1.2V to 1.5V forward voltage. Test by running your GPIO code and listening for the relay click. If it does not trigger, add an NPN transistor (like a 2N2222) as a level shifter: GPIO through a 1K resistor to the base, collector to the relay IN pin, and emitter to ground.
How does OpenClaw control a relay on a Raspberry Pi?
OpenClaw runs on the same Pi as your relay setup. You wrap your relay control Python code in an OpenClaw skill, which the agent can invoke when it receives a natural language command through a messaging app like Telegram or WhatsApp. The LLM interprets the intent, maps it to the skill, and the skill executes the GPIO command. Scheduled tasks and sensor-triggered automations work the same way.
Related Resources

Persist Your Relay Configs and Automation Logs Off the Pi
A workspace for your OpenClaw agent. Store relay skill definitions, schedules, and event logs in a searchable cloud workspace. Monthly plans start with a trial of up to 14 days (credit card required).