How to Automate Your Garage Door with OpenClaw on Raspberry Pi
Guide to openclaw raspberry garage door physical access automation agent: Most Raspberry Pi garage door projects stop at a relay and a web button. This guide goes further: wire a relay and reed switch to your Pi, install OpenClaw as the decision layer, and add access rules that consider time of day, camera feeds, and user identity before opening the door. Sensor data and access logs sync to a Fastio workspace for remote monitoring.

Why a Garage Door Needs More Than a Relay Toggle
A garage door is the largest moving object in most homes, and it is also one of the least secured entry points. Smart garage door controllers reduce garage-related break-ins by up to 45% according to insurance claim data reviewed by the National Association of Mutual Insurance Companies. The problem is that commercial smart controllers cost $50-300, lock you into proprietary apps, and give you limited control over the access logic.
The typical Raspberry Pi garage door project wires a relay to simulate a button press on the opener's wall-switch terminals. A Python script toggles a GPIO pin, the relay closes, the door moves. It works. But it also means anyone with access to that script, or to the web UI running it, can open your garage at any time with no record of who triggered it or why.
OpenClaw changes the equation by sitting between the "open door" request and the relay trigger. Instead of a direct toggle, every request passes through an agent that can check the time, verify who is asking, look at a camera feed, and decide whether the door should actually open. The agent logs every decision with its reasoning, creating an audit trail that a simple relay script never provides.
This is practical for households where multiple people, a delivery driver, a dog walker, or a visiting contractor need garage access at different times. Rather than handing out app credentials or leaving the door unlocked, the OpenClaw agent enforces rules you define and adapts to context you specify.
Related guides
- How to Automate Perplexity Personal Computer with ZapierPerplexity Personal Computer gives you an always-on AI research agent that runs continuously on your behalf. Zapier...
- How to Automate Web Scraping With Hermes Agent's Scrapling SkillHermes Agent's Scrapling skill gives your AI agent three distinct scraping strategies, from fast HTTP fetching for...
- How to Automate Your Chicken Coop Door with OpenClaw on Raspberry PiBackyard chicken keepers have relied on timers and light sensors to open and close coop doors for years. This guide...
- How to Build a Facial Recognition Door Lock with OpenClaw on Raspberry PiMost Raspberry Pi face recognition tutorials stop at matching a face to a database and toggling a relay. This guide...
- How to Automate a Greenhouse or Hydroponics System with OpenClaw on Raspberry PiMost Raspberry Pi greenhouse and hydroponics projects rely on hardcoded thresholds: if pH drops below 5.8, add base...
- How to Automate Your Aquarium with OpenClaw on Raspberry PiStandard Raspberry Pi aquarium controllers use fixed thresholds: if pH drops below 6.5, dose alkaline buffer. That...
More on this subject: OpenClaw on Raspberry Pi (192 guides)
What to check before scaling openclaw raspberry pi garage door physical access automation agent
Garage door openers already have a simple interface for external triggers. The wall-mounted button inside your garage works by briefly shorting two low-voltage terminals on the opener unit. A relay connected to a Raspberry Pi does exactly the same thing: it momentarily closes the circuit between those terminals, and the opener treats it as a button press.
What you need beyond the Pi:
- Relay module, single-channel 5V with optical isolation ($3-5). Optical isolation protects the Pi's GPIO from voltage spikes generated by the relay coil. Do not skip this. An unprotected relay can damage the Pi's processor during switching transients.
- Magnetic reed switch and magnet ($2-4). Mount the magnet on the door and the reed switch on the frame near the closed position. When the door is closed, the magnet holds the reed switch shut. When the door opens, the switch opens. This gives the agent a reliable binary state: door closed or door not closed.
- Raspberry Pi Camera Module or USB webcam ($15-30). A Pi Camera Module 3 connects via the CSI ribbon cable and provides 12MP stills or 1080p video. A USB webcam works too, but draws more power and takes up a USB port.
- Jumper wires and a small breadboard or screw terminal block for connections.
Wiring the relay:
Connect the relay module's VCC to the Pi's 5V pin (pin 2 or 4), GND to a ground pin (pin 6, 9, or 14), and the signal (IN) pin to GPIO 17 (pin 11). GPIO 17 is a general-purpose pin with no secondary function conflicts on Pi 4 or Pi 5, making it a reliable default.
On the relay's output side, connect two wires from the relay's normally-open (NO) and common (COM) terminals to the two wall-button terminals on your garage door opener. These terminals are typically labeled "WALL" or marked with a button icon in the opener's manual. They carry low voltage (usually 12-24V DC), so there is no mains wiring involved.
Wiring the reed switch:
Connect one leg of the reed switch to GPIO 27 (pin 13) and the other to a ground pin. Enable the internal pull-up resistor on GPIO 27 in your Python script so the pin reads HIGH when the switch is open (door open) and LOW when the switch is closed (door shut). Mount the reed switch and magnet so they align within 15mm of each other when the door is fully closed.
Safety considerations:
Garage doors weigh 60-150 kg. The opener's own safety systems, including auto-reverse sensors and force limits, remain fully active regardless of what triggers the open/close command. Your relay simulates a button press, and the opener handles all mechanical safety. Never bypass the opener's infrared safety sensors or force-limit settings. If the opener detects an obstruction, it will reverse, and the agent should log this as an abnormal event rather than retrying.
Test the relay wiring with the door in view before connecting the camera or agent. Confirm that toggling GPIO 17 opens and closes the door, and that the reed switch correctly reports door state.
Installing OpenClaw and Configuring the Garage Agent
With the hardware wired and tested, the next step is installing OpenClaw and creating the agent that will manage door access.
Pi requirements: A Raspberry Pi 5 with 8GB RAM is the recommended platform. The Pi 4 with 4GB works for a garage door agent since the workload is lighter than video processing or continuous sensor polling. Use Raspberry Pi OS (64-bit) for best compatibility with OpenClaw and the camera stack.
Network: The Pi needs internet access for LLM API calls. A wired ethernet connection is more reliable for a garage installation where Wi-Fi signal may be weak. OpenClaw supports multiple LLM backends, including Claude, GPT-4, Gemini, and local models via Ollama. For a garage door agent that makes infrequent decisions (a few per day), cloud API costs are minimal. Local models eliminate external dependencies but need more RAM.
Control scripts: The agent delegates hardware interaction to two Python scripts. A door_toggle.py script pulses GPIO 17 HIGH for 500 milliseconds, then returns it LOW. That 500ms pulse simulates a button press. A door_state.py script reads GPIO 27 and returns "closed" or "open" based on the reed switch position. These scripts use the gpiozero library, which is pre-installed on Raspberry Pi OS and handles pin setup and cleanup automatically.
Camera capture: A capture_frame.py script grabs a single frame from the Pi Camera Module using libcamera-still (Pi 5) or raspistill (Pi 4) and saves it as a JPEG. The agent calls this script when it wants to visually verify what is happening at the garage door before or after an access event.
Agent configuration: The OpenClaw agent's system prompt defines the access rules. This is where you specify who can open the door, when, and under what conditions. The agent receives the current door state, the identity of the requester (if available), and the time of day. It then decides whether to trigger the relay.
A practical system prompt might instruct the agent to allow the door to open between 7 AM and 10 PM for household members, restrict access after 10 PM unless an override code is provided, always capture a camera frame before opening, and log every decision with timestamp and reasoning. The specifics depend on your household's needs, but the key advantage over a static script is that you can describe rules in natural language rather than coding every edge case.


Keep Your Garage Access Logs Searchable and Secure
Upload access decisions, camera frames, and door state history to a Fastio workspace. Intelligence Mode indexes everything so you can query your garage activity in plain language. generous storage. Built for openclaw raspberry garage door physical access automation agent workflows.
Access Rules and Camera Verification
The real value of an AI agent for garage door control is context-aware decision making. A relay toggle is binary: open or closed. An OpenClaw agent can evaluate whether opening the door is appropriate right now, given everything it knows.
Time-based access windows: The simplest rule is a schedule. The agent allows door operation during defined hours and blocks or requires confirmation outside those hours. Unlike a cron job, the agent can make exceptions. If you arrive home at 11:30 PM, you can request access with an explanation, and the agent can decide to allow it while logging the exception.
Camera-based verification: Before opening the door, the agent captures a frame from the Pi camera. If the LLM supports vision (Claude, GPT-4o), the agent can describe what it sees: "One person standing at the garage door, no vehicles in the driveway, daytime lighting." This creates a visual record of every access event. For routine openings, the image goes to the log. For unusual situations, like an unrecognized person or activity at 3 AM, the agent can refuse to open the door and send an alert.
Vision-capable models add latency (2-5 seconds for image analysis), so the agent should capture the frame and analyze it in parallel with other checks rather than sequentially. For time-sensitive openings, you can configure the agent to open first and verify after, logging any anomalies for review.
Integration with notification systems: The agent can send alerts through webhooks, email APIs, or messaging services when something unusual happens. A Telegram bot integration is one of the more common patterns for Pi-based home automation alerts. The agent formats a message with the timestamp, decision, reasoning, and an attached camera frame, then posts it to a Telegram chat.
Handling failure modes: If the LLM API is unreachable (network outage, provider downtime), the agent needs a fallback. Configure a local-only mode that allows basic toggle functionality with PIN or physical button input, bypassing the AI reasoning layer but still logging the event. This prevents you from being locked out of your own garage because of an API outage.
Multiple access methods: The agent can accept requests from several sources: a web interface on the local network, a Telegram bot, a scheduled routine (close the door every night at 11 PM if it is open), or a physical button wired to another GPIO pin as a manual override. Each method gets logged the same way, so the audit trail is complete regardless of how the door was triggered.
Logging Access Events to a Persistent Workspace
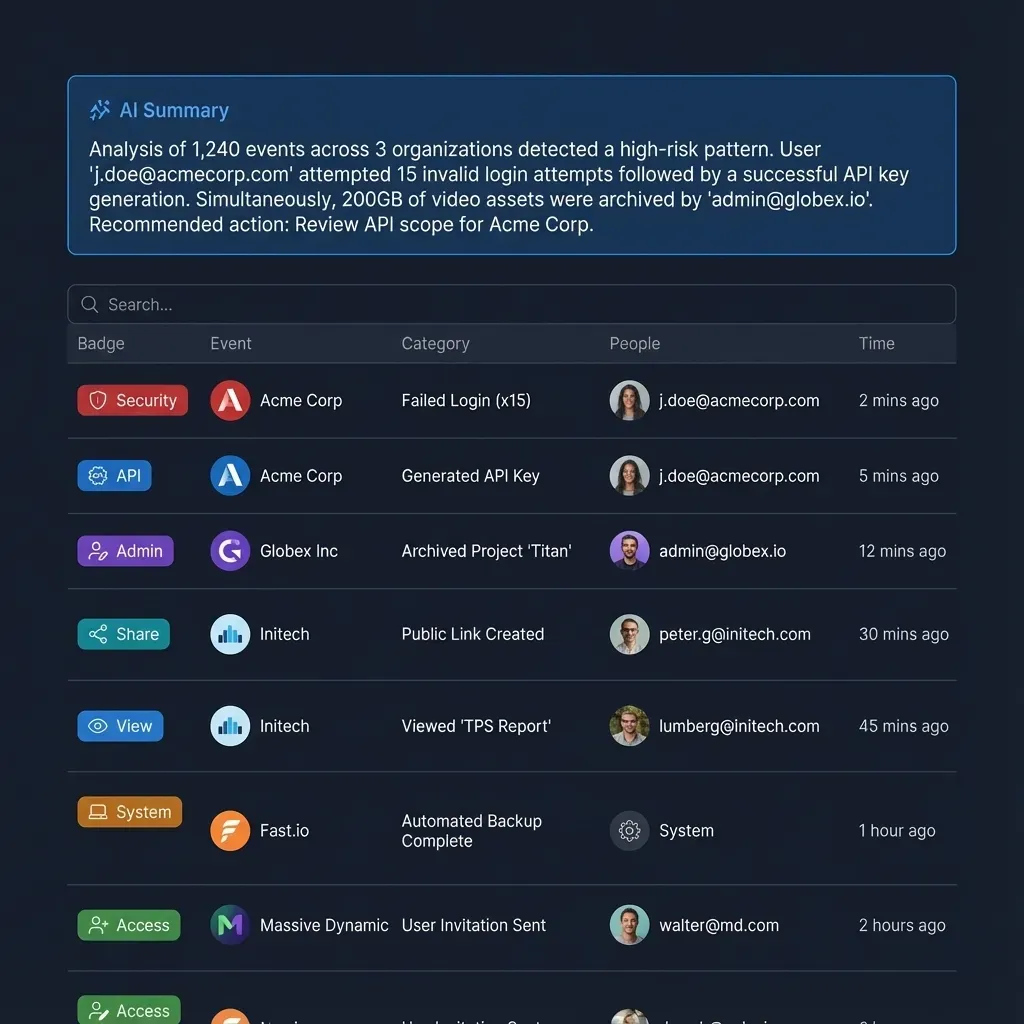
Every access decision, whether the door opened, stayed closed, or triggered an alert, should be logged somewhere durable and searchable. Local log files on the Pi work for short-term debugging, but they are not accessible remotely, not searchable by meaning, and not backed up if the SD card fails.
Fastio workspaces solve this cleanly. The OpenClaw agent uploads structured log entries, camera frames, and daily summaries to a shared workspace using the Fastio MCP server. Each entry includes a timestamp, the requester identity, the door state before and after, the agent's reasoning, and the camera image if one was captured.
With Intelligence Mode enabled on the workspace, those logs become queryable through natural language. You can ask "who opened the garage after 9 PM last week" or "show me all denied access attempts this month" without writing log-parsing scripts. The built-in RAG indexes uploaded files automatically, so queries return answers with citations pointing to specific log entries.
The Business Trial includes generous storage and monthly credits during the trial. A garage door agent generating a few log entries per day, even with camera frames, will use a fraction of that capacity over years of operation.
For households running multiple OpenClaw agents (irrigation controller, environmental monitor, garage door), all agents can upload to the same workspace. This creates a unified view of your home automation activity in one place, searchable across all devices.
Alternative logging approaches include pushing structured data to a local Home Assistant instance, an MQTT broker feeding InfluxDB and Grafana, or a simple SQLite database on the Pi itself. Fastio requires less infrastructure since there is no server to maintain, but any persistent storage that survives an SD card failure works. The important thing is that your access logs exist somewhere other than the Pi's local filesystem.
Troubleshooting and Hardening the System
A garage door controller is a physical security device. It needs to work reliably and fail safely. Here is what to watch for after deployment.
Relay contact bounce: Cheap relay modules can bounce during switching, sending multiple pulses instead of one. This can cause the door to start opening and immediately reverse. If you see erratic door behavior, add a 200ms debounce delay in your toggle script after setting the GPIO pin HIGH. Quality optically-isolated relay modules rarely have this problem, but it is worth testing.
Reed switch alignment: If the reed switch reports incorrect door state, check the gap between the magnet and the switch. Reed switches have a maximum activation distance, typically 15-20mm. Garage door vibration can shift the mounting over time. Use industrial adhesive or screws rather than tape for permanent installation. For a more strong setup, use two reed switches: one at the fully closed position and one at the fully open position. This gives the agent three states (closed, open, and in-transit) instead of two.
SD card reliability: Always-on Pi deployments wear out SD cards through continuous writes. Log rotation helps, but the best solution is booting from an SSD. The Pi 5 supports NVMe drives via the M.2 HAT+. The Pi 4 can boot from a USB SSD. If you must use an SD card, configure the OS to minimize writes: mount /tmp and /var/log as tmpfs, and write logs to Fastio or an external service rather than local disk.
Power loss recovery: When power returns after an outage, the agent should read the door state from the reed switch before taking any action. Do not assume the door is closed. If the door was mid-travel during the power loss, the opener's own safety logic will have stopped it in a partially-open position. The agent should log the unexpected state and wait for a human command rather than attempting to close the door automatically, since an obstruction might be present.
Network dependency: If your home internet goes down, the agent cannot reach cloud LLM APIs. A local Ollama model running on the Pi provides a fallback that works without internet. Alternatively, configure a simple rule-based fallback mode in the toggle script itself: accept requests from the local network only, require a PIN, and log the event for later upload when connectivity returns.
Periodic testing: Test the full system monthly. Verify that the relay triggers correctly, the reed switch reports accurate state, the camera captures clear images (clean the lens if it is in a dusty garage), and logs are reaching your persistent storage. Garage environments are harsh: temperature swings, dust, humidity, and vibration all degrade electronics over time.
Sources
References used to verify factual claims in this guide.
-
Smart garage controllers reduce garage-related break-ins by up to 45%
-
Garage doors weigh 60-150 kg
-
Raspberry Pi 5 with 8GB RAM costs approximately $80
Frequently Asked Questions
Can Raspberry Pi open a garage door?
Yes. A Raspberry Pi controls a relay module connected to the garage door opener's wall-button terminals. The relay momentarily closes the circuit between those terminals, which the opener treats as a button press. This is the same mechanism used by wired wall buttons and most commercial smart garage controllers. The Pi handles the logic and timing, while the opener manages all mechanical safety including auto-reverse sensors and force limits.
Is it safe to use Raspberry Pi for garage door automation?
The Pi does not interact with mains voltage or the door's mechanical system directly. It triggers a low-voltage relay that simulates a button press on the opener's existing control terminals. The opener's built-in safety systems, including infrared obstruction sensors, force limits, and auto-reverse, remain fully active. The main safety concern is software reliability: use a normally-open relay so the door stays closed if the Pi loses power or crashes, and never bypass the opener's safety sensors.
How do I connect a relay to Raspberry Pi for garage door?
Connect the relay module's VCC to the Pi's 5V pin (pin 2), GND to a ground pin (pin 6), and the signal pin (IN) to a GPIO pin like GPIO 17 (pin 11). On the relay's output side, wire the normally-open (NO) and common (COM) terminals to the garage door opener's wall-button terminals. Use an optically-isolated relay module to protect the Pi's GPIO from voltage spikes. The Pi pulses the GPIO pin HIGH for about 500 milliseconds to simulate a button press.
What does OpenClaw add to a Raspberry Pi garage door project?
OpenClaw adds a reasoning layer between the access request and the relay trigger. Instead of a simple web button that anyone can press, the OpenClaw agent evaluates context before acting. It can enforce time-based access windows, capture and analyze camera frames before opening, log every decision with its reasoning, and send alerts for unusual activity. This turns a basic relay toggle into a context-aware access control system.
How much does a Raspberry Pi garage door controller cost?
The hardware beyond the Pi itself costs roughly $25-45: a relay module ($3-5), a magnetic reed switch ($2-4), a Pi Camera Module or USB webcam ($15-30), and miscellaneous wires and connectors ($5). A Raspberry Pi 4 with 4GB RAM costs around $55, or a Pi 5 with 8GB costs around $80. Total project cost ranges from $80-125, compared to $50-300 for commercial smart garage controllers that lock you into proprietary apps.
Can OpenClaw work without internet for garage door control?
OpenClaw can use local LLM models through Ollama, which eliminates the need for internet access during normal operation. A local model handles routine decisions entirely on the Pi. You can also configure a fallback mode in the toggle script that accepts PIN-based access from the local network when both cloud APIs and local models are unavailable. Logs generated during offline periods sync to persistent storage once connectivity returns.
Related Resources

Keep Your Garage Access Logs Searchable and Secure
Upload access decisions, camera frames, and door state history to a Fastio workspace. Intelligence Mode indexes everything so you can query your garage activity in plain language. generous storage. Built for openclaw raspberry garage door physical access automation agent workflows.