How to Build a Raspberry Pi Rack Cluster for OpenClaw Agent Swarms
A 4-node Raspberry Pi 5 cluster draws under 28W and costs roughly $2 per month in electricity, yet it can run a coordinated OpenClaw agent swarm that processes batch workloads at 3x the speed of a single board. This guide walks through the full build: choosing rack hardware, wiring power and networking, deploying K3s, configuring OpenClaw coordinator and worker roles, and syncing agent output to a shared workspace for human review.


Why a Rack Cluster Beats a Single Pi for Agent Workloads
A single Raspberry Pi 5 running OpenClaw handles one inference at a time. That is fine for personal assistant tasks, but it becomes a bottleneck when you need an agent swarm processing email triage, research, code review, and drafting in parallel. According to the OpenClaw Pi cluster swarm guide, a 4-node swarm completes a mixed batch of 28 tasks in roughly 33 minutes compared to 110 minutes on a single board, a 3.3x throughput improvement after accounting for coordination overhead.
The throughput gain is not the only reason to go multi-node. OpenClaw's swarm architecture assigns specialized models to each worker. One node runs a general reasoning model, another handles code-focused tasks, a third triages and classifies incoming work. The coordinator node manages routing, shared memory, and health checks. If a worker goes offline, the coordinator redistributes its queue to surviving nodes automatically.
Rack-mounting the cluster solves the practical problems that come with running four boards 24/7. Loose Pis on a desk overheat, tangle cables, and take up more space than necessary. A proper rack case stacks the boards vertically, routes airflow through dedicated fans, and keeps power and Ethernet cables organized. For a device that draws only 5 to 7 watts per node at idle, a rack cluster is one of the most power-efficient ways to run always-on AI workloads at home or in a small office.
Most Raspberry Pi rack guides focus on Kubernetes homelab projects or NAS builds. This guide is specifically about choosing rack hardware optimized for always-on OpenClaw agent swarms, with cloud file sync to get agent output where humans can actually use it.
Related guides
- How to Build a Claude Cowork Multi-Agent Orchestration LoopMulti-agent orchestration in Claude Cowork involves coordinating several Claude agents to work concurrently on shared...
- How to Build a Hermes Agent AI Code CheckerThe proportion of copy-pasted code in repositories rose from 8% in 2020 to 12% in 2024, representing a 48% relative...
- How to Build a Raspberry Pi Cluster with OpenClaw Agent OrchestrationRaspberry Pi cluster computing distributes workloads across multiple Pi boards, turning roughly $430 of hardware into a...
- How to Build Edge AI Agents with OpenClaw on Raspberry PiEdge AI with OpenClaw on Raspberry Pi processes sensor data locally through an AI agent that makes decisions and takes...
- How to Build a Raspberry Pi UPS Shutdown Agent with OpenClawA Raspberry Pi without a UPS is one unplugged cable away from a corrupted SD card. This guide walks through building a...
- OpenClaw on Raspberry Pi vs Orange Pi: Which SBC Runs Your AI Agent Better?Raspberry Pi has official OpenClaw support and a massive ecosystem. Orange Pi offers more RAM and an onboard NPU for...
More on this subject: OpenClaw on Raspberry Pi (192 guides)
What Hardware Do You Need for a 4-Node Rack Build
The bill of materials below comes from the OpenClaw Pi cluster swarm guide and community builds documented by Austin Osuide and the Raspberry Pi Foundation. Every component is available from standard retailers.
Core compute (4 nodes):
- 4x Raspberry Pi 5, 8GB RAM. The Pi 5's quad-core Cortex-A76 at 2.4GHz and PCIe lane for NVMe make it the clear choice over the Pi 4 for sustained agent workloads. Budget $80 per board, $320 total.
- 4x MicroSD cards, 64GB A2 rated. These handle the OS boot. A2 cards have faster random read/write, which matters for the small file operations OpenClaw performs constantly. About $12 each, $48 total.
Rack case and cooling:
- 1x stackable cluster case with integrated fans. UCTRONICS and GeeekPi both make 4-layer desktop cluster cases for $30 to $45 that accommodate Pi 5 boards with proper standoff spacing. For standard 19-inch server rack mounting, the 52Pi RS01 1U rackmount holds four Pi 5 boards with M.2 NVMe adapters, though it costs more at $60 to $80.
- If your rack case does not include fans, add two 40mm or 50mm USB fans. Under sustained inference load, Pi 5 boards throttle at 85 degrees Celsius. Active cooling keeps them in the 55 to 65 degree range.
Networking:
- 1x 5-port Gigabit Ethernet switch. An unmanaged switch is fine here since the swarm communicates over standard TCP. Budget $20.
- 4x Cat6 Ethernet cables, 30cm length. Short cables reduce clutter inside the rack. About $3 each, $12 total.
Power:
- 4x USB-C power supplies, 27W (official Raspberry Pi 5 supply recommended). The Pi 5 limits USB port current with a 15W supply, which causes problems if you add NVMe HATs later. Budget $12 each, $48 total. Some builders prefer a single multi-port USB-C PD hub to reduce wall outlet usage.
Optional but recommended:
- NVMe SSD HATs and drives. A 256GB NVMe per node costs roughly $25 to $40 per node. The performance difference over microSD is dramatic for the constant small writes OpenClaw's workspace generates. The OpenClaw Raspberry Pi documentation explicitly recommends USB SSD or NVMe over SD cards for always-on deployments.
Total cost: $478 for the base build, or roughly $580 to $640 with NVMe storage on each node.

Power, Cooling, and Rack Assembly
A 4-node Pi 5 cluster has a small power envelope but a few details matter for reliability over months of continuous operation.
Power draw: According to measured benchmarks at raspberry.tips, a Pi 5 draws 2.7 to 3.0W at idle and up to 8.8W under full CPU load. With all four boards running inference simultaneously, expect 20 to 28W total draw depending on workload intensity. At the US average residential electricity rate of roughly $0.16/kWh, that is $2.30 to $3.20 per month running 24/7. Even at higher rates of $0.30/kWh, the annual cost stays under $75 for all four nodes combined.
Assembly order:
- Mount each Pi 5 onto its rack tray or layer using the included standoffs. Tighten firmly but do not overtighten the brass standoffs since the PCB can flex.
- Attach heatsinks to the SoC and PMIC if your case does not include a heatsink plate. The official Raspberry Pi active cooler works well but adds height that may not fit all rack layers.
- Insert microSD cards (or connect NVMe HATs if using SSD storage).
- Connect Ethernet cables from each Pi to the switch. Route cables along one side of the rack to keep airflow paths clear on the other side.
- Connect USB-C power last. Powering a Pi before the network is connected is fine, but it avoids the situation where the board tries to PXE boot from a switch that is not ready.
Cooling placement: Position the rack so the fans pull air in from the front and exhaust out the back (or top, depending on case orientation). Stacking four boards generates enough combined heat that passive cooling alone will cause throttling during sustained inference. The UCTRONICS cluster case includes two 70mm fans that push about 15 CFM, which is adequate for four nodes without NVMe. With NVMe drives adding heat, consider replacing stock fans with Noctua NF-A4x20 units for better airflow at lower noise.
Labeling: Stick a small label on each Pi's Ethernet port or case tray with its hostname (pi-coordinator, pi-worker-1, pi-worker-2, pi-worker-3). When you are SSH'd into four identical machines, physical labels save real debugging time.


Give Your Pi Cluster a Shared Workspace
Agents upload, humans review, same workspace.
How to Install K3s and Configure Cluster Networking
Every node runs Raspberry Pi OS Lite 64-bit. The 32-bit version is not supported by OpenClaw, and the desktop environment wastes RAM on a headless server. Flash all four cards using Raspberry Pi Imager with SSH enabled and unique hostnames configured during the imaging step.
Initial node configuration (all nodes):
After first boot, SSH into each node and run system updates. Install build-essential, git, and curl. Then install Node.js 24 from the NodeSource ARM64 repository, which the OpenClaw Pi documentation recommends as the runtime. On nodes with 4GB RAM or less, create a 2GB swap file with swappiness set to 10 to prevent out-of-memory kills during peak inference.
K3s control plane (coordinator node):
K3s is a lightweight Kubernetes distribution built for ARM. Its control plane binary is under 100MB, compared to over 700MB for standard Kubernetes. Install it on the coordinator node with Traefik disabled (the swarm communicates directly, so an ingress controller is unnecessary overhead).
Austin Osuide's documented Pi cluster runs K3s v1.34 with containerd and reports stable operation across five nodes. The key lesson from that deployment: use K3s's built-in local-path storage provisioner rather than distributed storage solutions like Longhorn, which consume too much CPU and memory on ARM devices.
Worker nodes:
Join each worker to the cluster using the node token from the control plane. After joining, label each worker node with its intended role. This prevents Kubernetes from scheduling the wrong workloads on the wrong hardware.
Networking: Assign static IPs on the cluster's internal subnet (for example, 192.168.1.101 through 192.168.1.104). The switch operates as a flat Layer 2 network. MetalLB can provide bare-metal load balancing if you want external access to cluster services, with an IP pool carved from your LAN's DHCP-excluded range.
Storage: Create persistent volume claims for OpenClaw's configuration directory and workspace. The critical rule from production deployments: never use ephemeral storage for the .openclaw directory. Pod restarts with ephemeral storage cause unrecoverable data loss of agent memory and credentials.
OpenClaw Swarm Configuration and Agent Roles
With K3s running across all four nodes, the next step is installing OpenClaw and configuring the swarm topology. The OpenClaw Raspberry Pi installation guide covers single-node setup. The swarm guide extends that to multi-node coordination.
Install OpenClaw on every node using the official installer. Run the onboarding process with the daemon install flag, and use API keys rather than OAuth for headless authentication. Each node needs its own LLM provider API key or a shared key with sufficient rate limits for concurrent inference.
Coordinator node setup:
The coordinator is the brain of the swarm. It runs the OpenClaw gateway process, manages the shared memory store, routes incoming tasks to workers based on capability matching, and monitors health. According to the swarm guide, the coordinator checks worker health every 10 seconds and synchronizes shared memory every 30 seconds. If a worker misses three consecutive health checks, the coordinator marks it offline and redistributes its task queue.
The coordinator exposes a monitoring dashboard on port 8420 with real-time topology visualization, per-node CPU, RAM, and temperature metrics, and task distribution tracking. Access it through an SSH tunnel or Tailscale for secure remote monitoring.
Worker node specialization:
Each worker runs up to two concurrent tasks and reports heartbeats every five seconds. The power of the swarm comes from assigning different models to different workers based on the type of work they handle:
- Worker 1 runs a general reasoning model for research and analysis tasks
- Worker 2 runs a code-focused model for development and review tasks
- Worker 3 runs a lightweight model for fast classification, triage, and routing
This specialization means the coordinator can route tasks to the worker best equipped to handle them, rather than sending everything to a single general-purpose model. The fallback strategy is round-robin when capability matching does not produce a clear winner.
Failover behavior: When a worker drops offline, the coordinator attempts three restarts before marking it permanently unavailable. Pending tasks from the failed node are redistributed to surviving workers. New nodes can join the swarm dynamically, and the coordinator automatically begins routing tasks to them after their first successful health check.
Performance expectations: The swarm guide benchmarks a mixed workload of 20 email triage items, 5 draft replies, and 3 research tasks. A single Pi 5 completes this in roughly 110 minutes. The 4-node swarm finishes in about 33 minutes. The speedup is 3.3x rather than the theoretical 4x because the coordinator consumes some capacity for routing and memory sync, and some tasks have sequential dependencies that prevent full parallelization.
Syncing Agent Output to a Shared Workspace
A swarm that generates files, drafts, and research outputs needs somewhere to put them where humans can review, approve, and act on the results. Leaving output scattered across four Pi filesystems defeats the purpose of running a coordinated swarm.
Local options include NFS shares mounted across the cluster. The Raspberry Pi Foundation's cluster tutorial uses the head node as an NFS server with a USB SSD providing shared scratch space. This works for local access but does not help when you need to review agent output from a laptop, phone, or another location.
Cloud storage services like Google Drive or Dropbox can sync files from a Pi, but they lack the audit trail and permission controls that matter when agents are generating content autonomously. You cannot easily see which agent created which file, when it was modified, or control who can access what.
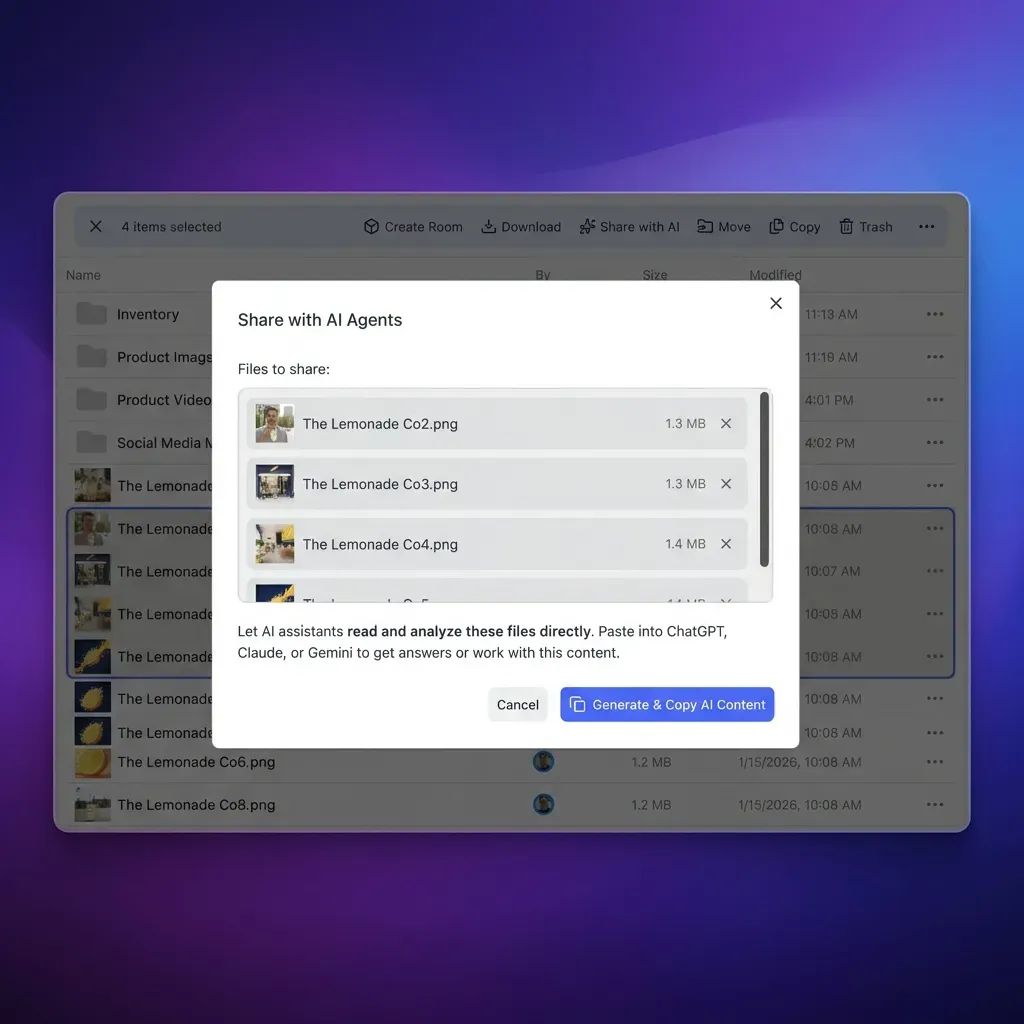
Fast.io solves this by giving the swarm a shared workspace that both agents and humans access through the same intelligence layer. Each agent node syncs its output to a Fast.io workspace using the MCP server or API. When Intelligence Mode is enabled, files are automatically indexed, which means you can search agent output by meaning rather than filename, and ask questions about the content with citations pointing back to specific documents.
The practical workflow looks like this: the OpenClaw swarm generates research reports, code reviews, or draft content on the Pi cluster. Each worker uploads its output to a designated workspace on Fast.io. A human reviewer opens the workspace, browses the results, uses the AI chat to ask questions about what the agents produced, and approves or requests changes. The agent retains admin access to the workspace for follow-up tasks, while the human reviewer has full ownership of the final output.
Fast.io offers a 14-day Business Trial, card required (see pricing). File versioning means you can see how agent output changed across runs, and granular permissions let you share specific workspaces with clients or teammates without exposing the entire agent workspace.
For swarms that interact with files from other cloud services, Fast.io's URL Import pulls files from Google Drive, OneDrive, Box, and Dropbox via OAuth without downloading them to the Pi first. This saves both storage and bandwidth on the resource-constrained cluster nodes.
Sources
References used to verify factual claims in this guide.
-
A Pi 5 draws 2.7 to 3.0W at idle and up to 8.8W under full CPU load
-
4-node swarm completes a mixed batch of 28 tasks in roughly 33 minutes compared to 110 minutes on a single board 4-node Pi 5 cluster total hardware cost under $478
-
K3s control plane binary under 100MB, compared to over 700MB for standard Kubernetes
-
K3s v1.34 with containerd stable operation across five Pi nodes
-
Pi 5 minimum requirements: 2GB RAM, 64-bit OS, official power supply
Frequently Asked Questions
How do I build a Raspberry Pi rack cluster?
Start with four Raspberry Pi 5 boards (8GB RAM each), a stackable cluster case or 1U rackmount enclosure, a 5-port Gigabit Ethernet switch, USB-C power supplies, and microSD cards or NVMe SSDs. Flash each board with Raspberry Pi OS Lite 64-bit, assign static IPs, install K3s on the coordinator node, and join the workers to the cluster. The full hardware build costs under $500 and takes about two hours to assemble and configure.
Can I run OpenClaw on multiple Raspberry Pis?
Yes. OpenClaw supports a coordinator-worker swarm architecture where one Pi manages task routing, shared memory, and health monitoring while the other Pis run inference as workers. Each worker can be assigned a different model specialization. The coordinator redistributes tasks automatically if a worker goes offline.
What rack case fits Raspberry Pi 5?
UCTRONICS and GeeekPi make cluster cases in both desktop stackable and 19-inch 1U rackmount formats that support Pi 5 boards. The UCTRONICS 4-layer desktop case with fans costs around $30 to $45. The 52Pi RS01 1U rackmount holds four Pi 5 boards with NVMe adapter support for $60 to $80. Check standoff spacing since some older cases designed for Pi 4 need adapter plates for the Pi 5 mounting holes.
How much does a Raspberry Pi cluster cost?
A 4-node Pi 5 cluster with 8GB per board, rack case, switch, power supplies, and microSD cards costs approximately $478. Adding NVMe SSDs to each node brings the total to $580 to $640. Monthly electricity cost is $2 to $3 for continuous 24/7 operation.
How much power does a 4-node Pi 5 cluster use?
Each Pi 5 draws 2.7 to 3.0W at idle and up to 8.8W under full CPU load. A 4-node cluster uses 12 to 28W depending on workload, which costs roughly $2 to $3 per month at average US electricity rates. That is less than a single desktop computer uses at idle.
Do I need Kubernetes to run an OpenClaw swarm?
K3s (lightweight Kubernetes) is the recommended orchestration layer because it handles service discovery, health checks, and automatic restarts across the cluster. However, you can run an OpenClaw swarm without Kubernetes by installing OpenClaw directly on each node and configuring the coordinator-worker topology manually. K3s adds resilience and makes scaling easier.
Where should I store output from a Raspberry Pi agent cluster?
NFS shares work for local-only access. For remote access and collaboration, a cloud workspace like Fast.io gives agents and humans the same view of generated files with search, versioning, and permission controls, accessible via a remote MCP server.
Related Resources

Give Your Pi Cluster a Shared Workspace
Agents upload, humans review, same workspace.