How to Build a Facial Recognition Door Lock with OpenClaw on Raspberry Pi
Most Raspberry Pi face recognition tutorials stop at matching a face to a database and toggling a relay. This guide adds an AI reasoning layer with OpenClaw so the agent can enforce time-based lockouts, send a photo to your phone when someone unrecognized approaches, and log every access decision to a searchable cloud workspace.

Why Face Recognition Alone Is Not Enough
Raspberry Pi face recognition door locks have been a popular maker project since the face_recognition library made it straightforward to detect and compare faces using Python. The dlib model behind that library achieves 99.38% accuracy on the Labeled Faces in the Wild benchmark, and real-world Pi implementations routinely reach 95% or higher with properly lit enrollment photos and a reasonable training set.
The hardware side is equally accessible. A Pi Camera Module, a relay module, and a 12V solenoid or electromagnetic lock give you a working prototype for about $30 beyond the cost of the Pi itself. Hundreds of tutorials walk through this setup. Wire the relay, capture a frame, compare the face encoding against your stored dataset, and toggle the GPIO pin if there is a match.
The problem is what happens after the match fails. A basic face recognition script has two outcomes: unlock or do nothing. It cannot distinguish between a family member who changed their hairstyle, a delivery driver holding a package in front of their face, and a stranger testing whether anyone is home. It cannot lock someone out after repeated failed attempts. It cannot notify you when an unrecognized face appears at the door. It cannot adjust its behavior based on the time of day.
These are reasoning tasks, not computer vision tasks. A face recognition pipeline tells you whether the face matches someone in the database. An AI agent decides what to do with that information. OpenClaw sits between the camera output and the relay trigger, evaluating context before acting. The face encoding is an input to the agent's decision, not the decision itself.
This distinction matters for security. A pure CV system that unlocks on match and does nothing on failure is a binary gate. An OpenClaw agent that considers match confidence, time of day, failure history, and notification preferences is an access control system.
Hardware: Pi, Camera, and Lock Mechanism
The hardware list splits into three groups: the Pi itself, the camera and recognition stack, and the lock mechanism. Total cost beyond the Pi runs about $25 to $35 depending on whether you choose a solenoid lock or an electromagnetic lock.
Core components:
- Raspberry Pi 5 (8 GB recommended) or Pi 4 (4 GB minimum). The Pi 5's Cortex-A76 cores run face encoding roughly 2 to 3 times faster than the Pi 4's A72, which matters when you want recognition latency under two seconds
- 32 GB or larger microSD card (A2-rated) or M.2 HAT+ with NVMe SSD for better write endurance
- 27W USB-C power supply for the Pi 5, or 5V 3A USB-C for the Pi 4
- Raspberry Pi Camera Module 3 (standard or wide-angle). The wide-angle version's 120-degree field of view covers more of a doorway, but the standard 66-degree lens captures higher-detail face images at typical door distances
Lock mechanism (choose one):
- 12V solenoid lock ($8 to $12). Fail-secure: stays locked when power is cut. Unlocks when the solenoid energizes. Good for interior doors where you want the door to remain locked during power outages
- 12V electromagnetic lock ($15 to $25). Fail-safe: releases when power is cut. Stays locked while energized. Better for fire safety in commercial or multi-tenant settings, but requires a battery backup if you need the lock to hold during power loss
Control electronics:
- Single-channel 5V relay module with optical isolation ($3 to $5). The optical isolation protects the Pi's GPIO from voltage spikes when the relay coil switches
- 12V DC power supply for the lock (separate from the Pi's power supply)
- Jumper wires and a small terminal block for connections
Wiring the relay and lock:
Connect the relay module's VCC to the Pi's 5V pin (pin 2), GND to a ground pin (pin 6), and the signal pin (IN) to GPIO 17 (pin 11). On the relay's output side, wire the 12V power supply's positive terminal to the relay's common (COM) contact. Wire the relay's normally-open (NO) contact to the lock's positive terminal. Connect the lock's negative terminal and the power supply's negative terminal together.
With this wiring, the lock receives 12V power only when the relay closes. Setting GPIO 17 HIGH energizes the relay, which connects the 12V supply to the lock. For a solenoid lock, this retracts the bolt. For an electromagnetic lock, you would wire through the normally-closed (NC) contact instead, so the magnet stays energized by default and releases when the relay triggers.
Camera mounting:
Position the camera at face height, roughly 140 to 160 cm from the ground. The face_recognition library works best when faces occupy at least 80x80 pixels in the frame. At a typical door distance of 50 to 80 cm, even the standard camera module provides more than enough resolution. Avoid placing the camera where direct sunlight or overhead lighting creates harsh shadows on faces, as this degrades recognition accuracy .
Face Enrollment and the Recognition Pipeline
Face recognition on a Raspberry Pi relies on comparing a live camera frame against a database of known face encodings. The enrollment process captures reference images, extracts 128-dimensional face encodings from each image, and stores them for later comparison.
Setting up the recognition environment:
Install the core libraries on Raspberry Pi OS (64-bit). The face_recognition library wraps dlib's face detection and encoding models, and OpenCV handles camera capture and image manipulation. On a Pi 5, compilation of dlib takes about 15 minutes. On a Pi 4, expect closer to 45 minutes.
Enrolling faces:
Capture 5 to 10 photos of each person from slightly different angles and lighting conditions. Straight-on, slight left turn, slight right turn, and varied lighting give the model enough variation to handle day-to-day differences in appearance. Store the raw images in a directory per person, then generate encodings from each image. Average the encodings per person to create a single reference vector that is more tolerant of minor variations than any single-image encoding.
Name each person's directory (e.g., enrolled_faces/tom/, enrolled_faces/sarah/). The directory name becomes the identity label the agent receives when a match is found.
The recognition loop:
A Python script runs continuously, capturing frames from the Pi Camera at a rate of one to two frames per second. Each frame goes through three steps:
- Face detection using the HOG-based detector (faster on a Pi than the CNN detector, and accurate enough for controlled doorway lighting)
- Face encoding, which generates a 128-dimensional vector for each detected face
- Comparison against all enrolled encodings using Euclidean distance, with a threshold of 0.6 (dlib's default, where lower values mean a closer match)
If the distance between the live encoding and a stored encoding falls below the threshold, the system reports a match along with the person's name and the confidence score. If no match falls below the threshold, the system reports an unknown face.
Accuracy considerations:
The 99.38% accuracy figure from dlib's benchmark applies to high-quality, well-lit portrait images. Real-world accuracy at a doorway depends on lighting, camera angle, and how much the person's appearance has changed since enrollment. Expect 95% or higher with proper enrollment photos and consistent lighting. Performance drops in low light, so consider adding an IR LED array and using the Pi NoIR camera module for night operation. IR illumination is invisible to the human eye but lights up the scene for the camera.
The recognition script outputs structured data: a JSON payload containing the detected face count, the identity (or "unknown"), the confidence score, and the file path to the captured frame. This payload is what the OpenClaw agent receives as input for its access decision.


Store Your Door Access Logs Where You Can Search Them
Upload face recognition events, camera frames, and access decisions to a Fastio workspace. Intelligence Mode indexes everything so you can query your door activity in plain language. generous storage, no credit card.
Configuring the OpenClaw Access Control Agent
With face recognition running as a standalone process, the next step is installing OpenClaw and creating the skill that turns recognition results into access decisions.
Installing OpenClaw on the Pi:
Start with Raspberry Pi OS (64-bit). Install Node.js 22.x via nvm, then run the OpenClaw installer as documented by the Raspberry Pi Foundation:
curl -fsSL https://openclaw.ai/install.sh | bash
Run openclaw onboard to configure your LLM provider. OpenClaw supports Claude, GPT-4, Gemini, and local models via Ollama. For an access control agent, a cloud-hosted model with vision capability is the best choice since it can analyze camera frames as part of its decision process. Local models on the Pi are too slow for real-time door access decisions.
Creating the access control skill:
OpenClaw organizes agent behavior through skills, which are directories containing a SKILL.md file with natural language instructions. Create a door-access skill that defines the agent's responsibilities:
- Receive face recognition results from the detection script (identity, confidence score, frame path)
- If the face matches an enrolled person with confidence above 0.5, unlock the door by setting GPIO 17 HIGH for 3 seconds, then restore it LOW
- If the face is unknown, capture the frame and send it to the homeowner via Telegram with a message asking whether to grant access
- If the same unknown face triggers three failed attempts within 10 minutes, enter lockdown mode and refuse to unlock for 30 minutes regardless of subsequent matches
- After 10 PM, require both a face match and a confirmation via Telegram before unlocking, even for enrolled users
- Log every decision with timestamp, identity, confidence score, reasoning, and frame reference
The power of this approach is that these rules are described in natural language. You do not need to write conditional logic for every edge case. The LLM interprets the intent and applies it to novel situations. If someone holds up a printed photo of an enrolled user's face, and the recognition script reports a match but with lower confidence (say 0.45), the agent can flag this as suspicious and request additional verification.
Connecting the detection script to the agent:
The face recognition script runs as a systemd service, continuously capturing and analyzing frames. When it detects a face, it writes the result to a JSON file or sends it to the agent via a local HTTP endpoint. The OpenClaw agent polls for new events or listens for incoming data, then processes each event through its skill instructions.
Telegram notification setup:
OpenClaw's Telegram integration lets the agent send alerts with attached photos and receive commands back. When an unknown face appears, the agent sends the captured frame to a designated Telegram chat along with the timestamp and a prompt asking whether to unlock. The homeowner can reply with "yes" to trigger a one-time unlock, or ignore the message to leave the door locked.
For repeated unknown faces, the agent escalates: the first appearance gets a standard notification, the second within a short window gets an urgent notification, and the third triggers lockdown mode with a clear alert explaining that the door will not unlock until the cooldown period expires or the homeowner explicitly overrides.
Logging Access Events to a Persistent Workspace
Every access decision, whether the door unlocked, stayed locked, or triggered an alert, should be logged somewhere durable and queryable. Local log files on the Pi work for debugging, but they are not accessible remotely, they are not searchable by meaning, and they disappear if the SD card fails.
For local-first logging, a SQLite database on the Pi stores events with structured fields: timestamp, identity, confidence score, decision, reasoning, and frame file path. This is sufficient for a single-door setup where you can SSH into the Pi to query the database.
For remote access and long-term storage, cloud-based options make the logs available from anywhere. You could push structured data to an MQTT broker feeding InfluxDB, sync files to S3, or use a purpose-built workspace platform.
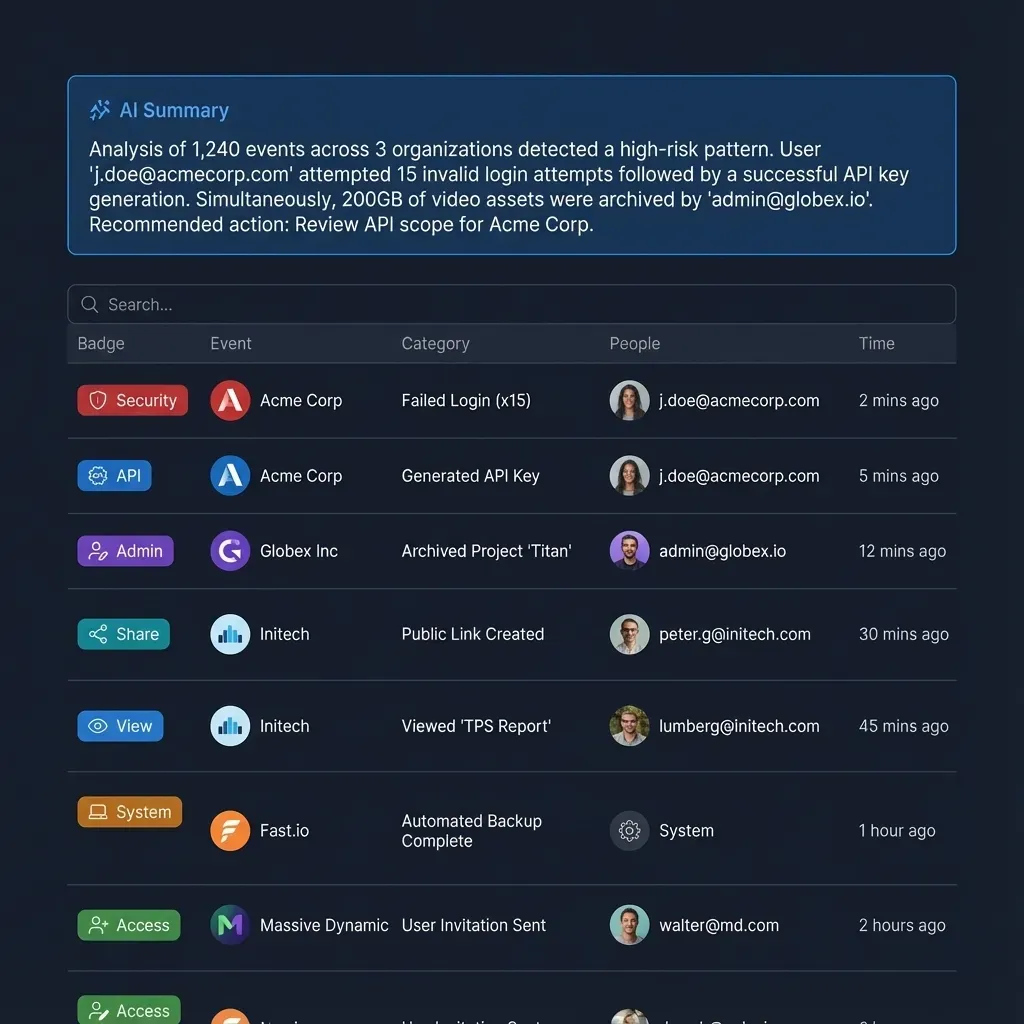
Fastio workspaces handle this well for agent-based setups. The OpenClaw agent uploads structured log entries and camera frames to a shared workspace using the Fastio MCP server. Each entry includes the timestamp, identity, confidence score, agent reasoning, and the camera frame.
With Intelligence Mode enabled on the workspace, those logs become searchable through natural language. You can ask "show me all unknown face events this week" or "when was the last time Tom arrived after midnight" without writing database queries. The built-in RAG indexes uploaded files automatically, returning answers with citations pointing to specific log entries.
The Business Trial includes generous storage and monthly credits during the trial with no credit card required. A door access agent generating a few log entries per day, even with camera frames attached, will use a small fraction of that capacity.
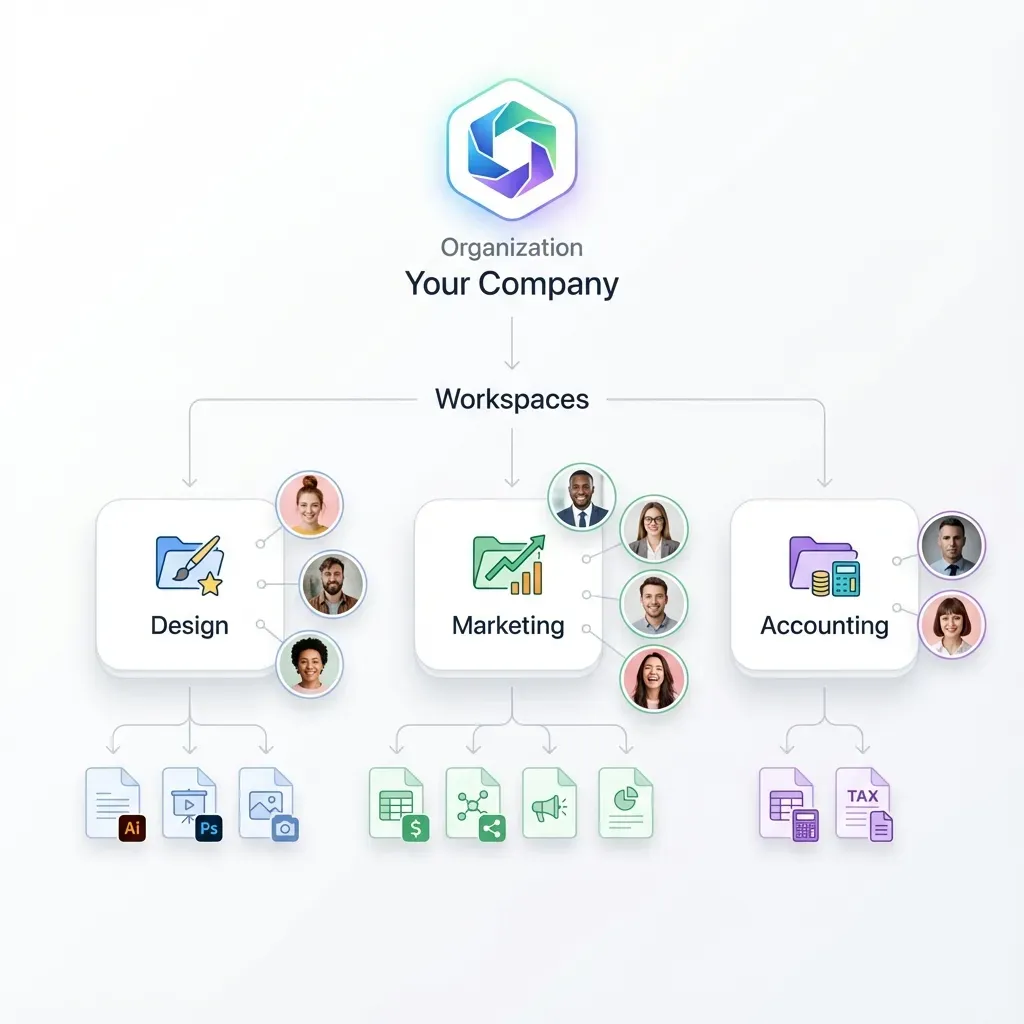
For households running multiple OpenClaw agents, whether a door lock, garage controller, irrigation system, or environment monitor, all agents can write to the same workspace. This creates a unified activity log across all your home automation devices, queryable from a single interface.
Alternative approaches include pushing events to a Home Assistant instance for integration with other smart home devices, or using Grafana dashboards with a time-series database for visual monitoring. Fastio requires less infrastructure since there is no server to run, but any persistent storage that survives an SD card failure works. The key requirement is that access logs for a physical security system exist somewhere other than the device controlling the lock.
Testing, Hardening, and Ongoing Maintenance
A facial recognition door lock is a physical security device. It needs to work reliably and fail safely. Test thoroughly before relying on it as a primary access method.
Initial testing checklist:
Run through every scenario before mounting the hardware permanently. Test each enrolled person at different times of day and in different lighting. Test with an unenrolled person and verify that the lockout logic triggers after the configured number of failures. Test the Telegram notification flow end to end: unknown face detected, photo sent, homeowner responds, door unlocks (or stays locked). Test what happens when the Pi loses internet connectivity, when the LLM API is unreachable, and when the 12V power supply for the lock is disconnected.
Handling false rejections:
A 95% accuracy rate means roughly 1 in 20 legitimate attempts may fail. Glasses, hats, facial hair changes, and poor lighting all increase false rejection rates. The OpenClaw agent can mitigate this by allowing a second attempt with adjusted lighting (turn on a porch light via a smart switch), by accepting lower confidence thresholds during daytime hours when the camera has better illumination, or by offering a fallback authentication method like a PIN code sent to Telegram.
Re-enroll users periodically, especially if their appearance changes . Adding new enrollment photos to the existing set and regenerating the averaged encoding takes a few minutes and meaningfully improves recognition consistency.
Preventing spoofing:
A printed photo or a phone screen showing someone's face can fool basic 2D face recognition. Mitigation options range from simple to sophisticated:
- Liveness detection: require the person to blink or turn their head slightly. The agent monitors consecutive frames for facial landmark movement
- Depth sensing: add a time-of-flight sensor (like the VL53L0X, about $5) to verify that the detected face is at a plausible distance and has physical depth rather than being a flat surface
- Confidence scoring: printed photos typically produce slightly lower match confidence and flatter lighting patterns. The agent can flag matches below a certain threshold for manual review
None of these are foolproof, but layering them makes casual spoofing impractical.
SD card and storage reliability:
Always-on Pi deployments wear out SD cards through continuous writes. The face detection loop writes captured frames constantly, which accelerates wear. Boot from an NVMe SSD via the M.2 HAT+ (Pi 5) or a USB SSD (Pi 4) for better write endurance. If you must use an SD card, mount /tmp and /var/log as tmpfs, limit captured frame retention to the most recent 1,000 images, and upload logs to cloud storage rather than accumulating them locally.
Power failure behavior:
When power returns after an outage, the agent should read the lock state before taking any action. A solenoid lock (fail-secure) will be locked during the outage since it needs power to retract. An electromagnetic lock (fail-safe) will release during the outage since it needs power to hold. Choose your lock type based on whether you prioritize keeping the door locked during outages or allowing emergency egress. The agent should log the power restoration event and resume normal operation without assuming anything about the current state.
Keeping the system current:
Update the face recognition library and OpenClaw periodically. Re-enroll faces every 6 to 12 months. Clean the camera lens monthly, especially in dusty or humid environments. Test the full access flow quarterly: face match, unknown face rejection, Telegram notification, lockdown trigger, and log upload. A physical security system that works on day one but degrades silently is worse than no system at all because it creates false confidence.
Frequently Asked Questions
How accurate is Raspberry Pi facial recognition?
The dlib model used by the face_recognition library achieves 99.38% accuracy on the Labeled Faces in the Wild benchmark. In real-world doorway conditions on a Raspberry Pi, expect 95% or higher with properly lit enrollment photos, consistent camera positioning, and a well-maintained training set. Accuracy drops in low light, which is why pairing a Pi NoIR camera with IR LED illumination is recommended for 24-hour operation.
Can OpenClaw control a door lock?
Yes. OpenClaw controls electromagnetic or solenoid locks through a relay module connected to the Pi's GPIO pins. The OpenClaw blog confirms that the agent can set GPIO 17 HIGH for a defined period to energize the relay and unlock the door. The agent adds a reasoning layer on top of the hardware control, evaluating face recognition results, time-of-day rules, and failure history before deciding whether to trigger the relay.
How do I build a smart door lock with Raspberry Pi?
You need a Raspberry Pi (4 or 5), a camera module, a 5V relay module with optical isolation, a 12V solenoid or electromagnetic lock, and a separate 12V power supply for the lock. Wire the relay's signal pin to a GPIO pin on the Pi, and connect the relay's output to switch the 12V supply to the lock. Install the face_recognition library for detection, enroll faces by capturing reference photos, and write a script that compares live frames against stored encodings. Add OpenClaw as the decision layer to get contextual access rules beyond simple match/no-match logic.
What sensors work with OpenClaw for home security?
OpenClaw can interface with any sensor that connects to the Raspberry Pi's GPIO pins or communicates via USB, I2C, or SPI. For door security specifically, useful additions include magnetic reed switches for door-open detection, PIR motion sensors for approach detection before the person reaches the camera, time-of-flight distance sensors for liveness verification during face recognition, and vibration sensors for tamper detection. The agent reads sensor data through Python scripts and incorporates the readings into its access decisions.
How much does the hardware cost beyond the Raspberry Pi?
About $25 to $35. A 12V solenoid lock costs $8 to $12, a single-channel relay module with optical isolation runs $3 to $5, and a Raspberry Pi Camera Module 3 is about $25 (though you may already have one). Add $5 for jumper wires, a terminal block, and a separate 12V DC power supply. A Raspberry Pi 5 with 8 GB RAM costs approximately $80, bringing the total project cost to roughly $105 to $115.
What happens if the face recognition fails or the internet goes down?
Configure fallback authentication for both scenarios. For recognition failures, the OpenClaw agent can offer a PIN code via Telegram, accept a manual override from a physical button, or lower the confidence threshold with additional verification. For internet outages that prevent the agent from reaching cloud LLM APIs, OpenClaw can run a local model through Ollama or fall back to a rule-based script that accepts PIN-based access on the local network and logs events for later upload when connectivity returns.
Related Resources

Store Your Door Access Logs Where You Can Search Them
Upload face recognition events, camera frames, and access decisions to a Fastio workspace. Intelligence Mode indexes everything so you can query your door activity in plain language. generous storage, no credit card.