How to Build an AI-Controlled Raspberry Pi Robot with OpenClaw
OpenClaw turns a standard Raspberry Pi robot from a remote-control toy into an autonomous agent that responds to natural language. This guide covers the full build: chassis selection, L298N motor wiring, sensor feedback loops, and cloud storage for telemetry. You will install OpenClaw on a Pi 5, write a movement skill, and connect the agent to persistent storage so sensor data and build logs survive across sessions.

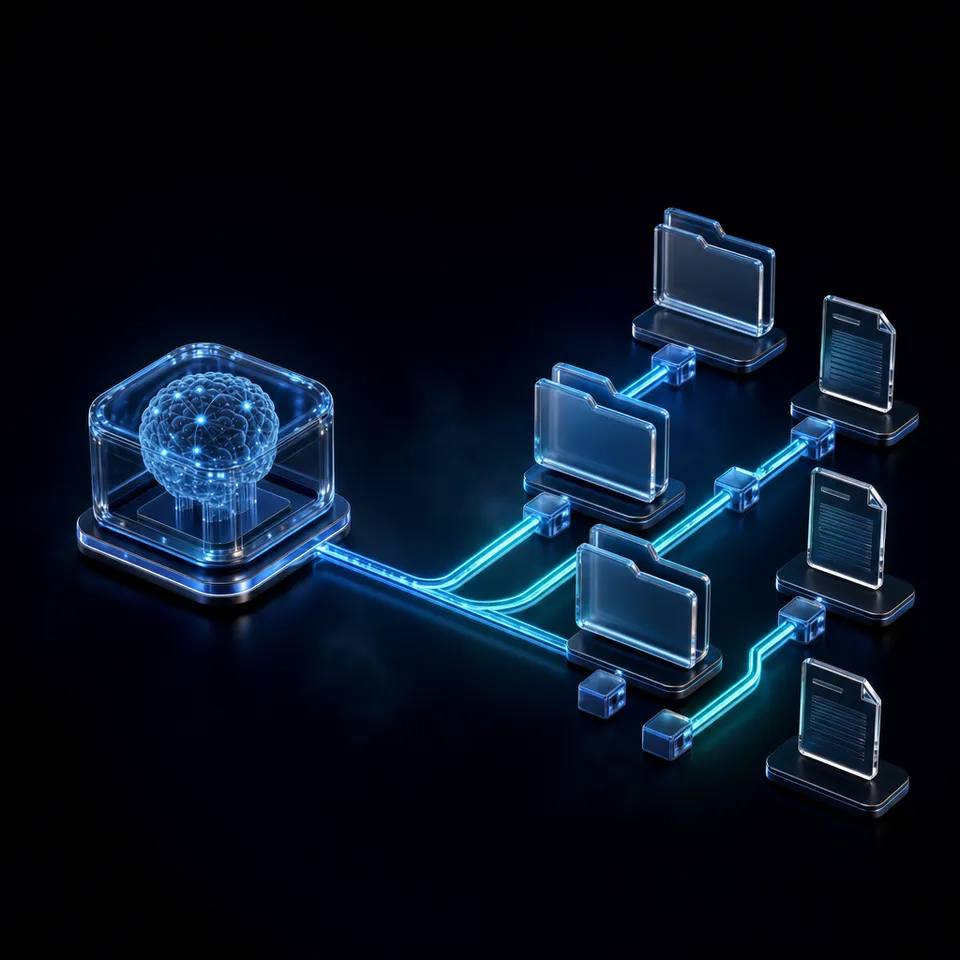
Why Most Pi Robot Builds Stop at Remote Control
OpenClaw crossed 247,000 GitHub stars within four months of its January 2026 launch, making it one of the fastest-adopted open-source AI agent projects on record (Wikipedia, March 2026). Most of that community energy flows into chatbots, home automation bridges, and personal server agents. Robotics, the use case that demands real-time hardware coordination and sensor feedback, remains the least-explored frontier for Pi-based AI agents.
The typical Raspberry Pi robot tutorial follows a familiar arc. You buy a chassis kit, wire two DC motors to an L298N driver, write a Python script that maps keyboard presses to motor directions, and control the bot from your phone or laptop. Forward, backward, left, right. Maybe you add a camera feed. That is where most guides end.
The gap between "remote-controlled car" and "autonomous robot" is not about better hardware. It is about a control layer that can reason about goals, break them into motor sequences, read sensor data mid-task, and adjust when something unexpected happens. That is what an AI agent provides.
OpenClaw runs as a persistent daemon on the Pi. It receives commands through messaging platforms like Telegram, Discord, or Signal (or through a local terminal interface), forwards them to an LLM such as Claude or GPT-4, and executes the resulting actions through shell commands on the Pi itself. For a robot build, those shell commands control GPIO pins, read distance sensors, and chain multi-step movements together. Tell it "drive to the wall and come back" and it generates the motor commands, monitors an ultrasonic sensor for distance, reverses when it reaches the target, and logs what happened.
This guide covers the full build in six steps:
- Choose a chassis and motors
- Wire the motor driver to GPIO
- Install OpenClaw on the Pi
- Create a movement skill
- Add sensor feedback for obstacle avoidance
- Store telemetry and share build data through cloud storage
Related guides
- How to Build Claude Cowork Client Portals for AI AutomationA Claude Cowork client portal gives agencies a branded staging area for their autonomous agents. The agents securely...
- How to Build End-to-End Clay Automation Workflows for Outbound OutreachClay automation workflows allow revenue teams to schedule tables and automatically execute data enrichment cascades....
- How to Build an AI Robot with a Raspberry Pi Starter Kit and OpenClawRaspberry Pi robotics kits now ship with ChatGPT voice commands and camera-based recognition out of the box, and the AI...
- How to Build a Raspberry Pi RC Car with OpenClaw NavigationHiwonder's ROSOrin Pro tutorials on Hackster.io prove that OpenClaw can drive a wheeled platform through SLAM-based...
- How to Control DC, Stepper, and Servo Motors with Raspberry Pi and OpenClaw AgentsRaspberry Pi shipped 7.6 million boards in fiscal year 2025, yet most motor tutorials still cover only one motor type...
- How to Control a Robotic Arm with OpenClaw on Raspberry PiMost Raspberry Pi robotic arm projects rely on hardcoded Python scripts that move servos to fixed positions. Adding...
More on this subject: OpenClaw on Raspberry Pi (192 guides)
What Hardware Goes into an AI-Controlled Pi Robot
The build splits into four groups: compute board, chassis with motors, motor driver, and sensors. Total cost ranges from $80 for a basic two-wheel build to $400+ for an advanced platform with depth sensing and a robotic arm.
Compute board
A Raspberry Pi 5 with 4 GB or 8 GB RAM is the recommended choice. The board weighs 46 grams without a case, adding under 80 grams total payload to a robot chassis. The 8 GB model gives more headroom when running OpenClaw alongside sensor-processing scripts, but the 4 GB model handles the workload for most builds. Running OpenClaw alongside sensor scripts, the Pi 5 typically draws 3 to 5 watts at idle and peaks near 8 watts during compute bursts. A 10,000 mAh USB-C power bank at 5V provides roughly 6 to 10 hours of continuous robot operation, depending on how aggressively the agent processes commands.
A Raspberry Pi 4 with at least 4 GB RAM also works. OpenClaw does not run the language model on the Pi itself. It sends prompts to a cloud LLM and executes the responses locally, so the on-board compute requirement stays modest. For ultra-lightweight setups, PicoClaw (a stripped-down variant) runs on a Pi Zero 2 W.
Use a high-endurance 32 GB microSD card or, better, an M.2 HAT+ with an SSD. Robot builds involve frequent writes (sensor logs, skill execution history), and cheap SD cards wear out fast under that pattern.
Chassis and motors
For a first build, a 2WD or 4WD tank-style chassis kit ($15 to $40 on Amazon or AliExpress) gives you a platform, two or four DC gear motors, wheels, a battery holder, and mounting screws. These kits fit the Pi and a breadboard on top with room for sensors.
For advanced builds, the Hiwonder ROSOrin Pro is a pre-integrated robotics platform with a 6-degree-of-freedom arm, 3D depth camera (Aurora930 Pro), TOF LiDAR, and full ROS 2 Humble support. The Hackster.io project by HiwonderRobot documents its OpenClaw integration, including autonomous task breakdown from natural language commands. It costs more than a DIY chassis, but eliminates the driver conflicts and library versioning issues that plague manual ROS 2 setups on the Pi.
Motor driver
The L298N dual H-bridge motor driver is the standard choice for DC motor robots. It controls two motors independently, handles up to 2A per channel, and costs about $3 to $5 for a breakout board. You connect four GPIO pins for direction control and two PWM-capable pins for speed control.
For servo-based robots (arms, pan-tilt mechanisms), a PCA9685 16-channel PWM driver communicates over I2C using just two GPIO pins and gives 12-bit resolution (4,096 steps) per channel.
Sensors
- HC-SR04 ultrasonic sensor ($2): measures distance up to 4 meters for obstacle avoidance
- Raspberry Pi Camera Module 3 ($25): visual feedback and object recognition
- MPU6050 IMU ($3): acceleration and gyroscope data for orientation tracking
- Raspberry Pi AI HAT+ with Hailo-8L (optional): onboard object detection without cloud round-trips

How to Wire the L298N Motor Driver to GPIO
The L298N board has screw terminals for two motors (OUT1/OUT2 and OUT3/OUT4), control pins (IN1 through IN4, ENA, ENB), and power connections (12V, GND, 5V).
Motor connections
- Left motor wires to OUT1 and OUT2
- Right motor wires to OUT3 and OUT4
- If a motor spins the wrong direction, swap its two wires at the screw terminal
GPIO connections
Pick six GPIO pins on the Pi. A common mapping that works well:
- IN1 to GPIO 17 (pin 11)
- IN2 to GPIO 27 (pin 13)
- IN3 to GPIO 22 (pin 15)
- IN4 to GPIO 23 (pin 16)
- ENA to GPIO 12 (pin 32, PWM-capable)
- ENB to GPIO 13 (pin 33, PWM-capable)
Power
Connect the motor battery pack (6V to 12V, depending on your motors) to the L298N's 12V and GND terminals. Run a second GND wire from the L298N's GND terminal to any ground pin on the Pi (pin 6, 9, 14, 20, 25, 30, 34, or 39). The Pi and L298N must share a common ground or the logic signals will not register.
Do not power the motors from the Pi's 5V rail. A stalled DC motor can pull several amps, which will brown out the Pi and risk corrupting the SD card or SSD. Always keep motor power and Pi power on separate supplies.
Quick test
Before installing OpenClaw, verify your wiring with a short Python script using the gpiozero library (pre-installed on Raspberry Pi OS):
from gpiozero import Robot
from time import sleep

robot = Robot(left=(17, 27), right=(22, 23))
robot.forward()
sleep(2)
robot.backward()
sleep(2)
robot.stop()
If both motors spin forward for two seconds, then backward for two seconds, your wiring is correct. If one side goes the wrong way, swap that motor's wires at the L298N screw terminal.
How to Install OpenClaw and Create a Movement Skill
With the hardware verified, install OpenClaw on the Pi. The official installation uses a single command, confirmed in the Raspberry Pi official news blog and the Adafruit Learning System guide:
curl -fsSL https://openclaw.ai/install.sh | bash
The script installs Node.js and all dependencies automatically. Installation takes two to four minutes over WiFi on a Pi 5. After the installer finishes, an onboarding wizard walks you through model provider selection (Anthropic, OpenAI, or a local model via Ollama for offline operation), API key configuration, and optional channel setup for Telegram or Discord.
A security note from the official docs: running an LLM-based agent with shell access carries real risk. The agent can execute any command the Pi user can run. Store API tokens in a password manager (not in a plaintext file on the Pi), and review the OpenClaw security documentation at docs.openclaw.ai before deploying on a network-connected robot.
How skills work
OpenClaw's core abstraction is skills: packaged instructions that tell the agent what tools it has available and when to use them. The agent receives a natural language command, checks its installed skills, and decides which ones to invoke. For a robot, you create a skill that wraps your motor control functions so the agent can call them by intent rather than by exact function name.
The practical workflow looks like this. You write a Python script that exposes motor control functions (forward, backward, turn left, turn right, stop) and sensor reads (distance to nearest obstacle, current heading from the IMU). You register that script as an OpenClaw skill with a description of what each function does and when the agent should use it. When you message the agent "drive forward until you are 30 centimeters from the wall, then turn left," OpenClaw reads your skill metadata, generates the appropriate sequence of calls, and executes them on the Pi.
This is where OpenClaw differs from a standard chatbot. The agent does not just suggest code for you to copy and run. It runs the code itself, reads the output (sensor values, error messages, success confirmations), and decides what to do next. If the ultrasonic sensor reports an obstacle at 50 centimeters when the agent expected clear space, it can re-plan the route on the fly.
Local models for latency-sensitive control
Cloud LLMs introduce 200 to 500 milliseconds of latency per decision cycle. For a robot moving through a room, that delay can mean bumping into furniture between sensor checks. OpenClaw supports local model hosting through Ollama, llama.cpp, or LocalAI. A smaller model running directly on the Pi 5 (or offloaded to a more powerful machine on the same local network) drops response time to under 100 milliseconds for simple routing decisions.
The practical split: use cloud models for complex planning tasks ("sort the red blocks into one bin and blue blocks into another") and local models for real-time reflexes ("stop if the distance sensor drops below 20 centimeters"). OpenClaw can switch between providers based on the task, so you do not have to choose one or the other.


Persist your robot's sensor logs and build data across sessions
Intelligent cloud workspace with automatic indexing once enabled. The OpenClaw agent on your Pi reads and writes files through MCP, and you review the results from any browser.
Sensor Feedback and Autonomous Navigation
A robot without sensors is a remote-control car with extra steps. Autonomous behavior requires a feedback loop: sense the environment, decide on an action, execute it, then sense again to verify the result.
Ultrasonic distance sensing
The HC-SR04 sensor sends an ultrasonic pulse and measures the time until the echo returns. Connect TRIG to any GPIO output pin and ECHO to an input pin through a voltage divider (the HC-SR04 outputs 5V and Pi GPIO pins accept 3.3V max, so you need two resistors to step it down). Mount the sensor at the front of the chassis, angled slightly downward to catch low obstacles like table legs and door frames.
With the sensor wired, your movement skill gains a distance function. The agent can now evaluate conditions: "move forward while distance is greater than 30 centimeters, then stop and scan left and right before choosing a direction." Each decision in that chain is an LLM call that reads the current sensor state and picks the next action from the skill's available functions.
Camera-based navigation
Adding a Raspberry Pi Camera Module 3 opens up visual reasoning. OpenClaw can capture a frame, describe what it sees through a multimodal LLM call, and make navigation decisions based on visual context. "I see a doorway ahead and to the left. Turning left." This works for waypoint navigation in familiar environments, where the agent recognizes landmarks rather than building a map from scratch.
For real-time object detection without cloud latency, the Raspberry Pi AI HAT+ with a Hailo-8L accelerator runs inference models locally on the Pi. The combination handles person detection, object classification, and basic scene understanding at frame rates useful for navigation decisions.
The advanced path: ROSOrin Pro with ROS 2
For builds that need SLAM (simultaneous localization and mapping), dynamic obstacle avoidance, and coordinated arm-plus-base control, the Hiwonder ROSOrin Pro provides a pre-integrated ROS 2 Humble stack with native OpenClaw agent support. The platform includes a 3D depth camera and TOF LiDAR that gives the robot 360-degree spatial awareness. The Hackster.io guide by HiwonderRobot documents the full integration, where OpenClaw handles high-level task breakdown (turning "clean the workspace" into a sequence of pick, move, and place operations) and the ROS 2 layer manages low-level motion planning, joint limits, and emergency stops.
This two-tier architecture makes sense for complex physical tasks. The AI agent reasons about goals and sequences. The robotics middleware handles physics: velocity profiles, collision envelopes, and torque limits. Neither layer needs to understand the implementation details of the other, which keeps both systems simpler to debug and maintain.

Storing Robot Telemetry and Sharing Build Data
Every robot session generates data: sensor readings, movement logs, error traces, photos from the camera, and the agent's own decision history. On a bare Pi, all of that lives on the SD card. Lose the card, corrupt the filesystem during a power cut, or fill the 32 GB with a week of continuous logging, and the data disappears.
The industrial Raspberry Pi market reached $1.8 billion in 2025, with robotics and automation driving the fastest-growing segment at 12.5% CAGR through 2034 (DataIntelo, 2026). As Pi-based robot projects move from hobby workbenches to commercial deployments, persistent telemetry storage becomes a requirement, not a nice-to-have.
The storage problem for robot projects
Local-only storage creates three issues. First, the data dies with the hardware. If you swap Pi boards or rebuild the chassis, you lose your logs unless you remembered to back them up. Second, you cannot share telemetry with collaborators without manually copying files off the Pi over SSH or sneakernet. Third, the agent itself has no persistent memory across sessions. It cannot reference what it learned yesterday unless you build that persistence layer yourself.
Cloud storage options
You could push telemetry to S3 or Google Drive through cron jobs or custom upload scripts. That works for raw data dumps, but gives you a folder full of timestamped JSON files with no search, no indexing, and no way for the agent to query its own history.
Fast.io approaches this differently. Instead of a passive file store, workspaces support built-in intelligence. Once Intelligence is enabled on a workspace, uploaded sensor logs are indexed automatically so the agent can search its own telemetry by meaning, not just by filename. "What was the average obstacle distance during yesterday's navigation run?" becomes a query the agent answers from its own stored data, with citations pointing back to the source files.
MCP integration for robot agents
Fast.io exposes a Model Context Protocol server with Streamable HTTP at /mcp. The OpenClaw agent can read from and write to workspaces directly, giving it persistent file storage that survives reboots, SD card swaps, and hardware changes. Sensor logs from Tuesday's run are still there on Friday. The agent reads them, references past sessions when planning new routes, and stores each run's results for future use. See the MCP documentation for the full tool surface.
Fast.io offers a 14-day Business Trial, card required (see pricing). For a robot project generating daily telemetry, Fastio provides scalable storage and workspace collaboration.
Sharing builds with a team
If you are building the robot as part of a team or class, ownership transfer lets the agent create a workspace, populate it with build documentation and telemetry, then hand ownership to a human collaborator. The agent keeps admin access for continued uploads while the human gets full control over the workspace and its contents. Branded shares let you package a robot's sensor logs, photos, and movement data into a single reviewable link.
Other storage approaches work for simpler setups. A local NAS handles basic backup if you never need remote access. S3 is fine if you are comfortable writing upload scripts and do not need the agent to query its own data. For a robot agent that needs to search its telemetry, share results with humans, and maintain persistent context across sessions, an intelligent workspace eliminates the glue code between storage and retrieval.
Sources
References used to verify factual claims in this guide.
-
OpenClaw crossed 247,000 GitHub stars within four months of its January 2026 launch
-
The global industrial Raspberry Pi market was valued at $1.8 billion in 2025, projected to reach $5.2 billion by 2034 at 12.5% CAGR
-
ROSOrin Pro integration enables autonomous task breakdown from natural language commands via ROS 2 Humble
-
Raspberry Pi 5 weighs approximately 46 grams
Frequently Asked Questions
What is the best Raspberry Pi for robotics?
The Raspberry Pi 5 with 4 GB or 8 GB RAM is the current best choice. It weighs 46 grams, fits any standard robot chassis, and has enough processing power to run OpenClaw alongside sensor-reading scripts. The Pi 4 with 4 GB RAM works for budget builds. For ultra-lightweight projects, the Pi Zero 2 W runs PicoClaw, a stripped-down agent variant designed for constrained hardware.
Can Raspberry Pi control a robot?
Yes. The Pi's 40-pin GPIO header connects directly to motor drivers like the L298N (for DC motors) and PCA9685 (for servos). Python libraries like gpiozero and RPi.GPIO provide motor control functions out of the box. Adding OpenClaw on top gives the Pi natural language reasoning, so it can execute multi-step movement commands autonomously rather than relying on manual remote control.
How do I program a Raspberry Pi robot with Python?
Start with the gpiozero library, which is pre-installed on Raspberry Pi OS. Create a Robot object with your GPIO pin numbers, then call methods like forward(), backward(), left(), and right(). For finer control, use RPi.GPIO directly to set individual pin states and PWM frequencies for speed adjustment. Adding OpenClaw wraps these Python functions into an AI skill, so natural language commands trigger motor sequences without manual scripting for each task.
What motors work with Raspberry Pi?
DC gear motors (the kind included in most chassis kits) work through an L298N or DRV8833 motor driver connected to GPIO pins. Standard hobby servos like the SG90 and MG996R work through a PCA9685 PWM driver over I2C, or directly on PWM-capable GPIO pins if you only need one or two servos. Stepper motors (NEMA 17) work through A4988 or DRV8825 driver boards for precise positioning in CNC or arm applications.
How does OpenClaw control a robot?
OpenClaw runs as a daemon on the Pi and receives natural language commands through Telegram, Discord, Signal, or a local terminal interface. It forwards those commands to an LLM (cloud-hosted or local via Ollama), which generates shell commands or Python calls based on the robot's installed movement skills. For motor control, the agent calls your movement functions, reads sensor outputs to check the result, and decides the next action. The sense-decide-act loop continues until the task is complete or the agent encounters a condition it cannot resolve.
Can I run OpenClaw on a Raspberry Pi without internet?
Yes. OpenClaw supports local model hosting through Ollama, llama.cpp, or LocalAI. Running a smaller model directly on the Pi 5 or on another machine on the local network eliminates cloud API calls entirely. Local operation keeps data private, reduces decision latency for real-time motor control, and removes ongoing API costs. The tradeoff is that smaller local models handle complex multi-step planning less reliably than cloud models like Claude or GPT-4, so most builders use both and switch based on task complexity.
Related Resources

Persist your robot's sensor logs and build data across sessions
Intelligent cloud workspace with automatic indexing once enabled. The OpenClaw agent on your Pi reads and writes files through MCP, and you review the results from any browser.