How to Build Programmatic Workspaces with the Clay API and CLI
The Clay API and CLI enable developers to programmatically manage tables, trigger enrichment waterfalls, and interface Clay with AI agents and custom backend services. By linking these programmatic interfaces to a persistent Fast.io workspace, organizations can construct automated go-to-market data pipelines that maintain full version history and execute real-time document extraction. This guide covers key setup steps, authentication headers, command-line operations, and AI agent integrations.


The Era of Programmatic Go-to-Market Workspaces
Approximately 76.0% of CRM users report that less than half of their organization's CRM data is accurate and complete, with contact data decaying at an average rate of 22.5% per year [Validity 2026 Survey] [HubSpot 2026 Study]. This chronic data decay is where programmatic workspaces live. Traditional sales organizations attempt to combat this decay by dedicating human hours to manual copy-pasting, research, and lookup. In fact, sales representatives spend roughly 70.0% of their time on non-selling activities, including manual prospecting and spreadsheet management [Aeolus GTM 2026 Report]. This operational overhead drags down sales velocity and prevents high-performing representatives from executing their primary role.
To solve this, Revenue Operations (RevOps) engineers are moving away from manual data maintenance toward programmatic workspaces. A programmatic workspace treats data enrichment as a continuous, automated process. Instead of downloading static CSV files and uploading them to disparate tools, developers build active loops that monitor incoming files, trigger targeted search workflows, and update internal databases. Clay has emerged as a central piece of this modern stack by consolidating over 150 data providers into a single platform. This guide explains how to build and orchestrate these pipelines using the Clay API and CLI, establishing a persistent execution layer that connects AI agents to human GTM workflows.
Related guides
- How to Generate and Use a Devin AI API Key for WorkspacesAccording to Cognition, 67% of pull requests generated by Devin AI are merged by human engineering teams without manual...
- How to Build an Online AI Detector API with Hermes AgentCommercial AI detectors frequently produce false accusations, with studies showing they flag up to 61% of essays...
- Programmatic Data Ingestion: Clay API File Upload GuideImplementing a Clay API file upload allows go-to-market teams to ingest large lead lists in bulk without hitting...
- How to Build End-to-End Clay Automation Workflows for Outbound OutreachClay automation workflows allow revenue teams to schedule tables and automatically execute data enrichment cascades....
- How to Build Scalable Lead Generation Workflows in ClayWaterfall enrichment increases contact find rates by up to 80%, yet many sales teams fail to scale outbound workflows...
- Programmatic Image Processing: Convert AVIF to PNG in Clay TablesConvert AVIF images to PNG format programmatically in Clay tables to prevent rendering failures in outbound email...
More on this subject: Clay and GTM Agents (82 guides)
Clay API Authentication and Key Setup Steps
Interfacing with the Clay platform programmatically requires a secure connection to the Public API. The base URL for all programmatic requests is https://api.clay.com/public/v0. Authentication relies on a custom header rather than a standard Bearer token. Every request sent to the API must include the clay-api-key header containing your workspace token. This represents the primary mechanism for clay api authentication.
To obtain your Clay API key, log in to your account dashboard and navigate to Settings. From there, select Account and scroll to the API keys (beta) section. You can generate a new token and copy it immediately. Because this token grants administrative access to your workspace, you must store it securely in your environment variables rather than hardcoding it into your codebase. For example, you should define it in a .env file as CLAY_API_KEY. This completes the clay api key setup process.
To verify your configuration, you can execute a test request to the user profile endpoint /me. The following Node.js snippet demonstrates how to configure the client and fetch workspace metadata:
const client = async () => {
  const response = await fetch('https://api.clay.com/public/v0/me', {
    method: 'GET',
    headers: {
      'clay-api-key': process.env.CLAY_API_KEY,
      'Content-Type': 'application/json'
    }
  });
  if (!response.ok) {
    throw new Error(`API error: ${response.status}`);
  }
  const data = await response.json();
  console.log(data);
};
client();
You can also test this connection from your terminal using curl:
curl --request GET \
  --url https://api.clay.com/public/v0/me \
  --header "clay-api-key: $CLAY_API_KEY"
The server returns a JSON payload containing details about your user profile, active workspaces, and associated organization. If the API key is invalid, the server returns an authentication error code.
For larger datasets, teams use routines to process leads in batch. A routine represents a pre-configured enrichment waterfall designed within the Clay UI. For example, you might create a routine that accepts a company domain name, retrieves the corporate headquarters location, checks for open job listings, and finds the email addresses of engineering managers.
To trigger a routine run, send a POST request to /public/v0/routines/{routine_id}/run. The payload contains the input fields required by the routine. When the execution completes, the API returns the enriched output fields. If you are dealing with millions of records, you should use the batch upload endpoints. First, request a presigned upload URL via POST /routines/{routine_id}/run-batch/upload-url. Next, upload a JSONL file containing your inputs to that URL. Finally, trigger the batch execution by sending a POST request to /routines/{routine_id}/run-batch. The execution runs asynchronously, and you can query the results using GET /routines/run/{routine_run_id}/results once the process completes.
This programmatic execution of waterfalls is the core capability of the Clay API. By combining the public endpoints with automated scripting, developers can build systems that enrich leads in real-time, feeding clean data directly into their GTM workflows.
Integrating CLI Tools: A Developer Guide
While direct HTTP requests work well for custom backend scripts, AI development assistants like Claude Code, Codex, and Cursor operate most effectively through a local clay cli command line interface. The Clay CLI provides a JSON-first environment where scripts and agents can execute search actions, manage routines, and monitor usage limits. The Clay CLI allows terminal-based table manipulation and provides direct access to your workspaces.
Installing the CLI inside an agent session requires installing the official agent plugin. For Claude Code, developers run specific marketplace commands:
/plugin marketplace add clay-run/agent-plugins
/plugin install clay@clay-plugins
For Codex, the installation goes through the built-in marketplace:
codex plugin marketplace add clay-run/agent-plugins
On Cursor, local installation paths can occasionally fail due to strict enterprise security policies. To avoid these issues, developers should clone the marketplace repository locally:
git clone https://github.com/clay-run/agent-plugins.git /tmp/clay-agent-plugins
After cloning, you must read and execute the setup instructions found in /tmp/clay-agent-plugins/clay/skills/setup/SKILL.md. This runbook guides you through the process of registering the plugin configuration and executing the clay:setup skill. After completing the setup, delete the temporary clone:
rm -rf /tmp/clay-agent-plugins
Regardless of the development assistant you use, running the setup command initiates the sign-in flow. The command clay login opens a browser window where you authorize the CLI session via OAuth. After authentication, you must restart your coding agent. This restart is critical because the Model Context Protocol (MCP) server only parses the session token at startup. If you omit the restart, the agent will fail to recognize the newly authenticated session and throw errors.
Once restarted, the agent can verify the CLI state by running clay whoami and checking the exit code. A successful session returns an exit code of 0. If the CLI fails to authenticate, it returns an exit code of 3. If a network disruption occurs, the CLI returns an exit code of 5. Because the CLI outputs all data as structured JSON, your agent can pipe terminal commands directly into parsing utilities:
clay whoami | jq '.workspace.name'
The CLI commands are designed to be composable. For example, to list all active tables in a workspace, you run clay tables list. To retrieve the schema and row count of a specific table, run clay tables get <table-name>. You can also trigger an enrichment workflow from the command line using clay fire <table-name> --data '<json>'. The --wait flag tells the CLI to block until the enrichment completes and return the output JSON, making it easy to chain commands in shell scripts. The CLI also provides usage tracking via clay usage show to monitor credit consumption across your workspace.
State Persistence and Concurrent Handoff Architecture
Although the Clay API and CLI are excellent for executing data enrichment waterfalls, they do not function as persistent file storage. In a typical GTM workflow, AI agents must read raw customer lists, execute lookups, write enriched output files, and hand off results to human supervisors. Relying on local developer machines or ephemeral database instances creates severe operational risks. If an agent's container restarts, the processed leads are lost. If multiple agents write to the same spreadsheet simultaneously, they risk overwriting columns and corrupting data.
To resolve these limitations, developers should use Fast.io workspaces as the persistent storage and collaboration layer. Fast.io provides org-owned workspaces where humans and AI agents collaborate on the same files. Instead of using raw AWS S3 buckets or local directories, which lack versioning and structured AI access, teams can deploy Fast.io workspaces to manage the GTM lifecycle.
A reliable architecture connects the AI agent to two different endpoints. The agent talks to the Clay API or CLI to run search routines. Simultaneously, it connects to the Fast.io MCP server to manage workspace files. Fast.io exposes its action-based MCP tools via Streamable HTTP at the /mcp endpoint and legacy SSE at the /sse endpoint, which are detailed on the Fast.io developer portal.
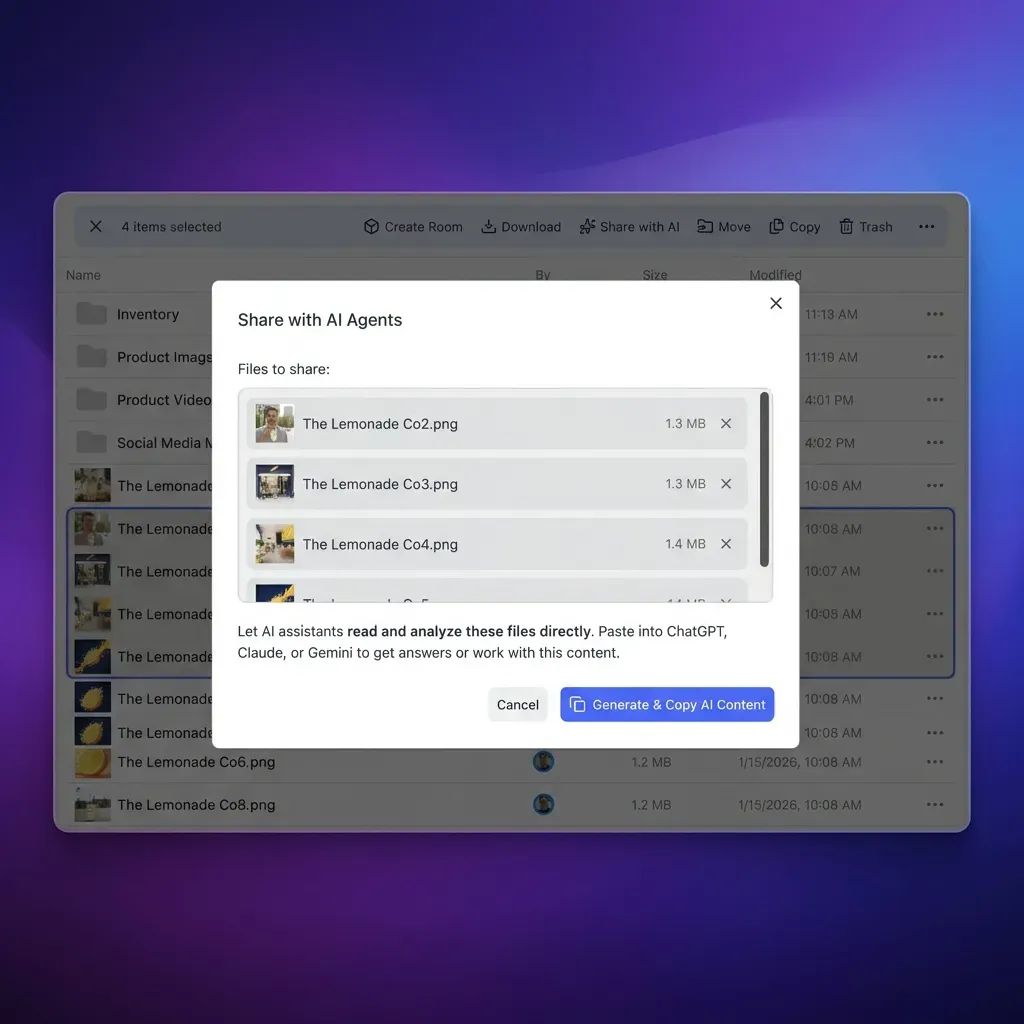
Using Fast.io ensures that every modification is fully auditable. The platform maintains a complete per-file version history. If an AI agent executes an incorrect regex or writes blank values over existing contact records, an operator can revert the file to its previous state instantly. If files must be imported from external systems, agents can use URL Import to pull spreadsheets directly from Google Drive, Box, OneDrive, or Dropbox via OAuth, bypassing local I/O bottlenecks.
Comparing Workspace Storage Alternatives
When designing a programmatic GTM pipeline, developers must choose where raw inputs and enriched outputs reside.
Local directories are simple to implement but lack sharing capabilities. If an agent runs a script on a local server, a human team member cannot inspect the output file without manual file transfers. Furthermore, local storage provides no version history, meaning a single script bug can permanently corrupt a dataset.
Cloud storage buckets, such as Amazon S3, offer high availability but require complex IAM policy configurations and lack collaboration interfaces. Humans cannot easily edit or review files in an S3 bucket without custom front-end applications, and buckets do not provide native file indexing for semantic search.
Fast.io bridges this gap by combining the accessibility of shared workspaces with the programming flexibility of a persistent API. AI agents read and write files using the same folder structures that human team members see in their web browsers. Because the workspace tracks file version history automatically, concurrent writes from multiple agents are isolated and auditable, ensuring that the GTM pipeline remains stable under heavy use.


Build secure Clay API data pipelines
Connect your automated Clay API workflows to a persistent Fast.io workspace with versioning, audit logging, and built-in Model Context Protocol tooling. Start your 14-day Business Trial today.
How to Build a Structured Document Extraction Pipeline
A programmatic workspace shines when handling unstructured documents. Consider a workflow where a corporate development team needs to monitor incoming PDF contracts, extract counterparties, and find their latest funding details.
First, a human uploads the contract PDFs to a Fast.io workspace. Fast.io automatically processes these files using Metadata Views, which turn documents into a queryable database. Instead of writing custom OCR templates or brittle parsing rules, teams describe the desired fields in natural language. The AI engine designs a typed schema, scans the files, and populates a spreadsheet with fields such as contract dates, counterparties, and values.
Once Metadata Views extract the company name, the AI agent detects the update by polling the activity feed or monitoring Fast.io's WebSocket events feed. The agent pulls the extracted company name from the workspace, and formats a request to the Clay API. It calls the routine endpoint to trigger an enrichment waterfall:
curl --request POST \
  --url https://api.clay.com/public/v0/routines/YOUR_ROUTINE_ID/run \
  --header "clay-api-key: $CLAY_API_KEY" \
  --header "Content-Type: application/json" \
  --data '{"company": "Example Corp"}'
Clay searches its consolidated data providers, retrieves the target's employee count, tech stack, and funding history, and returns the structured payload. The agent reads this response, formats it as a new CSV column, and writes the updated spreadsheet back to the Fast.io workspace.
Finally, the agent executes an ownership transfer. By passing file ownership from the agent account to the human business manager, the agent hands off the verified leads for final review. The human manager receives full control of the enriched asset, while the agent retains admin privileges to handle future incremental updates.
Detailed Event Listener Implementation
To automate this workflow, developers can deploy a simple Node.js service that monitors Fast.io events. The event feed contains details about the modified file and the workspace where the event occurred. When a metadata extraction completes, the handler processes the output and triggers the Clay enrichment routine.
The following Node.js code shows how to receive the event, parse the Metadata View results, and call the Clay API:
const WebSocket = require('ws');
// Mint a realtime token with GET https://api.fast.io/current/websocket/auth/{workspace_id}
// (Bearer API key; the token lasts an hour), then connect to
// wss://{host}/api/websocket/?{auth_token}, where the token is the whole query string.
const ws = new WebSocket(process.env.FASTIO_WEBSOCKET_URL);

ws.on('message', async (data) => {
  const event = JSON.parse(data);
  if (event.response === 'event' && event.event === 'metadata_fact_update') {
    const companyDomain = await getExtractedDomain(event.object_id);
    if (!companyDomain) return;
    try {
      const clayResponse = await fetch('https://api.clay.com/public/v0/routines/YOUR_ROUTINE_ID/run', {
        method: 'POST',
        headers: {
          'clay-api-key': process.env.CLAY_API_KEY,
          'Content-Type': 'application/json'
        },
        body: JSON.stringify({ domain: companyDomain })
      });
      const enrichmentData = await clayResponse.json();
      await updateFastioFile(event.object_id, enrichmentData);
      console.log('Enrichment triggered and written back');
    } catch (error) {
      console.error('Workflow failed:', error);
    }
  }
});

async function getExtractedDomain(fileId) {
  // Reads the file's extracted metadata through the Fast.io REST API
}

async function updateFastioFile(fileId, data) {
  // Uses Fast.io REST API to append the enrichment payload to the file
}
This event-driven loop removes human intervention from the data gathering process. By listening to the WebSocket events feed, the AI agent can enrich lists as soon as they are uploaded, creating an active GTM system that runs continuously in the background.
Cost Controls and Audit Trails for GTM Automation
Automating enrichment workflows introduces the risk of runaway API consumption. If an AI agent enters an execution loop, it can run thousands of queries in minutes, depleting your Clay credit balance.
To mitigate this risk, operations teams should establish strict guardrails. During initial development, teams can use the 14-day Fast.io Business Trial, which requires a credit card, to test agent behavior in an isolated sandbox. This trial allows you to verify that your event listeners and agent prompts function correctly before moving to production. Once verified, teams can transition to paid plans on the Fast.io pricing page. Fast.io pricing features clear tiers: the Starter plan costs $9.99/mo, the Business plan is $49.99/mo, and the Enterprise plan is $199.99/mo.
On the Clay side, administrators should define strict credit limits per routine and restrict the CLI to specific, pre-approved functions. On the storage side, Fast.io provides granular permissions at the organization, workspace, folder, and file levels. By restricting the AI agent's write access to a single input-output folder, you prevent it from editing historical datasets or accessing restricted organizational directories.
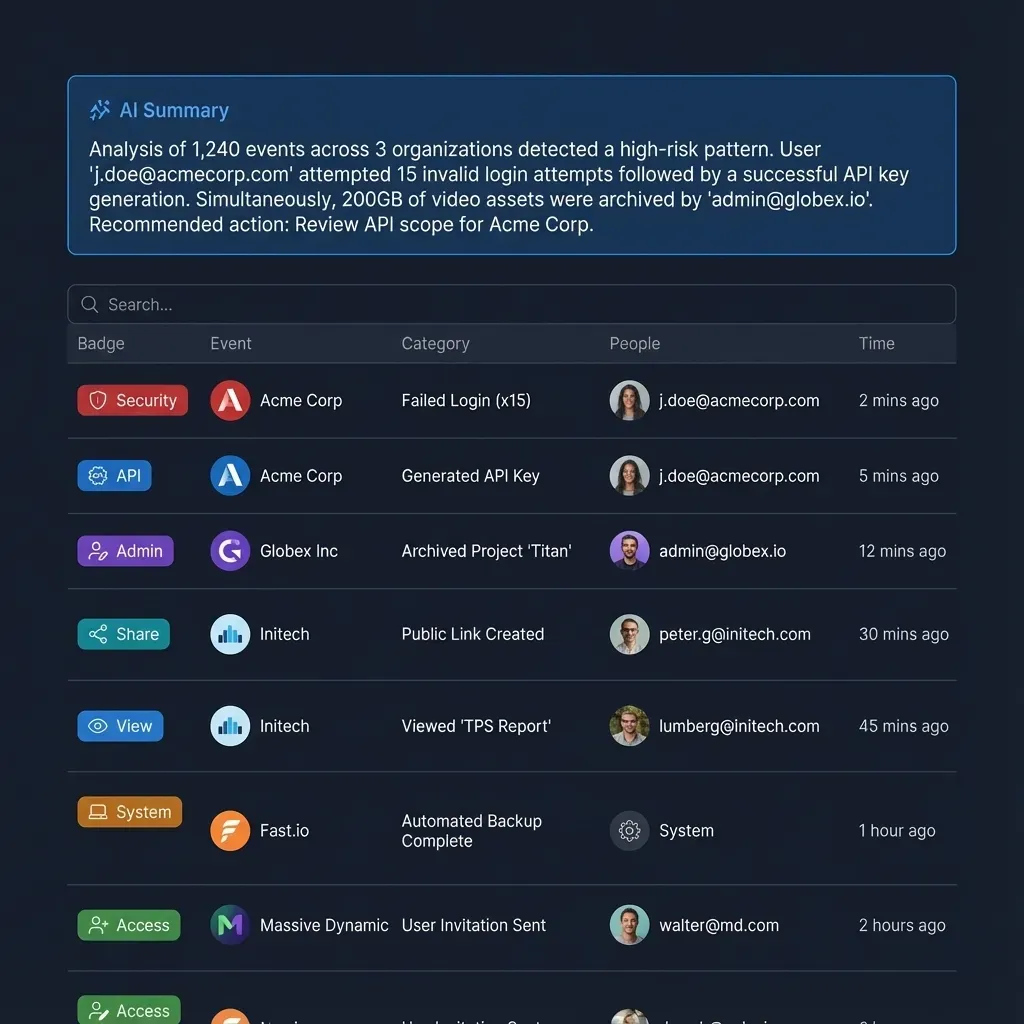
Every read, write, and API call is recorded in the Fast.io activity log. If a discrepancy arises, admins can inspect the log to trace the exact sequence of events. This transparency ensures that GTM automation remains secure, cost-controlled, and completely auditable.
Implementing Alert Routing and Error Handling
Even with strict guardrails, automated GTM pipelines can experience runtime failures. A data provider might fail to return data, or a webhook payload might contain malformed JSON. To maintain data integrity, developers must build defensive error handling into their scripts.
When a Clay API request fails, the server returns a structured error envelope. For instance, if you exceed your monthly credit quota, the API returns a HTTP 429 status code with a body detailing the rate limit violation. The script should catch this error, log the incident, and halt further execution. Rather than retrying indefinitely and wasting processing cycles, the agent should write a warning message to a shared error log inside the Fast.io workspace.
This error file, stored directly in the team's shared directory, acts as a visual alert for human operators. When the human logs into the Fast.io dashboard, they see the error file and can resolve the API billing issue. Because Fast.io supports real-time activity feeds, the human supervisor receives a notification immediately, allowing them to troubleshoot the pipeline without digging through server logs.
Sources
References used to verify factual claims in this guide.
-
Approximately 76.0% of CRM users report that less than half of their organization's CRM data is accurate and complete.
-
B2B contact data decays at an average rate of approximately 22.5% per year.
-
Sales representatives spend roughly 70.0% of their time on non-selling activities.
-
Fast.io pricing features clear tiers: the Starter plan costs $9.99/mo, the Business plan is $49.99/mo, and the Enterprise plan is $199.99/mo.
Frequently Asked Questions
How do I get my Clay API key?
To retrieve your Clay API key, log in to Clay, navigate to Settings, select Account, and look for the API keys (beta) section where you can generate a new token.
Does Clay have a public API?
Yes, Clay provides a public API at `https://api.clay.com/public/v0` that allows developers to run routines, upload batch datasets, and fetch enrichment results programmatically.
How do you use the Clay CLI with coding agents?
To use the Clay CLI with coding agents like Claude Code or Cursor, install the official `clay-run/agent-plugins` package, authenticate via `clay login`, and restart the agent so the Model Context Protocol (MCP) server can load the session.
Related Resources

Build secure Clay API data pipelines
Connect your automated Clay API workflows to a persistent Fast.io workspace with versioning, audit logging, and built-in Model Context Protocol tooling. Start your 14-day Business Trial today.