How to Set Up Wake-on-LAN on Raspberry Pi with an OpenClaw Agent
A Raspberry Pi 5 draws 2.7 watts at idle, which costs roughly $4 per year in electricity at the US national average rate. That makes it a practical always-on relay for Wake-on-LAN packets. This guide walks through enabling WoL on target machines, installing etherwake on a Pi, deploying an OpenClaw agent, and wiring chat-triggered wake commands through Telegram so you can power on workstations from your phone.


Why a Raspberry Pi Is the Right WoL Relay
A Raspberry Pi 5 draws 2.7 watts at idle on Raspberry Pi OS Lite, according to Tom's Hardware testing. Across a full year of 24/7 operation, that adds up to about 23.6 kWh. At the US national average residential electricity rate, the annual cost comes to roughly $4. For less than the price of a latte, you get a dedicated device that can send Wake-on-LAN packets to any machine on your network.
Wake-on-LAN works by broadcasting a 102-byte "magic packet" over the local network. The packet contains six bytes of 0xFF followed by the target machine's MAC address repeated 16 times, sent on UDP port 9. Any computer with WoL enabled in its BIOS will power on when it receives a magic packet containing its own MAC address.
The catch is that someone, or something, needs to send that packet. Your sleeping workstation cannot wake itself. Desktop WoL utilities work when you are sitting at another computer on the same LAN, but they do not help when you are on the train or when you want machines booted before you walk into the office.
A Pi solves the relay problem. It stays on around the clock, shares the same LAN as your workstations, and runs Linux with full access to etherwake and wakeonlan packages. Most existing guides stop there, leaving you with a Pi that can send magic packets but only through SSH and manual terminal commands.
Adding an OpenClaw agent to the Pi changes the picture. Instead of SSH-ing into the Pi and typing etherwake commands, you send a Telegram message like "wake the render server" and the agent handles the rest. You can schedule wake commands for weekday mornings, verify whether a machine actually came online, and store logs of every wake event in a shared workspace that your whole team can read.
Related guides
- How to Set Up the Hermes Agent Web UI DashboardThe Hermes Agent web dashboard gives you browser-based control over an agent that normally lives in a terminal. This...
- How to Set Up MCP in Claude DesktopClaude Desktop MCP enables the local Claude app to interact with external tools and data sources via the Model Context...
- How to Set a Static IP on Raspberry Pi for Always-On OpenClaw AgentsRaspberry Pi OS Bookworm replaced dhcpcd with NetworkManager in late 2023, but most static IP tutorials still reference...
- How to Set Up Samba File Sharing on Raspberry Pi with an OpenClaw AgentSamba turns a Raspberry Pi into a network file server that Windows, macOS, and Linux clients can access natively, but...
- How to Set Up Offline Speech Recognition on Raspberry Pi for OpenClaw Voice AgentsWhisper Tiny transcribes speech in 2-3 seconds on a Raspberry Pi 5, making fully offline voice agents practical on $80...
- How to Set Up Multi-System Emulation on Raspberry Pi with OpenClawRaspberry Pi emulation splits into two domains that most setup guides conflate: retro gaming through packages like...
More on this subject: OpenClaw on Raspberry Pi (192 guides)
How to Enable Wake-on-LAN on Your Target Machines
Before your Pi can wake anything, the target machines need WoL enabled at two levels: the BIOS/UEFI firmware and the operating system network driver.
Start with the firmware. Reboot each target machine and enter the BIOS setup (usually by pressing F2, Delete, or F12 during POST). Look for a setting labeled "Wake on LAN," "Power On By PCI-E," or "Resume by LAN" under the power management or network configuration menu. Enable it and save. The exact label varies by manufacturer. On Dell machines, check Power Management. On Lenovo ThinkPads, look under Config > Network. ASUS motherboards often place the option under Advanced > APM Configuration. If you cannot find the setting, search your motherboard model number plus "enable Wake-on-LAN" for specific instructions.
Next, verify that the operating system's network driver recognizes WoL. On Linux, install ethtool and check the Ethernet interface:
sudo apt install -y ethtool
sudo ethtool enp0s3 | grep -i wake
Replace enp0s3 with your actual interface name (run ip link to find it). The output shows two key lines: "Supports Wake-on" lists the available wakeup modes, and "Wake-on" shows the current setting. The letter g means magic packet support is active. If "Wake-on" shows d (disabled), turn it on:
sudo ethtool -s enp0s3 wol g
This setting resets on reboot. To make it persistent on systems using NetworkManager, create a dispatcher script at /etc/NetworkManager/dispatcher.d/99-wol:
#!/bin/bash
if [ "$1" = "enp0s3" ] && [ "$2" = "up" ]; then
    ethtool -s enp0s3 wol g
fi
Make it executable with chmod +x. On systems using systemd-networkd, add WakeOnLan=magic to the relevant .link file instead.
One important limitation: WoL only works over wired Ethernet. Wi-Fi adapters do not support magic packet wake, so your target machines must be connected via Ethernet cable to the same broadcast domain as the Raspberry Pi.
How to Install and Test etherwake on the Pi
With WoL enabled on your target machines, set up the Raspberry Pi to send magic packets. Start with a fresh Raspberry Pi OS Lite (64-bit) installation. The 64-bit version matters because OpenClaw requires an aarch64 architecture.
Install etherwake from the default repositories:
sudo apt update && sudo apt install -y etherwake
An alternative package called wakeonlan is also available. The main difference: etherwake sends raw Ethernet frames directly (requires root), while wakeonlan sends UDP broadcast packets (works without root but may not traverse all network configurations reliably). For a local relay on the same subnet, either works. This guide uses etherwake because it operates at the data link layer and avoids IP routing complications.
Test by waking a target machine. You need the MAC address of the target's Ethernet adapter. Find it from the target itself with ip link show enp0s3, or check your router's DHCP lease table.
sudo etherwake -i eth0 AA:BB:CC:DD:EE:FF
Replace eth0 with your Pi's Ethernet interface and substitute the actual MAC address. The command produces no output on success. Wait 15 to 30 seconds, then ping the target to confirm it powered on:
ping -c 3 192.168.1.100
If the target does not wake, verify three things: the target's BIOS has WoL enabled, the target's OS has WoL set to g via ethtool, and both devices share the same Layer 2 broadcast domain.
Create a simple inventory file to track your machines. A plain text file works fine for a small fleet:
render-server  AA:BB:CC:DD:EE:FF  192.168.1.100
dev-workstation  11:22:33:44:55:66  192.168.1.101
nas-backup  77:88:99:AA:BB:CC  192.168.1.102
This inventory becomes useful once you connect OpenClaw, since the agent can read it and map friendly names to MAC addresses without you remembering hex strings.


Store your network inventory where your agent can reach it
Cloud workspaces with MCP access. Your OpenClaw agent reads MAC addresses, logs wake events, and shares reports in one persistent layer.
Deploy OpenClaw as Your Network Power Agent
OpenClaw turns the Pi from a passive relay into an active agent that accepts commands through Telegram, WhatsApp, or Discord. The official installation guide at docs.openclaw.ai/install/raspberry-pi covers the full process. Here is the core path.
Hardware requirements: a Raspberry Pi 4 (4GB or more) or Pi 5, Raspberry Pi OS Lite 64-bit, and at least 500MB of free disk space. The docs recommend 2GB or more of RAM with a USB SSD for reliable 24/7 operation. Pi Zero 2 W is unsupported due to insufficient resources.
Update the system and install prerequisites:
sudo apt update && sudo apt upgrade -y
sudo apt install -y git curl build-essential
Install Node.js 24 via the NodeSource setup script, then install OpenClaw:
curl -fsSL https://openclaw.ai/install.sh | bash
Run the onboarding wizard with daemon mode enabled:
openclaw onboard --install-daemon
For a headless Pi, use API key authentication instead of OAuth. You need a key from at least one LLM provider (Anthropic or OpenAI). OpenClaw routes requests to cloud-hosted models, so the Pi itself does no inference. The docs recommend Claude Sonnet as the primary model with an OpenAI fallback.
Verify the agent is running:
openclaw status
systemctl --user status openclaw-gateway.service
Connect Telegram as your chat interface. Open Telegram, find @BotFather, create a new bot, and copy the API token. Configure the token in OpenClaw's channel settings. The Telegram channel docs at docs.openclaw.ai/channels/telegram walk through the exact steps. Once connected, you can message your bot and receive AI-powered responses.
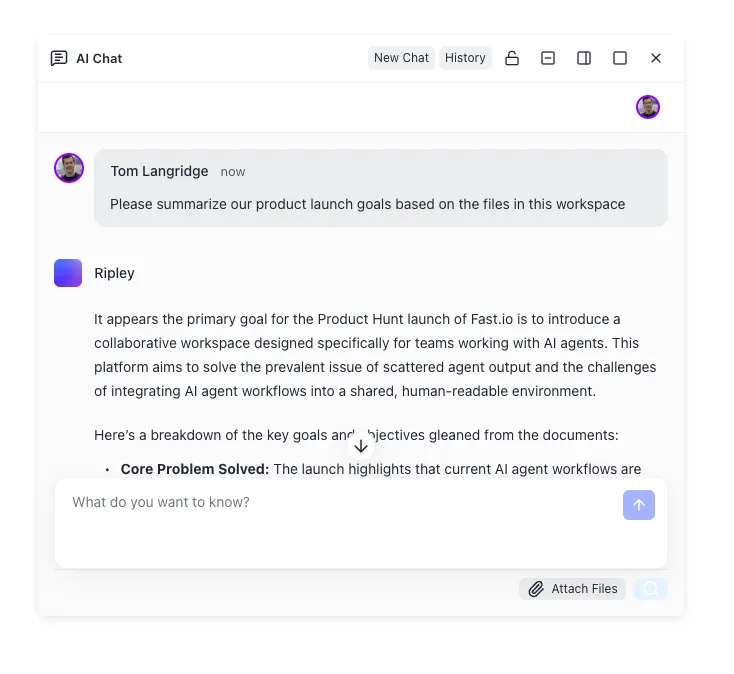
For persistent file storage across agent sessions, connect your OpenClaw instance to a Fastio workspace. The remote Fastio MCP server at https://mcp.fast.io/mcp/tools provides a consolidated toolset for file operations, so your agent can store MAC address inventories, wake logs, and availability reports in a shared workspace that both you and the agent can access. See Fastio pricing for paid plans or begin with a 14-day Business Trial.
Connect WoL Commands to Your OpenClaw Agent
The final step ties etherwake to your OpenClaw agent so you can wake machines through conversation instead of SSH.
OpenClaw supports custom skills that extend the agent's capabilities. You can create skills by asking your Telegram bot in natural language, downloading pre-built skills from ClawHub (the community skill marketplace), or writing scripts and registering them through the OpenClaw CLI. For a WoL relay, the skill needs to read your machine inventory file, run etherwake with the correct MAC address, and report whether the target came online.
Describe the behavior you want through your Telegram chat. Tell the agent that you have a file listing machine names and MAC addresses, that "wake [name]" should send a magic packet using etherwake, and that it should ping the target afterward to confirm it powered on. OpenClaw's file system access and shell execution capabilities let the agent read the inventory, run the etherwake command, and check connectivity without manual intervention.
Scheduling wake cycles
Morning routines are the strongest use case. Instead of walking into the office and waiting for machines to boot, schedule the agent to wake your workstations 15 minutes before you arrive. You can set this up conversationally: tell the agent which machines to wake and when, and it handles recurring execution. This is particularly useful for render farms or shared lab machines that should be ready at the start of each workday but do not need to run overnight.
Monitoring after wake
Sending a magic packet does not guarantee the machine actually powered on. The network cable might be unplugged, the BIOS setting might have been reset after a firmware update, or the PSU might be switched off. After sending the wake command, the agent can ping the target at intervals to verify it responded. If a machine fails to answer after 60 seconds, the agent can retry the wake command or alert you through Telegram. This catches failures early instead of leaving you staring at a blank screen when you sit down.
Keeping wake logs in a shared workspace
If your team needs visibility into which machines were woken and when, store those logs in a Fastio workspace. The agent writes a timestamped entry after each wake event. Anyone on the team can check the workspace to see machine status without messaging the person who manages the Pi. With Intelligence Mode enabled, you can search your wake history using natural language queries like "when was the render server last woken this week?" Fastio's built-in RAG indexes uploaded files automatically, so there is no separate vector database to configure.
Alternatives to the Pi relay approach
You could run a WoL utility on an existing server or NAS that already stays powered on. Synology NAS devices include built-in WoL tools, for example. Out-of-band management consoles like Dell iDRAC or HP iLO can wake machines remotely but cost more per device. For most home offices and small studios, a $35 Pi drawing 2.7 watts is the most cost-effective dedicated relay, and layering an OpenClaw agent on top adds conversational control that none of these alternatives provide out of the box.
Sources
References used to verify factual claims in this guide.
-
Raspberry Pi 5 draws approximately 2.7 watts at idle on Raspberry Pi OS Lite
-
WoL magic packet is 102 bytes containing 6 bytes of 0xFF followed by target MAC address repeated 16 times
-
Raspberry Pi 5 annual electricity cost is approximately $4 at US average residential rates (23.6 kWh per year)
Frequently Asked Questions
How do I set up Wake-on-LAN on Raspberry Pi?
Install etherwake with `sudo apt install -y etherwake`, then send a magic packet using `sudo etherwake -i eth0 AA:BB:CC:DD:EE:FF` where the MAC address belongs to the machine you want to wake. The target machine must have WoL enabled in its BIOS and its network driver configured with `ethtool -s <interface> wol g`.
Can a Raspberry Pi wake other computers on the network?
Yes. A Raspberry Pi connected to the same LAN via Ethernet can send WoL magic packets using etherwake or wakeonlan packages. The Pi acts as a relay, staying on 24/7 while target machines sleep. When combined with an AI agent like OpenClaw, you can trigger wake commands from a phone through Telegram.
What is a WoL magic packet?
A Wake-on-LAN magic packet is a 102-byte network frame containing six bytes of 0xFF followed by the target machine's 48-bit MAC address repeated 16 times. It is typically broadcast on UDP port 9. Any network adapter with WoL support that detects its own MAC address in a magic packet will signal the motherboard to power on.
How do I enable Wake-on-LAN in BIOS?
Reboot the target machine and enter BIOS/UEFI setup (usually F2, Delete, or F12 during POST). Find the Wake-on-LAN setting under power management or network configuration. The label varies by manufacturer, so look for "Wake on LAN," "Power On By PCI-E," or "Resume by LAN." Enable it, save, and exit.
Does Wake-on-LAN work over Wi-Fi?
No. WoL requires a wired Ethernet connection. The magic packet operates at the data link layer, and Wi-Fi adapters power down their radios during sleep, so they cannot receive incoming frames. Both the Pi relay and the target machines must be connected via Ethernet.
How much does it cost to run a Raspberry Pi 24/7 as a WoL relay?
A Raspberry Pi 5 draws about 2.7 watts at idle on Raspberry Pi OS Lite. Over a full year (8,760 hours), that is roughly 23.6 kWh. At the US national average residential electricity rate, the annual cost is approximately $4.
Related Resources

Store your network inventory where your agent can reach it
Cloud workspaces with MCP access. Your OpenClaw agent reads MAC addresses, logs wake events, and shares reports in one persistent layer.