How to Organize and Deliver Real Estate Listing Photos
Guide to real estate listing photos: Professional listing photos help homes sell faster and for more money, but the photos themselves are only half the battle. This guide covers the full operational workflow: MLS photo requirements, file organization, avoiding compression artifacts, and delivering full-resolution images to agents without quality loss.

Why Listing Photo Quality Drops Between Camera and MLS: real estate listing photos
Listings with professional photos sell 32% faster on average, according to data compiled by the Real Estate Photography Association. Homes photographed professionally also command higher sale prices, with some analyses showing a premium of $3,000 to $11,000 depending on the market and price tier.
Yet most conversations about real estate listing photos focus on camera settings, staging tips, and lighting techniques. The part that actually breaks photo quality happens after the shoot: file export, delivery to the agent, MLS upload, and syndication to portals like Zillow and Realtor.com.
Here is the problem. Every time a JPEG gets resized or re-saved, it loses quality. A photographer exports from Lightroom at high quality. The agent downloads it and re-uploads to the MLS. The MLS recompresses and resizes it to fit platform limits. Then Zillow pulls the image from the MLS feed and compresses it again for their CDN. By the time a buyer sees the photo, it may have gone through three rounds of compression. Colors shift, details get muddy, and the crisp shot from the camera becomes a blocky mess.
The fix is not better photography. It is a better workflow for everything that happens between the camera and the buyer's screen.
Helpful references: Fastio Workspaces, Fastio Collaboration, and Fastio AI.
MLS Photo Requirements You Need to Know
MLS systems vary by region, but most follow similar technical requirements. Getting these right before upload prevents the MLS from auto-resizing your images, which is where most quality loss happens.
Resolution and dimensions
- Minimum: 1024x768 pixels (enforced by most MLS platforms)
- Recommended: 2048x1536 pixels for sharp display on high-resolution screens
- Maximum: varies by MLS, typically 4096x3072 on larger systems
- Aspect ratio: 4:3 or 3:2, landscape orientation required
File format and size
- JPEG/JPG is the only accepted format on roughly 93% of MLS systems
- PNG, TIFF, and HEIC files are typically rejected
- File size limits range from 100 KB to 6 MB per photo depending on the platform
- Most systems accept up to 3 MB comfortably
Content restrictions
- No watermarks, agent logos, or contact information overlaid on photos
- No promotional text or calls to action
- Some MLS systems reject photos with virtual staging unless labeled
Photo count
According to a HomeJab survey of 289 listing agents, 51% upload 30 photos per listing and 19% upload 40 or more. The minimum recommendation from most brokerages is 20 to 25 photos. Many MLS systems cap listings at 25 to 50 images.
The first photo in a listing gets dramatically more views than any other image, so the exterior front shot needs to be the strongest image in the set.
How to Organize Listing Photos for Fast Delivery
Disorganized photo delivery is one of the most common complaints agents have about photographers. Files arrive with cryptic names like DSC_0847.jpg, in no particular order, with no indication of which rooms they show. The agent then spends 20 minutes sorting through 30 images before they can upload anything.
File naming that prevents confusion
Number files in MLS upload order. The sequence should follow a logical walkthrough of the property:
- Exterior front
- Entry/foyer
- Living room
- Kitchen
- Dining room
- Primary bedroom
- Primary bathroom
- Secondary bedrooms
- Secondary bathrooms
- Bonus rooms (office, media room, gym)
- Backyard and outdoor spaces
- Garage
- Aerial/drone shots (if included)
Name files with the sequence number and room: 01-exterior-front.jpg, 02-living-room.jpg, 03-kitchen-wide.jpg. This way, the agent can upload the entire folder and the MLS displays them in the right order.
Deliver two sets of files
Agents need two versions of every photo:
- Full-resolution masters for print materials, signage, and social media posts where they control the export
- MLS-optimized versions pre-sized to the target MLS dimensions (typically 2048x1536) and exported at 80-90% JPEG quality from the lossless master
The MLS-optimized set is critical. When images already match the MLS platform's preferred dimensions, the system does not resize them on upload. This skips the automatic recompression pass that degrades quality.
Separate supplementary assets
Keep virtual tours, floor plans, and drone footage in separate folders from the still photos. Agents upload these to different fields in the MLS, and mixing them with the main photo set creates confusion.


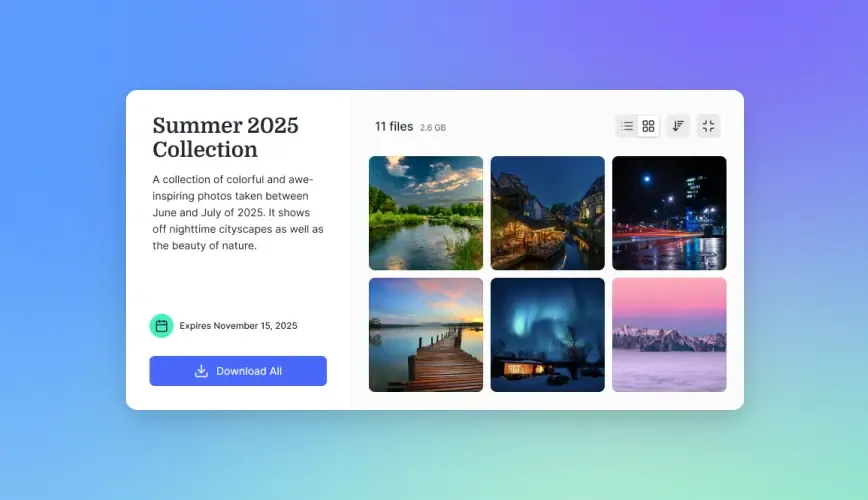
Deliver listing photos without quality loss
Create a free workspace to organize, share, and deliver full-resolution listing photos to agents with branded download links and audit trails. 50 GB free, no credit card required. Built for real estate listing photos workflows.
Avoiding the Double-Compression Problem
The biggest technical threat to listing photo quality is what photographers call double compression. It happens when an already-compressed JPEG gets recompressed by the MLS platform, and sometimes recompressed a third time by syndication portals.
Why it happens
MLS platforms have dimension and file size limits. When an uploaded image exceeds those limits, the system automatically resizes and recompresses it. The platform does not warn the agent that quality was reduced. Photos that looked sharp in the photographer's delivery portal appear soft or washed out on the live listing.
Then portals like Zillow, Redfin, and Realtor.com pull the already-compressed MLS image and run it through their own CDN optimization. Each pass introduces more artifacts: color banding in skies, blocky textures on walls, and loss of fine detail in landscaping and fixtures.
How to prevent it
- Export MLS-ready files from a lossless source (TIFF, PSD, or DNG), never from a previously saved JPEG
- Match export dimensions exactly to the target MLS platform's preferred size
- Use 80-90% JPEG quality, which gives a good balance between file size and visual fidelity
- Strip unnecessary metadata to reduce file size, but keep the sRGB color profile embedded (many MLS systems strip ICC profiles, causing color shifts)
- Deliver both the lossless master and the MLS-optimized version so the agent can choose the right file for each context
Test your workflow
Upload a test image to your local MLS and then view the live listing at full size. Compare it side by side with the original. If you see noticeable degradation, adjust your export settings until the live version is acceptable. This one-time calibration saves quality across every listing.
How to Deliver Listing Photos to Agents
Standard turnaround in real estate photography is 24 to 48 hours after the shoot. Agents working competitive markets expect even faster delivery, sometimes same-day for vacant properties that need to go live immediately.
What does not work
- Email attachments cap out at 25 MB. A set of 30 high-resolution listing photos easily exceeds 100 MB
- USB drives require a physical handoff and have no version tracking
- Generic cloud links (Google Drive, Dropbox) work for delivery but offer no branding, no download tracking, and limited organization for professional presentation
What works better
Set up a delivery system that gives agents a branded portal where they can download both the full-resolution masters and the MLS-optimized set. Good delivery portals let you organize files into labeled folders, track when the agent downloaded, and send automatic notifications.
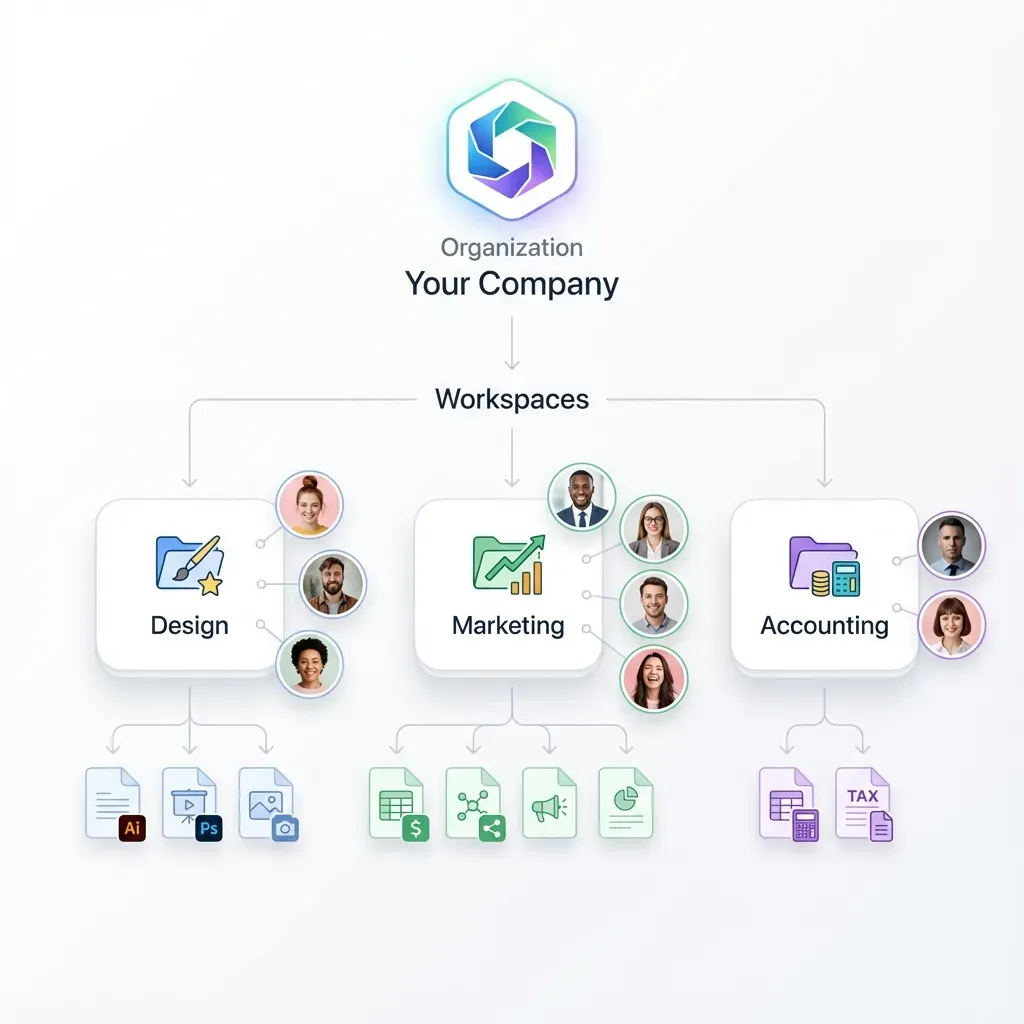
Fastio workspaces handle this well. You can create a workspace per agent or per brokerage, organize listing photo sets into folders by property address, and share them through branded download links. The agent gets a clean interface with labeled folders, and you get an audit trail showing exactly when files were accessed. Since Fastio preserves original file quality on upload and download, you avoid the extra compression pass that happens with some file sharing services.
For photographers managing multiple agents, the workspace structure scales naturally. Each agent or brokerage gets their own workspace. Each listing gets a folder within that workspace. You can set permissions so agents only see their own properties, and enable Intelligence Mode so agents can search across their photo sets by description rather than scrolling through thumbnails.
Handling revisions
Agents frequently request edits: brighter kitchen, remove a trash can from the driveway, crop tighter on the backyard. File versioning matters here. Using a platform that keeps version history means the agent always has access to both the original and revised files, and you can see exactly which version they downloaded for the MLS upload.

Building a Repeatable Photo Workflow for Every Listing
Photographers who shoot 10 or more listings per week cannot afford to reinvent their delivery process for each client. A repeatable workflow keeps quality consistent and delivery times short.
Pre-shoot checklist
- Confirm the property address, lockbox code, and any access notes
- Check the target MLS platform's current photo requirements (these change periodically)
- Create the delivery folder structure before the shoot so you can import directly into it
Post-shoot processing
- Cull and select the best 25 to 35 images
- Edit from RAW or lossless originals
- Export two sets: full-resolution masters and MLS-optimized versions
- Name files in walkthrough sequence with room labels
- Separate drone shots, floor plans, and virtual tours into their own folders
Delivery
- Upload both sets to the agent's workspace or delivery portal
- Send the agent a notification with download instructions
- Include a note about which set to use for MLS upload vs. print materials
- Set an expiration or archive date for completed listings to keep storage organized
Post-delivery
- Confirm the agent received and downloaded the files
- Archive the listing folder after the property sells or after 90 days
- Keep lossless masters for at least 12 months in case the agent needs them for future marketing
For teams using Fastio, the Receive share type lets agents submit shoot requests and property details directly into your workspace. This keeps the entire workflow, from request to delivery, inside one system instead of scattered across email, text messages, and separate file sharing apps. The audit trail on each workspace gives you a record of every delivery, download, and revision without maintaining a separate tracking spreadsheet.
Frequently Asked Questions
How many photos should a real estate listing have?
Most experienced agents upload 25 to 35 photos per listing. A HomeJab survey found that 51% of agents upload 30 photos and 19% upload 40 or more. Homes with 20 or more photos average 32 days on market compared to 70 days for listings with just one photo. Check your MLS platform's cap, which typically ranges from 25 to 50 images.
What are the MLS photo requirements?
Most MLS platforms require JPEG format, minimum 1024x768 pixels, and landscape orientation with a 4:3 or 3:2 aspect ratio. File size limits range from 100 KB to 6 MB. Photos cannot include watermarks, agent contact information, or promotional overlays. Requirements vary by region, so check your specific MLS documentation.
How do you organize real estate listing photos?
Name files in walkthrough order with sequence numbers and room labels, such as 01-exterior-front.jpg and 02-living-room.jpg. Deliver two sets to the agent, full-resolution masters for print and MLS-optimized versions pre-sized to the platform's preferred dimensions. Keep drone shots, floor plans, and virtual tours in separate folders.
How do photographers deliver photos to real estate agents?
Professional photographers typically use branded delivery portals or shared workspaces where agents can download both full-resolution and MLS-ready versions. Email attachments are too small for full photo sets, and USB drives lack version tracking. A good delivery system provides organized folders, download notifications, and an audit trail showing when files were accessed.
How do you prevent listing photos from losing quality on MLS?
Export MLS-ready files from lossless originals (TIFF or PSD), not from previously saved JPEGs. Match your export dimensions exactly to the MLS platform's preferred size so the system does not resize and recompress your images. Use 80-90% JPEG quality and keep the sRGB color profile embedded. Test by uploading a sample image and comparing the live listing version to the original.
Related Resources

Deliver listing photos without quality loss
Create a free workspace to organize, share, and deliver full-resolution listing photos to agents with branded download links and audit trails. 50 GB free, no credit card required. Built for real estate listing photos workflows.