How to Build a Radiation Monitoring Station with OpenClaw on Raspberry Pi
A Geiger counter connected to a Raspberry Pi gives you raw counts per minute. Adding OpenClaw turns those numbers into contextual alerts that separate normal background variation from genuine anomalies. This guide covers hardware selection, GPIO wiring, OpenClaw setup, and building an agent that explains why your readings changed.
Why Radiation Monitoring Needs an AI Layer
Connecting a Geiger-Muller tube to a Raspberry Pi is a well-documented project. The balena community published a complete radiation monitor build using InfluxDB and Grafana. The PiGI project offers an open-source HAT with a web dashboard. The official Raspberry Pi Magazine featured a Pico W build that pushes CPM readings to a server every few hours.
All of these projects do the same thing: count pulses from a GM tube and display the number. The problem is that raw CPM values are difficult to interpret without context. Background radiation fluctuates constantly, and most of those fluctuations are harmless.
Rain washes radon gas out of the atmosphere and temporarily spikes readings by 20 to 40 percent. Altitude affects cosmic ray contribution, so a monitor in Denver reads higher than one in Miami with nothing wrong. Granite countertops and concrete walls register differently than wood-framed rooms. Even the time of day matters, since atmospheric pressure changes and solar activity follow daily and seasonal cycles.
A dashboard that shows "CPM jumped from 28 to 52" tells you something happened. It does not tell you whether that something matters. You still need a human to check the weather, consider the location's baseline, compare against historical patterns, and decide whether to investigate or ignore the reading.
OpenClaw removes that interpretation bottleneck. OpenClaw is an open-source AI agent framework that runs directly on a Raspberry Pi. It connects to a cloud LLM for reasoning while reading sensor data locally through GPIO. Instead of just logging counts, the agent evaluates each reading against the station's baseline, checks environmental factors, and sends notifications that explain what happened and whether it warrants attention.
The notification difference is stark. A traditional setup sends "Alert: CPM above threshold." An OpenClaw agent sends "CPM rose from 28 to 52 over the past hour. Rainfall began 45 minutes ago, which typically increases background radiation through radon washout. Current dose rate is 0.34 uSv/h, well within safe limits. No action needed."
That contextual awareness is the gap no existing Raspberry Pi Geiger counter guide addresses. The hardware ecosystem is mature and affordable. The missing piece was always a reasoning layer that could run on the same device.
Detector Board Options
Several detector boards work with the Raspberry Pi's GPIO pins. The choice comes down to tube sensitivity, cost, and how much assembly you want to do.
DFRobot Gravity Geiger Counter Module
This is the easiest option for a first build. The Pi Hut sells it for about 57.60 GBP (roughly $73 USD). It uses an M4011 Geiger-Muller tube and handles the high-voltage generation internally, so you never work with dangerous voltages directly. The board provides a digital output pin that pulses each time the tube detects an ionizing event. Connect power, ground, and the signal pin to a GPIO, and you are counting radiation.
The M4011 tube operates at 380 to 450V (generated on-board from the 5V input), registers roughly 25 CPM at normal background levels, and has a conversion factor of 153.8 CPM per microsievert per hour. That conversion factor lets you translate raw pulse counts into a dose rate that is meaningful for safety comparisons.
PiGI (Pi Geiger-Muller Interface)
PiGI is a fully open-source HAT designed specifically for the Raspberry Pi. The project provides complete schematics, PCB layouts, and software. Its high-voltage supply generates up to 1000V, which means it supports a wider range of GM tubes than the DFRobot module. Detection works through GPIO falling edge interrupts: each pulse from the tube pulls the configured GPIO pin to ground, and the software counts those transitions.
PiGI's companion software includes a web interface built on WebSockets that displays live readings in a mobile-friendly browser dashboard. The project is community-maintained on GitHub (apollo-ng/PiGI), and the design files are open enough to order your own PCBs or modify the circuit.
Generic Detector Boards
Budget radiation detector boards are available for $25 to $40 from electronics retailers and direct from manufacturers. These typically use the same M4011 tube and provide the same digital pulse output. Build quality and documentation vary, but the electrical interface is identical: 5V power in, digital pulse out. The balena radiation monitor project was built around one of these generic boards and documented the full wiring process.
Which to pick
For a first build where you want clear documentation and reliable performance, the DFRobot Gravity module is the safest choice. For a project where you want full hardware transparency and the ability to swap tubes, PiGI gives you that control. For the lowest budget, a generic board works fine as long as you are comfortable with minimal documentation.

Wiring the Geiger Counter to Raspberry Pi GPIO
The physical connection between any of these detector boards and a Raspberry Pi requires three wires. This is the same wiring pattern documented in the balena radiation monitor project and the PiGI setup guide.
Three-wire connection:
- 5V power: Connect the detector board's VCC pin to Raspberry Pi physical pin 2 or 4 (5V power)
- Ground: Connect the detector board's GND pin to Raspberry Pi physical pin 6 (ground)
- Signal: Connect the detector board's output pin to a GPIO pin. GPIO 26 (physical pin 37) is a common choice because it avoids conflicts with I2C, SPI, and UART peripherals that other projects might use
The detector board handles everything between the 5V input and the digital output: voltage multiplication to 380V or higher, tube biasing, and pulse shaping. Each ionizing event in the GM tube produces a brief voltage pulse on the output pin. The Raspberry Pi detects these pulses using GPIO edge detection.
Reading pulses with Python:
The standard approach uses the RPi.GPIO library with interrupt-driven edge detection. Register a callback function on the falling edge of your chosen GPIO pin. Each time the tube fires, the callback increments a counter. A separate timer function reads and resets the counter every 60 seconds to calculate CPM.
import RPi.GPIO as GPIO
import time
import threading

SIGNAL_PIN = 26
pulse_count = 0
lock = threading.Lock()

def pulse_callback(channel):
    global pulse_count
    with lock:
        pulse_count += 1

GPIO.setmode(GPIO.BCM)
GPIO.setup(SIGNAL_PIN, GPIO.IN, pull_up_down=GPIO.PUD_UP)
GPIO.add_event_detect(SIGNAL_PIN, GPIO.FALLING, callback=pulse_callback)

def get_cpm():
    global pulse_count
    with lock:
        cpm = pulse_count
        pulse_count = 0
    return cpm
This code runs independently of OpenClaw and provides the raw CPM data that the agent consumes. The interrupt-based approach means the Pi never misses a pulse, even while the CPU is busy with agent tasks. A thread lock prevents race conditions between the interrupt handler and the reading function.
Testing the connection:
Before involving OpenClaw, verify that the hardware works. Run the pulse detection script and observe the output. At normal background levels with an M4011 tube, expect roughly 20 to 30 CPM. If you see zero counts, check the wiring. If you see wildly high counts (thousands per minute), the signal pin might be floating. Make sure the pull-up resistor is enabled on the GPIO pin, or add an external 10k pull-up.
Hold a small piece of uranium-bearing mineral (available from geology shops) near the tube. The count rate should jump noticeably, confirming the detector is responding to radiation and not just electrical noise.
Installing OpenClaw on Raspberry Pi
With the Geiger counter hardware connected and tested, the next step is installing OpenClaw to add the intelligence layer. OpenClaw is an open-source personal AI assistant written in TypeScript that you self-host on your own devices. On a Raspberry Pi, it reads sensor data through GPIO, routes decisions through a cloud LLM, and takes actions at the edge without requiring a separate server.
Hardware requirements:
- Minimum: 1 GB RAM, 1 CPU core, 500 MB free disk space, 64-bit Raspberry Pi OS
- Recommended: 2 GB or more RAM, 16 GB or larger SD card (USB SSD preferred for long-running deployments), Ethernet connection for reliability
A Raspberry Pi 4 (2 GB) or Pi 5 handles both the GPIO pulse counting and the OpenClaw agent loop without bottlenecks. The GM tube interrupt handler uses negligible CPU. Most of the compute goes to formatting data and communicating with the LLM API.
Installation:
Start with a fresh Raspberry Pi OS (64-bit) install. OpenClaw requires Node.js 22.16 or later (Node 24 recommended). Install with a single command:
curl -fsSL https://openclaw.ai/install.sh | bash
After installation, the onboarding wizard walks you through configuring your LLM backend. OpenClaw supports multiple providers including Anthropic Claude, OpenAI, and others. The LLM handles the reasoning and natural language generation for your agent's alerts and reports. All sensor reading and GPIO interaction happens locally on the Pi.
Messaging integration:
One of OpenClaw's core capabilities is acting as a gateway between your monitoring station and your messaging apps. It supports WhatsApp, Telegram, Discord, Slack, Signal, and over 15 other platforms. Configure one or more channels during setup, and your radiation monitor becomes queryable from your phone. Ask "what is the current reading?" or "show me today's CPM history" from any connected messaging app.
This messaging bridge also handles alert delivery. Instead of setting up a separate notification system with email, SMS, or push notification services, OpenClaw routes alerts through whatever messaging platform you already use. The agent decides what to send and where, based on the severity and context of the reading.


Give Your Radiation Monitor Persistent Cloud Storage
Fastio gives your OpenClaw monitoring station 50 GB of free cloud storage with built-in AI search. Upload radiation logs, query historical readings, and share data with collaborators or citizen science projects. No credit card required.
From Raw Counts to Contextual Alerts
The CPM data from your Geiger counter is the input. The agent's job is to turn that number into an assessment that a non-specialist can act on. This is where OpenClaw's LLM reasoning layer makes the project fundamentally different from a logging-only build.
Establishing a baseline:
The first thing the agent needs is a location-specific baseline. Normal background radiation varies by geography. Coastal cities in the United States typically read 15 to 25 CPM with an M4011 tube. Higher elevations like Denver or Salt Lake City run 30 to 50 CPM because of increased cosmic ray exposure. Areas with granite bedrock or uranium-bearing minerals read higher than regions built on sedimentary rock.
Run the station for at least 72 hours before configuring alert thresholds. The agent logs CPM at regular intervals and calculates a rolling average and standard deviation for your specific location. Two standard deviations above the mean is a reasonable starting threshold for investigation. Three standard deviations is where you might want an immediate alert.
Environmental context:
This is the critical gap that no existing Raspberry Pi Geiger counter build addresses. Raw threshold alerts generate false positives because they ignore environmental factors that affect readings.
Rain is the most common trigger for false alerts. Precipitation washes radon-222 and its decay products out of the atmosphere, concentrating them at ground level. A moderate rainstorm can increase background readings by 20 to 40 percent for several hours. An agent that checks weather data before raising an alarm saves you from investigating every thunderstorm.
Other factors the agent can evaluate:
- Barometric pressure drops often precede increased radon exhalation from soil, similar to the rain effect but without precipitation
- Snow cover acts as a radiation shield, temporarily lowering readings. A sudden thaw removes the shield and readings return to baseline
- Time of day affects cosmic ray flux slightly, though this is usually within noise for consumer-grade detectors
- Nearby construction or earth-moving can expose subsurface minerals and temporarily change readings
- Cosmic ray showers from solar events produce brief spikes that look alarming but are harmless and short-lived
Dose rate conversion:
Raw CPM is a relative measurement. Different tubes have different sensitivities, so 50 CPM on one detector is not comparable to 50 CPM on another without knowing the conversion factor. The M4011 tube converts at 153.8 CPM per microsievert per hour. At 25 CPM background, that is roughly 0.16 uSv/h, well below the 0.5 uSv/h level where most guidelines suggest further investigation.
The agent includes this conversion in every notification. Instead of reporting a number that requires the reader to look up conversion tables, it provides the dose rate and compares it against recognized reference levels. "Current reading: 48 CPM (0.31 uSv/h). This is within the normal range for your elevation. Average natural background in the US is 0.1 to 0.3 uSv/h."
Alert tiers:
Structure the agent's responses in tiers based on how far the reading deviates from baseline and whether environmental factors explain the deviation.
- Informational: Reading is above average but within expected range for current conditions. Log it, no notification needed.
- Advisory: Reading exceeds two standard deviations and no obvious environmental explanation. Send a message with context and suggest checking again in an hour.
- Warning: Reading exceeds three standard deviations or sustained elevation over several hours without environmental correlation. Send an immediate notification with dose rate, duration, and recommended actions.
The agent handles all the math, context checking, and threshold evaluation. The human receives a clear assessment with enough information to decide what to do next.
Persisting and Sharing Radiation Data
A radiation monitoring station that runs for weeks or months generates valuable time-series data. Where you store that data determines whether it stays useful or becomes a liability.
Local storage options:
The simplest approach is writing CPM readings and agent assessments to a SQLite database or CSV files on the Pi's SD card. This works for short-term projects but has real limitations. SD cards degrade with constant writes and can fail without warning, taking your entire dataset with them. The data is only accessible when you are on the same network as the Pi. And if the monitoring station is in a remote location, physical access for data retrieval is inconvenient.
InfluxDB with Grafana is the standard stack for Pi-based monitoring projects. The balena radiation monitor project uses this combination, and it works well for visualization. You get time-series charts, configurable dashboards, and basic alerting. The tradeoff is resource consumption: InfluxDB and Grafana together use more RAM and CPU than the actual monitoring, which can be tight on a Pi with 1 or 2 GB of RAM.
Cloud storage options:
For long-running stations, pushing data to cloud storage provides durability and remote access. S3-compatible storage (AWS, Backblaze B2, MinIO) is reliable and cheap but requires configuration, credentials management, and a separate tool for browsing or searching your data.
Fastio workspaces offer a different approach. The Business Trial includes 50 GB of storage, included credits, and 5 workspaces with no credit card required. Your OpenClaw agent can upload timestamped radiation logs, daily summaries, and alert records to a workspace using the Fastio MCP server.
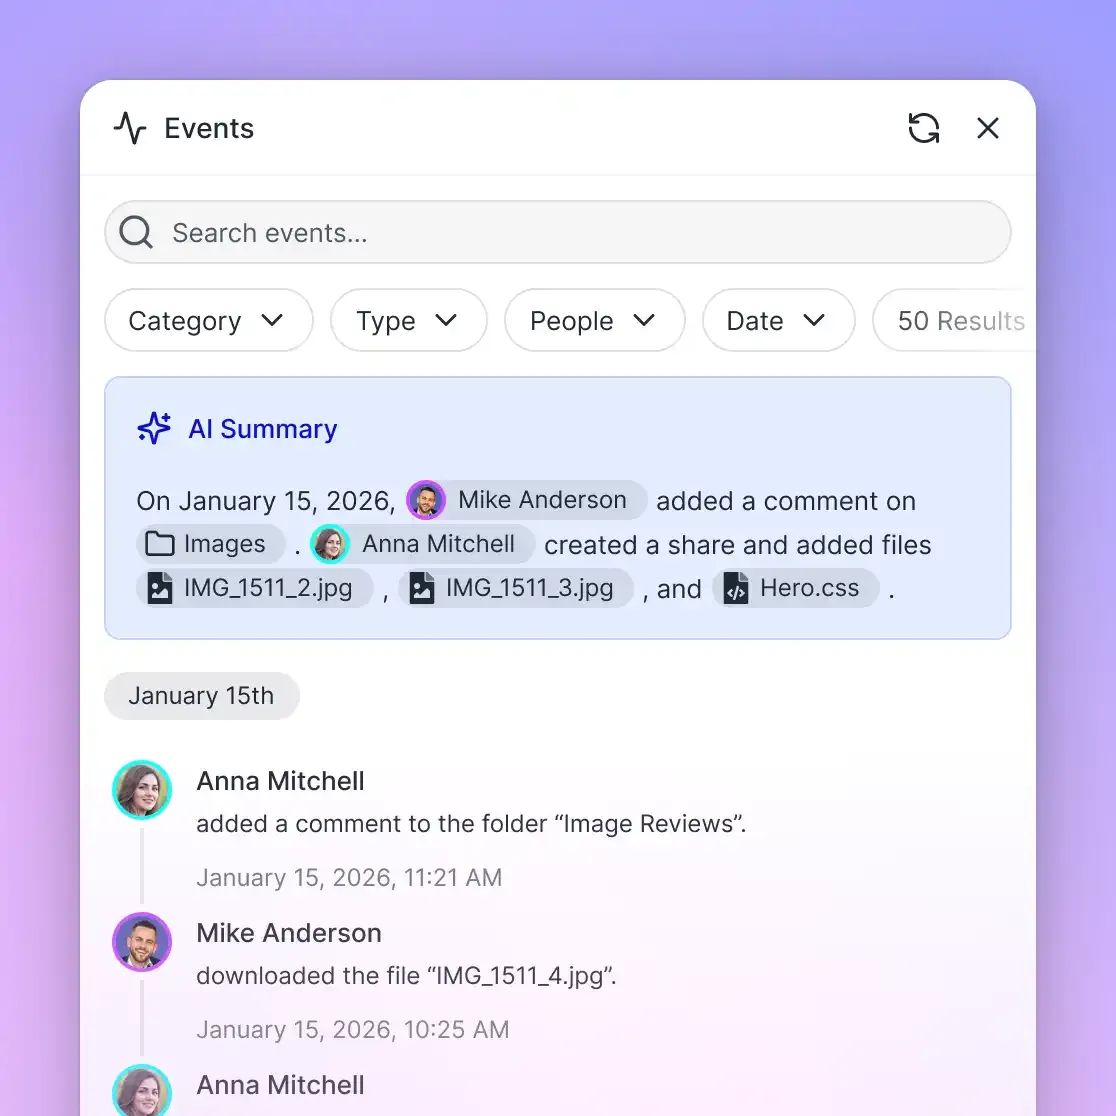
What makes this useful for a monitoring station is Intelligence Mode. When enabled on a workspace, Fastio automatically indexes uploaded files for semantic search and AI chat. After a few weeks of data, you can ask questions like "show me all readings above 50 CPM in the last month" or "were there any unexplained spikes that did not coincide with rain?" The workspace becomes a searchable archive of your station's history, not just a bucket of files.
Collaboration and citizen science:
Radiation monitoring is more valuable as a network than as individual stations. Citizen science projects like Safecast have demonstrated that distributed monitoring stations provide data density that no single institution can match.
If you are running a station as part of a research group, classroom, or community project, the data needs to be shareable. Fastio workspaces support granular permissions at the workspace, folder, and file level. Share read access with collaborators while keeping write access restricted to the monitoring agent. The ownership transfer feature lets you build and configure a monitoring station for someone else, then hand over the workspace when the station is deployed.
For broader sharing, export your data as CSV and contribute to open radiation monitoring networks. The agent can generate periodic exports formatted for common citizen science platforms, combining your station's raw counts with the contextual assessments that give the data more value than numbers alone.
Backup strategy:
Run both local and cloud storage in parallel. Keep a rolling 30-day SQLite database on the Pi for immediate access and real-time queries. Push daily summaries and weekly archives to your cloud workspace for durability. If the Pi's SD card fails, you lose at most a day of data. If cloud access drops temporarily, the local database bridges the gap until connectivity returns.
Frequently Asked Questions
How do I connect a Geiger counter to Raspberry Pi?
Connect three wires between the detector board and the Pi. Wire 5V power from Pi pin 2 or 4 to the board's VCC, ground from Pi pin 6 to the board's GND, and the board's digital output to a GPIO pin (GPIO 26 on pin 37 is a common choice). The detector board handles high-voltage generation internally. Use RPi.GPIO with falling edge detection to count pulses from the tube.
What is a normal CPM reading for background radiation?
With an M4011 Geiger-Muller tube, normal background radiation produces roughly 20 to 50 counts per minute depending on your location. Coastal, low-elevation areas tend toward 15 to 25 CPM, while higher altitudes like Denver run 30 to 50 CPM due to increased cosmic ray exposure. The same CPM reading on a different tube means a different dose rate, so always use the tube's specific conversion factor.
Can Raspberry Pi monitor radiation levels continuously?
Yes. A Raspberry Pi 4 or Pi 5 running a GPIO interrupt-based pulse counter draws about 3 to 5 watts and can run 24/7 with a standard USB-C power supply. The interrupt handler uses negligible CPU, so the Pi handles both counting and running an OpenClaw agent simultaneously. For long deployments, use a USB SSD instead of an SD card to reduce wear from continuous data writes.
How do I build a DIY radiation monitoring station?
Start with a Raspberry Pi (model 4 or 5), a Geiger counter module with an M4011 tube (available from The Pi Hut or electronics retailers for $40 to $75), and three jumper wires. Connect the module to GPIO, install a pulse counting script, and verify you get 20 to 30 CPM at background levels. Add OpenClaw for AI-powered contextual alerts, or use InfluxDB and Grafana for a traditional dashboard-based monitor.
What does OpenClaw do with sensor data on Raspberry Pi?
OpenClaw reads sensor data from GPIO and routes it through a cloud LLM for interpretation. For radiation monitoring, it compares current CPM readings against a location-specific baseline, checks environmental factors like rain or pressure changes, converts raw counts to dose rates using the tube's conversion factor, and sends contextual alerts through messaging apps like Telegram or Discord. The reasoning happens in the cloud while the sensor reading stays local.
Does rain affect Geiger counter readings?
Yes. Rain washes radon-222 and its decay products out of the atmosphere and concentrates them at ground level. This can increase background radiation readings by 20 to 40 percent during and after a rainstorm. The effect is temporary and harmless but is the most common cause of false alerts in automated radiation monitoring setups. An AI agent that checks weather data before alerting eliminates most of these false positives.
Related Resources

Give Your Radiation Monitor Persistent Cloud Storage
Fastio gives your OpenClaw monitoring station 50 GB of free cloud storage with built-in AI search. Upload radiation logs, query historical readings, and share data with collaborators or citizen science projects. No credit card required.