How to Set Up the Fastio Node.js SDK for MCP Servers
Using the Fastio Node.js SDK within an MCP server enables Claude and other MCP-compatible clients to natively access Fastio file storage and semantic search capabilities. The Model Context Protocol standardizes how artificial intelligence agents connect to external systems. Node.js and TypeScript are popular choices for developing custom MCP servers because of their large ecosystem and asynchronous event handling.
What Is the Fastio Node.js SDK for MCP?
Using the Fastio Node.js SDK within an MCP server enables Claude and other MCP-compatible clients to natively access Fastio file storage and semantic search capabilities. The Model Context Protocol provides a standard way for large language models to interact with local and remote environments. By writing a custom server, you define exact boundaries and capabilities for your AI agent.
Node.js and TypeScript are popular choices for developing custom MCP servers. The Node.js asynchronous architecture handles multiple tool calls efficiently, while TypeScript provides strong typing for complex API responses. When you combine Fastio with a custom MCP implementation, you create useful agent workflows. Instead of manually uploading context to your language model prompt, your agent can dynamically query your Fastio workspace.
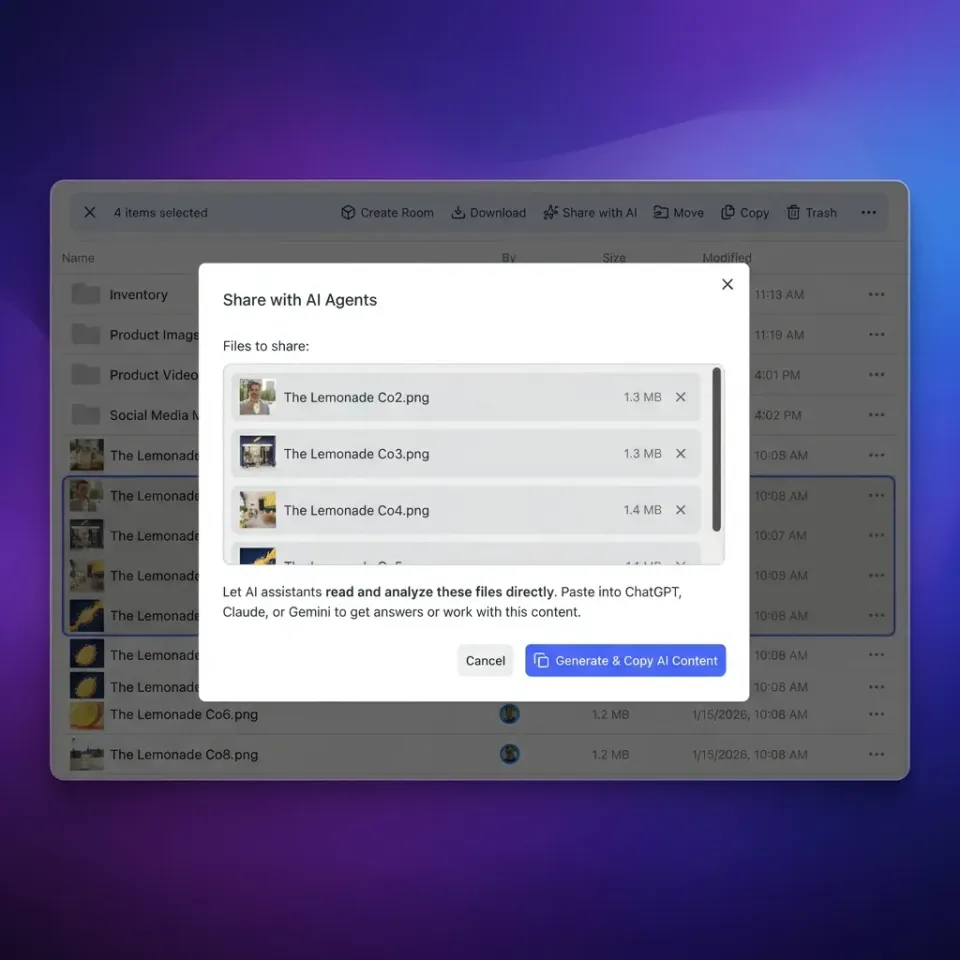
The agent can list files, read document contents, and perform semantic searches entirely on its own. Fastio is designed as an intelligent workspace. You do not just store files; the platform automatically indexes text and documents. This turns your cloud storage into a searchable knowledge base that works well alongside Claude or local models.
Helpful references: Fastio Workspaces, Fastio Collaboration, and Fastio AI.
How to Prepare Your TypeScript Project
Before writing any code, you need to configure a new Node.js project with TypeScript support. Start by initializing a new directory and installing the required dependencies. You need the official Model Context Protocol SDK and the Fastio Node.js SDK.
Run these terminal commands to scaffold your environment:
mkdir fastio-mcp-server
cd fastio-mcp-server
npm init -y
npm install @modelcontextprotocol/sdk @fastio/sdk
npm install -D typescript @types/node tsx
npx tsc --init
After installing the packages, update your tsconfig.json file to support modern module resolution. Set your target to ES2022 and enable strict mode. This ensures your TypeScript compiler catches type errors before your MCP server runs in production.
You also need a valid Fastio API key, which you can generate from your workspace settings panel. The Fastio Business Trial includes generous storage and monthly credits during the trial, making it easy to build and test your integration without upfront costs. Store this API key in an environment variable to prevent accidental exposure in your source code repository.
Building the Server Foundation
An MCP server communicates with AI clients over standard input and output streams or HTTP transport. For local development with Claude Desktop, standard I/O is the default method. You must initialize the core server instance and connect it to the Fastio Node.js SDK. This creates the connection between the AI client and your Fastio workspace.
Create a new file named index.ts and add the foundational imports. Then, instantiate both the MCP server and the Fastio client:
import { Server } from '@modelcontextprotocol/sdk/server/index.js';
import { StdioServerTransport } from '@modelcontextprotocol/sdk/server/stdio.js';
import { CallToolRequestSchema, ListToolsRequestSchema } from '@modelcontextprotocol/sdk/types.js';
import { FastIO } from '@fastio/sdk';

const server = new Server({
  name: 'fastio-custom-mcp',
  version: '1.0.0'
}, {
  capabilities: {
    tools: {}
  }
});

const fastio = new FastIO({
  apiKey: process.env.FASTIO_API_KEY
});
This code sets up the basic server identity. It also initializes the Fastio client using your environment variable for secure credential management. According to Fastio Documentation, Fastio provides 19 consolidated tools via Streamable HTTP and SSE, giving you detailed control over workspace interactions. By building a custom Node.js server, you can selectively expose a subset of these capabilities or combine them into custom macro functions tailored to your specific workflow.


Build powerful agent workflows
Get generous storage and 19 consolidated tools during the trial to supercharge your AI agents. Built for fast node sdk setup mcp workflows.
Exposing Fastio Capabilities as MCP Tools
The main benefit of an MCP server comes from the specific tools it provides to the client. You register these tools by handling the ListToolsRequestSchema and CallToolRequestSchema events. This process defines exactly what actions the AI agent can take within your Fastio workspace.
First, define the tools you want to expose. We will create a tool that allows the agent to list files in a specific Fastio folder.
server.setRequestHandler(ListToolsRequestSchema, async () => {
  return {
    tools: [
      {
        name: 'list_fastio_files',
        description: 'List files in a Fastio workspace',
        inputSchema: {
          type: 'object',
          properties: {
            folderPath: {
              type: 'string',
              description: 'The path to list files from'
            }
          },
          required: ['folderPath']
        }
      }
    ]
  };
});
Next, implement the actual tool execution logic. When the client calls list_fastio_files, your server uses the Fastio Node.js SDK to fetch the data and return it to the agent.
server.setRequestHandler(CallToolRequestSchema, async (request) => {
  if (request.params.name === 'list_fastio_files') {
    const args = request.params.arguments;
    const folderPath = String(args?.folderPath || '/');

    try {
      const files = await fastio.storage.list({ path: folderPath });
      return {
        content: [
          {
            type: 'text',
            text: JSON.stringify(files.items, null, 2)
          }
        ]
      };
    } catch (error) {
      return {
        content: [
          {
            type: 'text',
            text: `Failed to list files: ${(error as Error).message}`
          }
        ],
        isError: true
      };
    }
  }

  throw new Error('Tool not found');
});
This code block demonstrates the initialization of the Fastio SDK inside an MCP CallToolRequest handler. You capture the request arguments, execute the SDK method, and format the response according to the MCP specification.
Adding Document Intelligence and File Uploads
Fastio includes built-in retrieval-augmented generation capabilities through its Intelligence Mode. When you toggle this feature on a workspace, all uploaded files are automatically indexed. You do not need to build a separate vector database or manage embeddings. Your custom MCP server can expose this search feature to your AI agent directly.
To add semantic search, update your ListToolsRequestSchema handler to include a new search_fastio_workspace tool. Then, add the corresponding execution logic to your CallToolRequestSchema handler:
if (request.params.name === 'search_fastio_workspace') {
  const args = request.params.arguments;
  const query = String(args?.query || '');

  try {
    const searchResults = await fastio.ai.query({ prompt: query });
    return {
      content: [
        {
          type: 'text',
          text: searchResults.text
        }
      ]
    };
  } catch (error) {
    return {
      content: [
        {
          type: 'text',
          text: `Search failed: ${(error as Error).message}`
        }
      ],
      isError: true
    };
  }
}
This allows Claude to ask conceptual questions about your stored documents. The Fastio backend performs the retrieval and returns accurate, cited answers based only on your workspace data. By wrapping this in an MCP tool, you give the agent the ability to autonomously research topics across thousands of documents.

Connecting and Testing Your Custom MCP Server
The final step is to connect the transport layer so your server can listen for incoming client requests. The Model Context Protocol typically uses standard input and output streams for local execution. This approach works well with desktop clients like Claude or integrated development environments like Cursor.
Add the initialization logic to the bottom of your index.ts file:
async function main() {
  const transport = new StdioServerTransport();
  await server.connect(transport);
  console.error('Fastio MCP Server running on stdio');
}

main().catch(console.error);
Notice that we use console.error for logging rather than console.log. The standard output stream is strictly reserved for the MCP protocol messages. If you log debug information to standard output, it will corrupt the JSON-RPC communication and cause the AI client to disconnect immediately.
Testing a custom MCP server requires verifying both the protocol communication and the Fastio API interactions. You should isolate these layers to identify problems quickly. Start by testing the Fastio Node.js SDK independently. Create a small standalone script that calls the Fastio API without any MCP logic. This confirms your API key is valid and your workspace permissions are correct.
Once the standalone test passes, you can use the official MCP Inspector tool to test the server layer. The MCP Inspector provides a graphical interface for connecting to your server, listing available tools, and executing test calls. It intercepts the JSON-RPC messages and displays them in a readable format. Run the inspector against your server file to verify that your tools receive the correct arguments and return the expected JSON structure from the Fastio workspace. After validating the tools, you can add your server to the claude_desktop_config.json file to begin using it natively in your AI workflows.
Frequently Asked Questions
How to build an MCP server in Node.js?
You can build an MCP server in Node.js using the official @modelcontextprotocol/sdk package. Initialize a Server instance, define your tools using setRequestHandler, and connect it using StdioServerTransport. Node.js is ideal for MCP servers because its asynchronous architecture easily handles concurrent tool calls from AI agents.
How do I connect Fastio to an MCP server?
You connect Fastio to an MCP server by importing the @fastio/sdk package into your server code. Initialize the FastIO client with your API key, then wrap SDK methods like storage.list() inside your MCP tool execution handlers. This allows the AI agent to interact with Fastio through your server.
Why should I use standard I/O for local MCP servers?
Standard I/O provides a secure, direct connection between the AI client and the MCP server running on your local machine. It eliminates the need to configure network ports or handle authentication for local development, making it the standard transport for tools like Claude Desktop.
Can the Fastio Node.js SDK handle large file uploads via MCP?
Yes, the Fastio Node.js SDK supports chunked uploads for large files. When exposing upload capabilities through an MCP tool, you should implement streaming or chunking logic to prevent memory exhaustion in your server process.
Is Fastio Intelligence Mode required for MCP tools?
Intelligence Mode is not required for basic file operations like listing folders or downloading documents. It is only necessary if you want to expose semantic search and document query capabilities to your AI agent.
Related Resources

Build powerful agent workflows
Get generous storage and 19 consolidated tools during the trial to supercharge your AI agents. Built for fast node sdk setup mcp workflows.