How to Build an Efficient Post-Production Workflow for Video Teams
Guide to post production workflow: Post-production workflow is the sequence of steps that transforms raw footage into a finished video, typically spanning editing, color grading, audio mixing, VFX, reviews, and final delivery. For teams working remotely or with external clients, the biggest workflow bottleneck often isn't the creative work itself but the file transfers and feedback loops between collaborators.
What Is a Post-Production Workflow?
Post-production workflow is the structured sequence of steps that takes raw footage from camera to finished deliverable. It encompasses everything that happens after the cameras stop rolling: ingesting media, organizing assets, editing, adding visual effects, color grading, sound design, client reviews, and final export. Post-production often accounts for a substantial portion of total production time on most video projects. That percentage grows quickly when teams are distributed across different locations or when clients need multiple review cycles to approve final cuts. A typical post-production pipeline includes seven stages:
- Ingest and backup - Transferring footage from camera media to your working storage
- Organization - Logging clips, syncing audio, creating folder structures
- Assembly and rough cut - Building the initial edit timeline
- Picture lock - Finalizing edit decisions before finishing work begins
- Finishing - Color grading, VFX compositing, audio mixing
- Review cycles - Client feedback, revisions, approvals
- Delivery - Exporting masters and creating distribution versions
Most workflow guides focus heavily on the creative editing stages. But the logistics stages are where remote teams lose the most time. When you're shipping terabytes of footage or waiting days for client feedback to arrive, creative work grinds to a halt.
Helpful references: Fast.io Workspaces, Fast.io Collaboration, and Fast.io AI.
What to check before scaling post production workflow
Every post workflow starts with getting footage off camera cards and into a system where your team can access it. This sounds simple, but ingest failures and disorganized media cause more project delays than any other factor.
Ingest Best Practices
- Create checksums during transfer to verify file integrity
- Backup immediately to at least two locations before reformatting cards
- Use consistent folder structures across all projects (by date, camera, scene, or reel number)
- Generate proxies during ingest if working with high-resolution codecs like RAW or high-end ProRes
The Remote Collaboration Problem
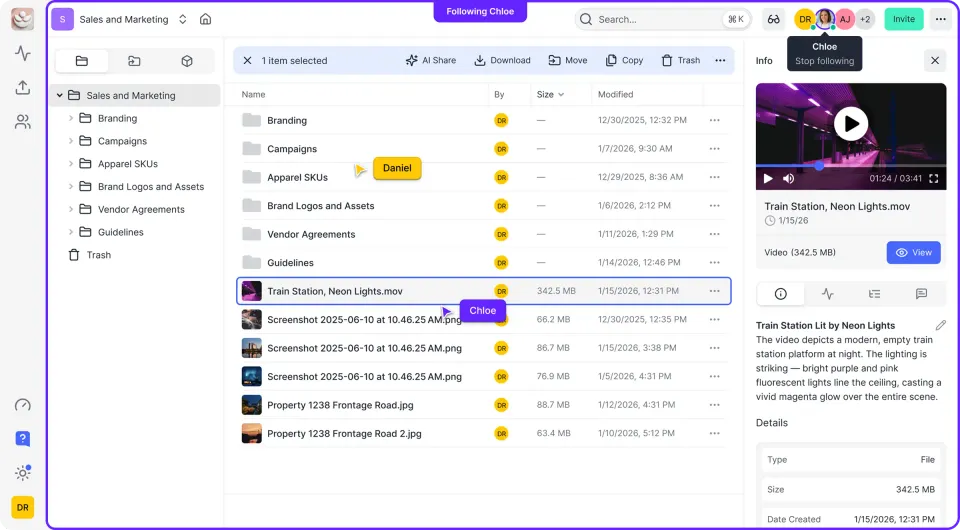
For teams working in the same facility, ingest is straightforward: plug in the card reader and start copying. But when your editor is in Los Angeles, your colorist is in London, and your client is in Tokyo, getting everyone access to the same media becomes a project in itself. Traditional solutions like shipping hard drives add days to your schedule. Uploading to consumer cloud storage means compression, slow transfers, and no way to preview footage without downloading everything first. Cloud-native storage platforms solve this by letting you upload once and stream anywhere. Instead of waiting for large projects to download before work can begin, editors can start reviewing footage while the upload is still in progress.
Stage 2: The Rough Cut and Assembly Process
Once media is organized and accessible, the assembly phase begins. This is where raw footage becomes a coherent story.
Assembly Workflow Steps
- Review all footage - Watch everything at least once, marking selects
- Sync audio - Match external audio recordings to camera footage
- Build string-outs - Arrange selected takes in rough scene order
- Create the assembly cut - A first pass that includes all intended content
- Refine to rough cut - Tighten pacing, adjust scene order, remove weak material
Proxy Workflows for Heavy Footage
If you're cutting high-resolution footage, your editing system will struggle to play back native files smoothly. Proxy workflows solve this: you create lower-resolution copies for editing, then relink to the full-resolution originals for finishing. Modern editing software (Premiere Pro, DaVinci Resolve, Final Cut Pro) all support proxy workflows natively. The key is generating proxies that match your original files frame-for-frame so relinking is automatic. For remote teams, proxy generation should happen server-side, not on individual editors' machines. When proxies are generated in the cloud, everyone on the team gets access immediately without each person running their own transcode.
Stage 3: Picture Lock and Finishing Preparation
Picture lock is the point where all edit decisions are final. No more changes to timing, no more rearranging scenes, no more swapping shots. This milestone triggers the handoff to finishing specialists.
What Gets Locked
- Edit timing - Every cut point is final
- Shot selection - No substituting alternate takes
- Scene order - Structure is approved
- Duration - Total runtime is confirmed
What Remains Flexible
- Color grading and look development
- Visual effects compositing
- Sound design and mixing
- Graphics and titles
- Music selection and scoring
The Handoff Challenge
Picture lock triggers a major handoff moment. The editor's timeline needs to reach the colorist, VFX artists, sound mixer, and composer simultaneously. Each specialist needs different pieces of the project: the colorist needs the full-resolution media, the composer needs a locked reference video, the VFX team needs specific shots pulled out. Efficient handoffs require a central location where everyone can access exactly what they need. When handoff involves uploading project files to multiple different platforms or shipping separate drives to each vendor, picture lock becomes a week-long logistics exercise instead of a single milestone.


Collaborate on Files with Your Team
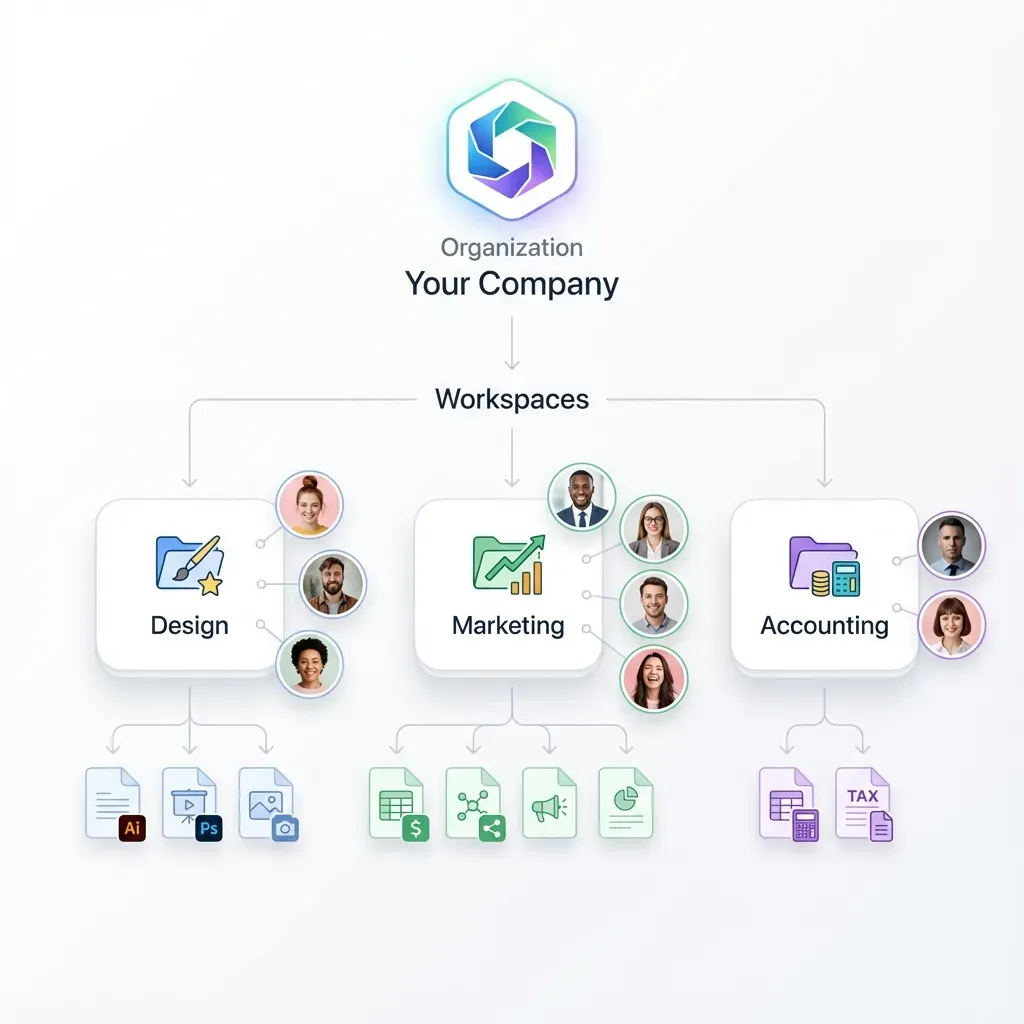
Fast.io gives teams shared workspaces, MCP tools, and searchable file context to run post production workflow workflows with reliable agent and human handoffs.
Stage 4: Color Grading, VFX, and Audio Finishing
Finishing is where the technical craft of post-production shines. Each specialty operates on the locked timeline, adding their layer to the final product.
Color Grading Workflow
Color grading happens in two phases:
- Primary correction - Balancing exposure, white balance, and contrast across all shots for consistency
- Secondary grading - Creating the artistic look, selective adjustments, matching shots for continuity
Professional colorists work with the highest-quality source files available. Compressed footage limits what's possible in the grade. This is why RAW and log-encoded footage preserves more latitude for color work.
Visual Effects
Integration VFX shots follow their own pipeline that runs parallel to the main edit:
- Pull shots - Export specific frames/clips that need effects work
- Track and comp - Create the visual effects
- Review and iterate - Internal QC before delivery
- Conform - Integrate finished VFX back into the master timeline
Each VFX shot may require multiple rounds of feedback before approval. Teams that can review VFX shots with frame-accurate timecode references rather than vague descriptions ("that explosion around the middle of the shot") save significant revision cycles.
Audio Post-Production Sound finishing includes:
- Dialogue editing - Cleaning up production audio, adding ADR
- Sound design - Creating and placing effects
- Foley - Recording footsteps, cloth movement, props
- Music editing - Cutting score and licensed tracks
- Mix - Balancing all elements for the final delivery format
Audio teams work from the locked picture edit, often in separate facilities with specialized mixing stages. They need a reliable reference video that matches the final edit frame-for-frame.
Stage 5: Review Cycles and Client Approvals
Review cycles involve sharing cuts for client feedback and revisions. Each round follows the same pattern: share a cut, wait for feedback, implement changes, repeat. This stage is where poorly designed workflows add weeks to delivery schedules.
The Review Bottleneck
Consider a typical review cycle without proper tools:
- Editor exports a review copy (a half-hour to an hour for HD)
- Upload to a file sharing service (several hours depending on file size and connection)
- Email the link to reviewers
- Wait for everyone to download and watch (often overnight for international teams)
- Collect feedback via email, Slack messages, text threads
- Compile scattered notes into actionable items
- Make revisions and start again
That's a day or two of waiting per review round. These rounds alone can add a week or more just on logistics.
Faster Review Methods
Modern review workflows compress this cycle:
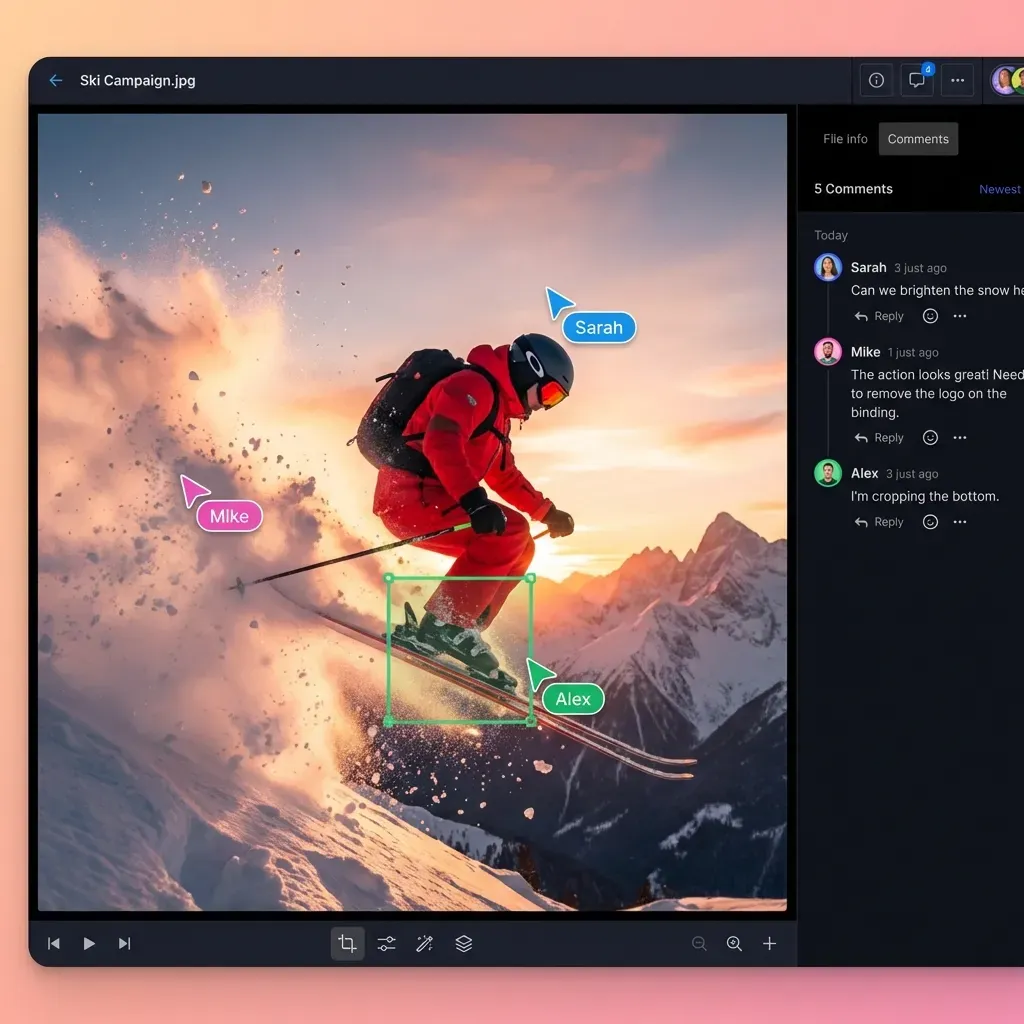
- Stream instead of download - Reviewers watch immediately via browser
- Timecoded comments - Feedback is pinned to specific frames, not described in paragraphs
- Centralized feedback - All notes live in one place, visible to the whole team
- Side-by-side comparison - Easily compare current version to previous cuts
The difference is dramatic. A review cycle that once took days can happen in a single session when everyone can watch the same stream and leave comments in real-time.
Remote Collaboration Without the Lag
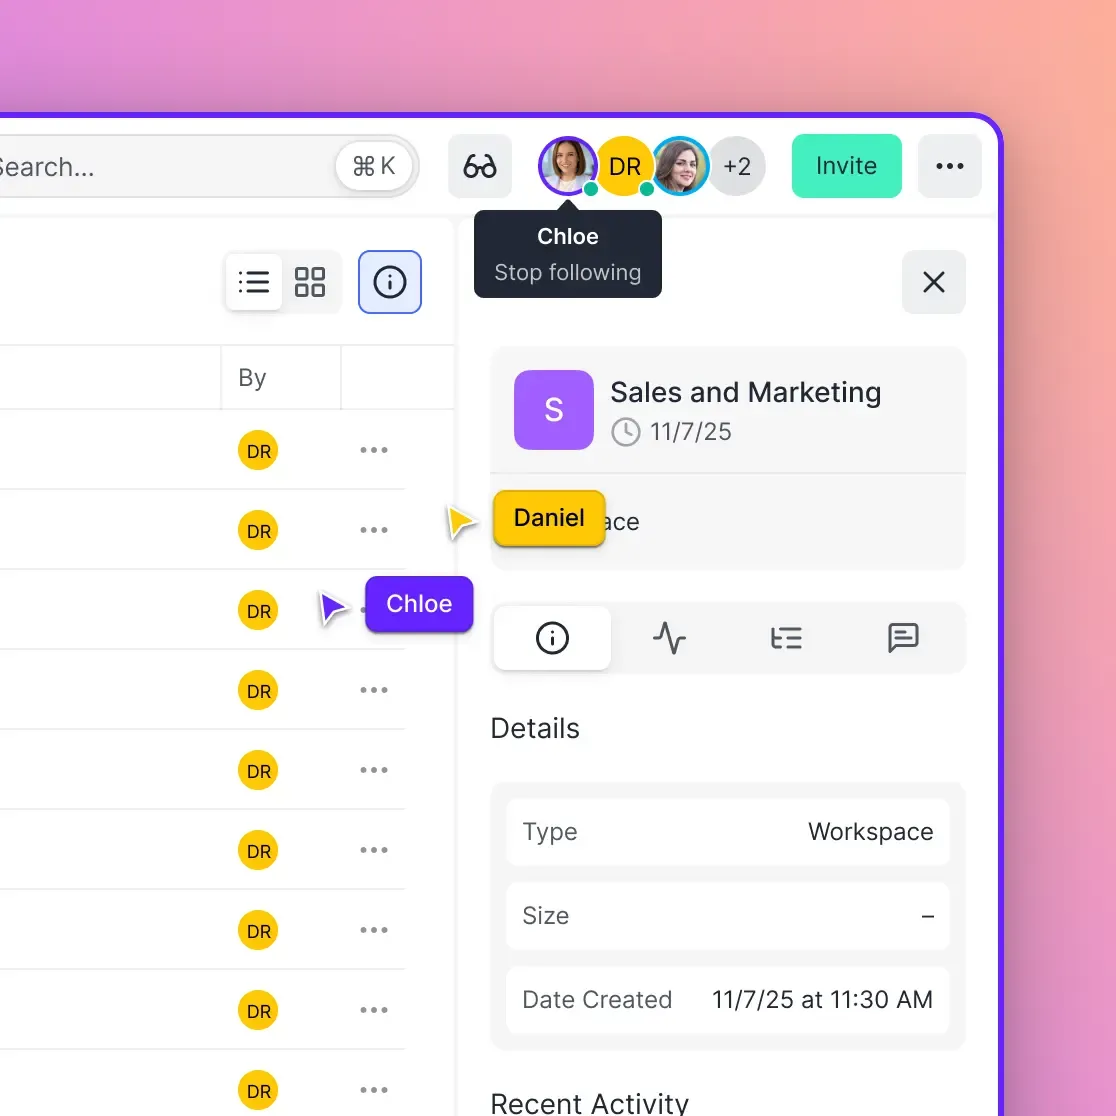
Distributed teams face an additional challenge: making sure everyone is looking at the same thing at the same time. Design reviews, color sessions, and director feedback all benefit from synchronized viewing, where clicking play on one screen starts playback for everyone. This kind of real-time collaboration eliminates the "can you see my screen?" back-and-forth that makes remote sessions tedious. When your colorist in London can show you exactly what they're seeing while walking through their grade, feedback is immediate and specific.
Stage 6: Mastering and Delivery
Final delivery involves creating master files and distribution copies for every intended platform.
Delivery Specifications
Different destinations require different specifications:
A single project might need numerous different delivery versions.
Quality Control
Before any file leaves your facility, QC catches technical issues:
- Audio levels - Checking against loudness specifications (LUFS standards)
- Color space - Verifying correct gamma and color primaries
- Resolution and frame rate - Confirming spec compliance
- Compression artifacts - Looking for banding, blocking, or other encode issues
- Sync - Confirming audio and video alignment
Archive and Backup
After delivery, archiving preserves the ability to create new deliverables in the future:
- Master timeline - Project file with all edit decisions
- Conformed media - Final color-graded, VFX-finished footage
- Audio stems - Separate dialogue, music, effects mixes
- Graphics and assets - Titles, lower thirds, logos
Proper archiving means you can create a new delivery version years later without reassembling the project from scratch.
Building a Collaboration-First Workflow
The technical stages of post-production haven't changed much in decades. Editing, color, sound, and delivery follow the same basic sequence whether you're cutting on film or in the cloud. What has changed is how teams work together across distances. Remote collaboration used to extend post timelines because moving large files between locations was slow and unreliable. Every handoff meant waiting. Every review meant scheduling around download times. The shift to cloud-native workflows removes these delays:
- Upload once, access everywhere - No shipping drives, no re-uploading to different services
- Stream full-quality video - Review in browser without downloading
- Frame-accurate feedback - Comments attached to specific timecodes
- Real-time presence - See who's viewing what, collaborate synchronously
- Instant handoffs - Finishing specialists access media the moment picture locks
The creative work still takes the same amount of time. An experienced colorist still needs hours to grade a feature. A skilled editor still needs days or weeks to find the cut. But the logistics between creative sessions, the waiting and transferring and re-downloading, can shrink from days to minutes. That's the difference between a workflow that fits the way distributed teams actually work and one that fights against it at every step.
Frequently Asked Questions
What are the 7 stages of post-production?
The key stages include ingest and backup, organization and logging, assembly and rough cut, picture lock, finishing (color, VFX, audio), review and approval cycles, and mastering and delivery. The creative editing stages get the most attention, but the logistics stages are where distributed teams lose the most time.
How long does post-production take?
Post-production typically accounts for a substantial portion of total production time. A short commercial might need a week or two; a feature film can take six months to a year or more. The biggest variable is review cycles, which often involve client feedback loops. Remote teams without efficient collaboration tools often extend these timelines just on file transfer and feedback logistics.
What is the post-production pipeline?
The post-production pipeline is the structured flow of work from raw footage to finished deliverable. It defines who does what, in what order, and how work passes between specialists (editor, colorist, VFX artist, sound mixer). A well-designed pipeline minimizes handoff delays and ensures each specialist has access to the files they need when they need them.
How do you organize a post-production workflow?
Start with consistent folder structures for every project. Use proxy workflows when working with high-resolution footage. Establish clear milestones (rough cut, fine cut, picture lock) with defined deliverables at each stage. For remote teams, centralize media in cloud storage that supports streaming so everyone can access footage without downloading entire projects.
What tools do post-production teams use for collaboration?
Common collaboration tools include Frame.io, ftrack, and cineSync for review and feedback. For file storage and sharing, teams use cloud platforms that support large video files and streaming playback. The best workflows combine editing software (Premiere, Resolve, Final Cut), review tools with timecoded comments, and storage that eliminates the download-watch-upload cycle.
Related Resources

Collaborate on Files with Your Team
Fast.io gives teams shared workspaces, MCP tools, and searchable file context to run post production workflow workflows with reliable agent and human handoffs.